


Print Profile(4)


Description
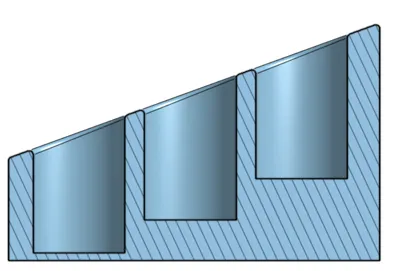
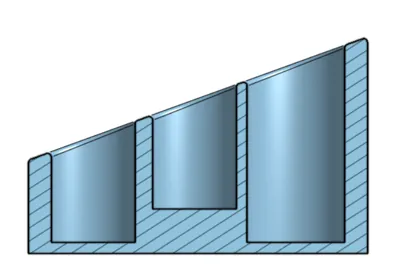
Chapstick/lip balm holder in 2 versions. The first is 8 holes with a wider slot at the back which can hold larger sized lip balms. This is the version shown as printed. the second version is a 12 hole. Both have a stadium style riser built-in as shown in the sectioned model images. The 12 hole is stadium on all 3 rows. The 8 hole is stadium only for the round holes.
I have created a Gridfinity version of this which can be found here.
The round holes are 22.25 mm. Standard tube diameters are 16mm for most chap sticks but we had some that are larger, hence the larger hole size. The slot in the back of the 8 hole can hold items up to 26mm side. My wife had a small hand lotion that we wanted to fit in here.
The printed 8 hole version shown is printed with the high quality 0.1mm layer height profile. it did take 8 hrs to print. I also included a faster print profile using the standard 0.2 mm layer height profile that prints in under 3 hrs. I have not printed the 0.2mm layer height profile, but you will have more noticeable layer lines going up the diagonal top of this model.
I can make other versions of this. If you want a specific setup, please leave a comment and I'll add it.
The text is editable, but make sure you change the part type back to part so you can edit it. If you want the text to be negative (as shown), be sure to change the part type back to negative part. Screen shots with instructions are below:
Step 1: Right click the text shape and select change type

Step 2: select Part

Step 3: Right click the text shape again and now select edit text. Be sure to redo steps 1 and 2 to make it negative again if you want the text to be negative.

License
You shall not share, sub-license, sell, rent, host, transfer, or distribute in any way the digital or 3D printed versions of this object, nor any other derivative work of this object in its digital or physical format (including - but not limited to - remixes of this object, and hosting on other digital platforms). The objects may not be used without permission in any way whatsoever in which you charge money, or collect fees.
Comment & Rating (46)