
Steampunk Time Teller

Print Profile(1)

Description

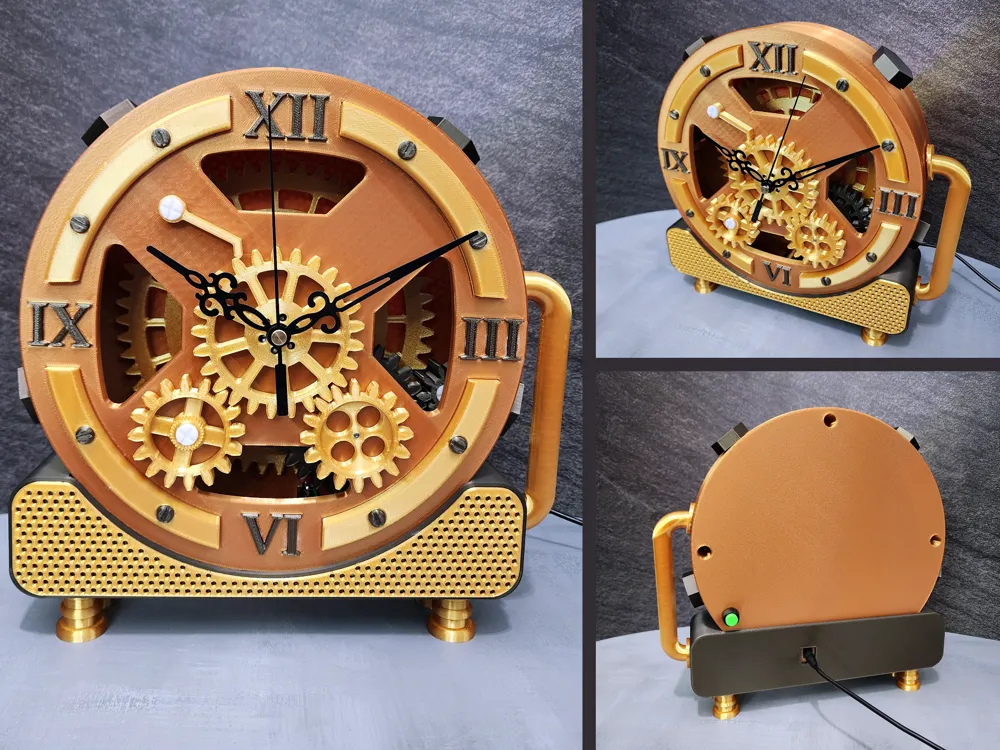

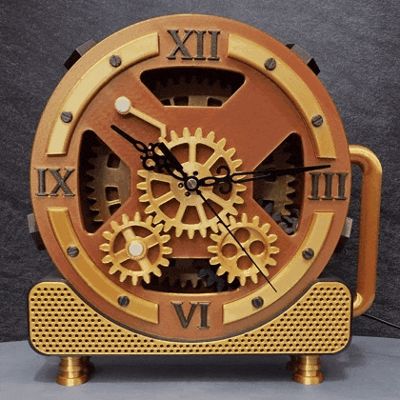
Steampunk Clock with Motor moving gears and a slot for real clock machine.
Assembly Guide is included
Kindly make sure your machine is calibrated and flow rate for each filament is properly calibrated.
this will be running on:
9 - 12 volt power brick for the gears.
and AA battery for the clock machine.
the design might need to glue some parts and sanding/filing/deburring depends on your machine tolerances, but overall i tried my best to make big tolerances as possible.
below i will mention tools needed and parts to make this design functional.
Parts needed with AliExpress links incase you want to take parts specifications: (NON of links are sponsored NOR affiliation)
1 x Duel Shaft 12v Mini motor 27 rpm:
https://www.aliexpress.com/item/1005004251974863.html
1 x clock machine 22mm shaft:
https://www.aliexpress.com/item/1005002837497716.html
1 x clock hands set:
https://www.aliexpress.com/item/1005005605157029.html
1 x momentary switch self locking 12mm diameter:
https://www.aliexpress.com/item/1005007077811575.html
1 x 12 volt power adaptor 1.0 amps:
https://www.aliexpress.com/item/1005005884209921.html
1 x square DC 5.5x2.5mm female socket:
https://www.aliexpress.com/item/1005007647319964.html
1 x Wire red and black 22 or 24 AWG:
https://www.aliexpress.com/item/1005007356973020.html
2 x 608zz Bearings:
https://www.aliexpress.com/item/1005005940076601.html
4 x M3 x 30mm to secure the front and back plate:
https://www.aliexpress.com/item/1005002393493838.html
2 x M3 x 8mm to secure the motor mount:
https://www.aliexpress.com/item/1005002393493838.html
Tools that can be used: (you can use tool as per you reference).
- wire cutter
- wire stripper
- soldering iron
- hot glue to secure the wires to the frame (so it does not get caught in the gears.
- quick glue to glue the face parts and numbers. (Use 1 to 3 little drops - applying too much glue will overflow)
- sanding paper or file bar or deburring tool might be needed.
Filament used:
- Gold Silk PLA.
- Copper Silk PLA.
- Brown Silk PLA.
the assembly is pretty straight forward, every part will fit in its place, but if you have any inquiry you can message me and i will be glad to help.
i hope you like this design, i spent a long time designing it and prototyping with trial and error, i would appreciate the support.
Boost Me (for free)
A boost will be appreciated and to keep my gears lubricated to create more ^^
Documentation (1)
License

You shall not share, sub-license, sell, rent, host, transfer, or distribute in any way the digital or 3D printed versions of this object, nor any other derivative work of this object in its digital or physical format (including - but not limited to - remixes of this object, and hosting on other digital platforms). The objects may not be used without permission in any way whatsoever in which you charge money, or collect fees.


Comment & Rating (12)