Search models, users, collections, and posts

Lithophane Tutorial
IP Report


Print Profile(1)

0.12mm layer, detailed
Designer
2.6 h
1 plate
Open in Bambu Studio
Boost
1461
3584
128
136
2.4 k
708
Released
Description
Easy to print picture that shows surprise under light!
Printing instructions - use white filament!
- Use either 100% infill or many walls/perimeters
- Recommended layer height is 0.12 however if you want the most detailed print, go lower. Maximum layer height in my opinion is 0.2
- Use BRIM and print in given position
- No supports
In case you want to do your own lithophanes, here is how I did it
- Find suitable picture - good contrast; usually simpler picture prints better than one with lots of details
- optional - use photoshop or any editing software (like the one in your phone gallery) and boost contrast, play with vibrance, saturation and sharpness.
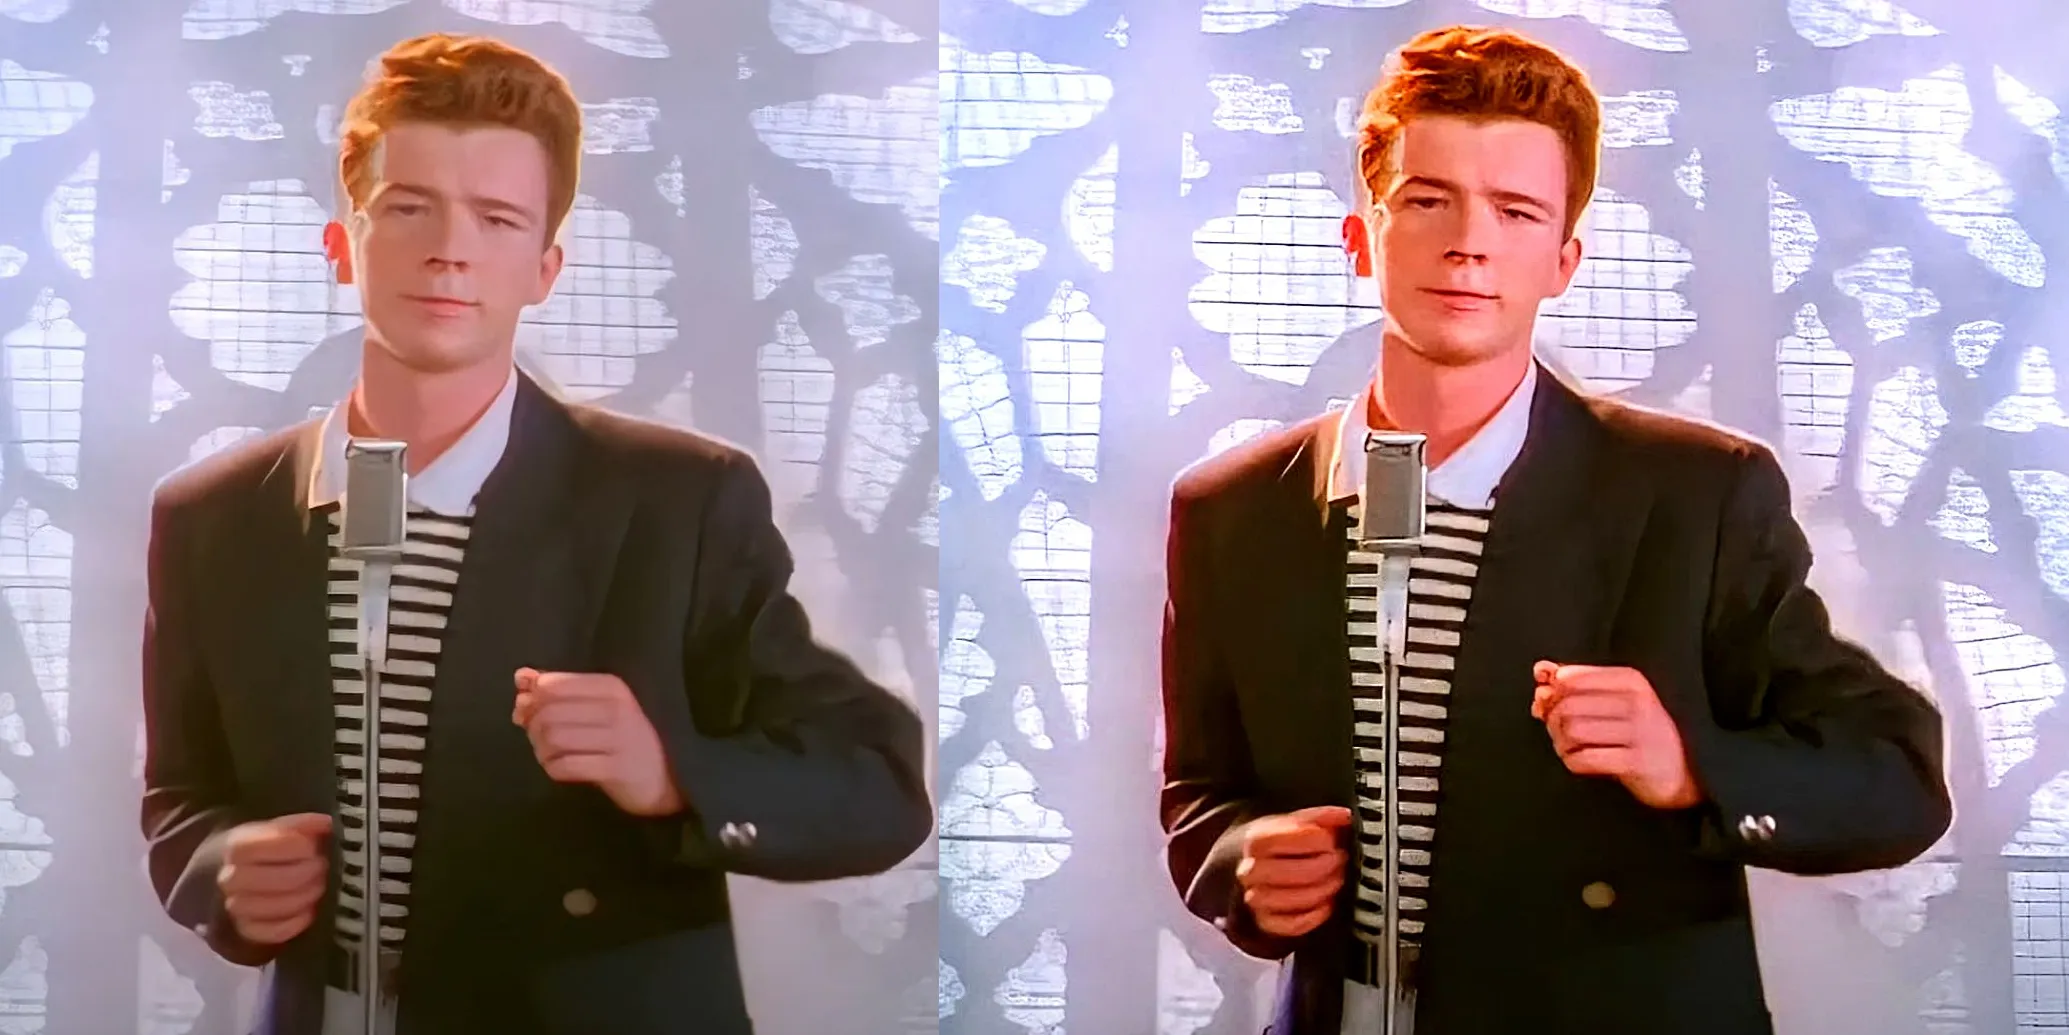
3. Upload your image to 3dp.rocks - on top click “Images” and upload yours then move to “Model” where you choose the type (curved, flat..) and hit refresh.
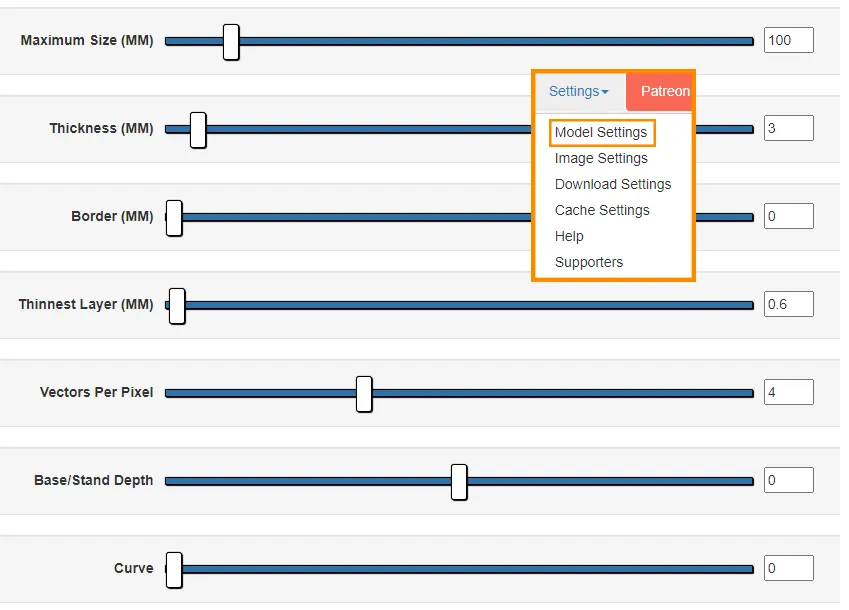
4. All there is left to do is change “Settings” - I use the one below this paragraph. The most important is “Maximum size (MM)”, that changes the model size. After any change you need to click REFRESH in the model settings.
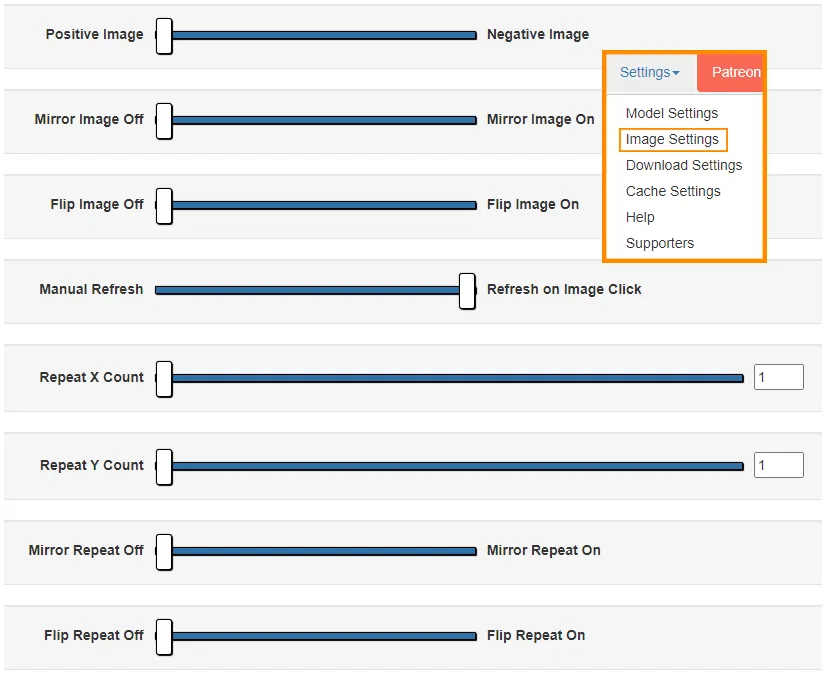
5. Download your STL file and put it into slicer
6. Enjoy!
My Twitter :)
In case you have any requests, feel free to send me a message and I will try to help you out!
License

This user content is licensed under a
Creative Commons Attribution-Noncommercial-Share Alike


Comment & Rating (128)