Modular Pistol Rack aka "Mod Rack 2.0"


Print Profile(37)


Bill of Materials
Description
<<<Update>>>
A1 Mini version now available!
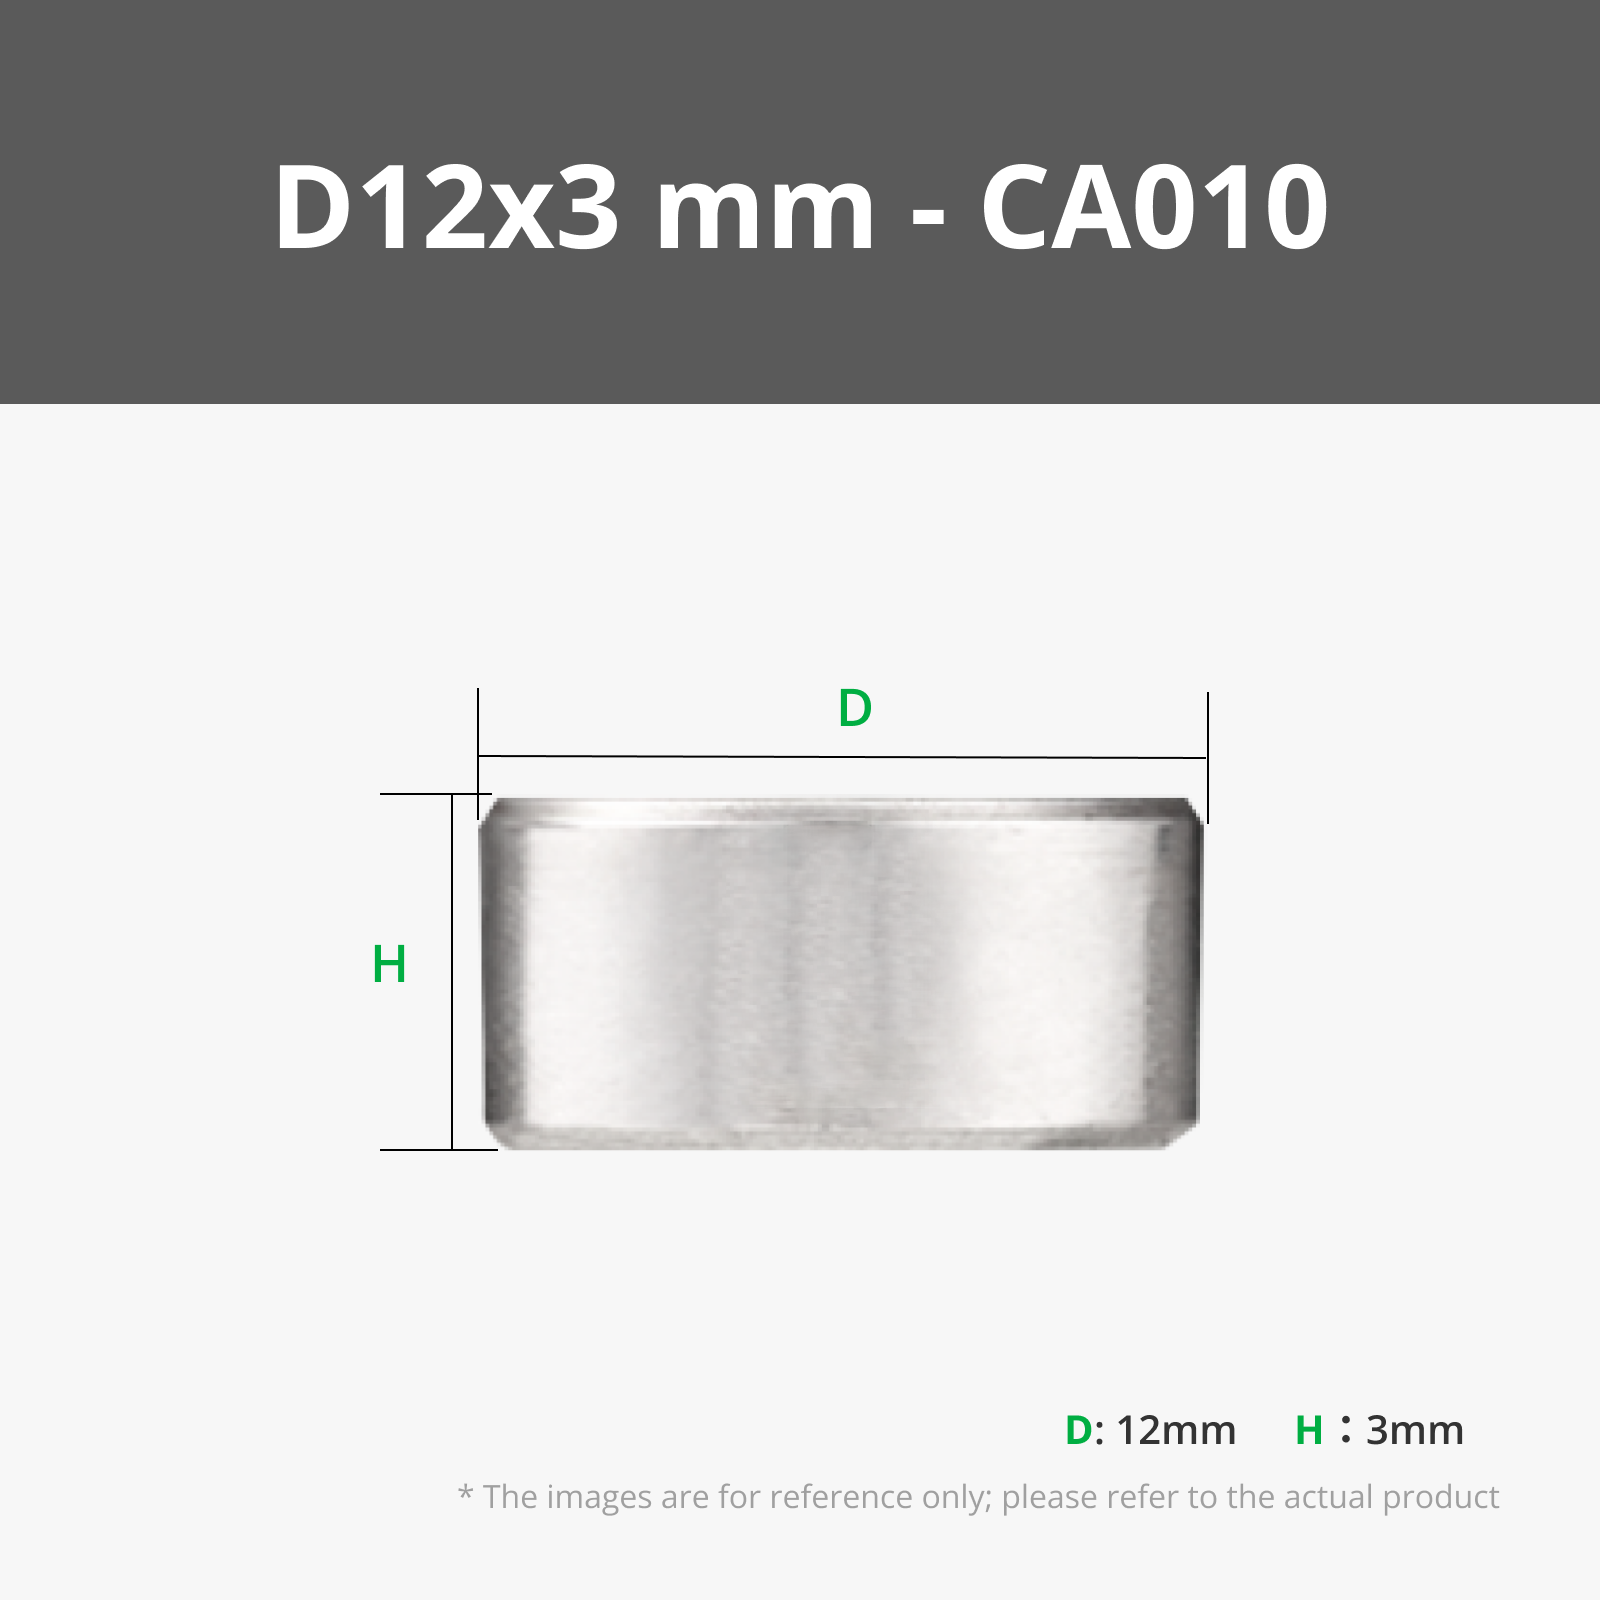
The long awaited A1 Mini version is here. There is also a magnetic version as well. That one uses four Bambu 12x3mm magnets in the base so it sticks to metal shelving. It's the same as the other model except the base is a bit thicker to accommodate the magnets.
There is a pause in the print once the holes are done printing. Once the printer stops, drop in your 4 magnets and resume the print. And thats it, no glue required and the magnets are imbedded into the print.


Big update, check out the universal mag holder, details at the bottom of the page!

About the Mod Rack 2.0
A couple months ago I released the original Mod Rack, a modular handgun storage solution designed to hold a wide range of pistols, either real, airsoft or props in your safe, storage area or on a shelf. Since then I’ve been thinking of ways to improve on it. I've received some really good feedback from the first model and I've implemented some of the ideas other users have suggested into this second version. After a bunch of designing and testing, I’m happy to present to you the Mod Rack 2.0! The original model can be found here: https://makerworld.com/en/models/656967?from=search#profileId-584064
This new version has all of the features that made the original one great, but everything is a bit more refined. This model also fixes a few of the flaws that were present on the original design, and we now have a couple of new features as well.
In my opinion, one of the coolest features with the original model was the ability to securely hold a wide range of handguns due to the swappable plates that held the barrel and slide. Unfortunately that was also it’s biggest flaw. There were over 25 plates for all the different sizes of guns. My primary goal for the second generation model was to simplify that while maintaining the modularity of the first design. Also the connectors weren’t perfect, and could be a bit finicky to install. Because of the design, as you got further up the tower, the plates could become a bit loose. And finally I wasn’t totally satisfied with the fit between the tower and the base. If your printer and filament weren’t perfectly dialed in, the fit could be a bit loose or a bit too tight.
Improvements over the original design:
- The Mod Rack 2.0 now utilizes an adjustable module that goes from approximately 18mm to 37mm wide. This allows for it to accommodate thin sub compacts all the way up to the width of an X300 weapon light.
- Using a dove tail like design, the tower now rides inside of the base, completely captured, but fully adjustable in approximately 9mm increments. It cannot fall off, and won’t move by itself.
- There are now customizable name plates for the front of the rack that allows you to identify where each handgun goes. The text can be created right in the Bambu slicer by you. No need for any other software.
- There are now a few more millimeters of space between the center of each rack allowing you get your hand in-between the grips of the handguns a bit easier. This is really nice if you have larger hands or bigger and wider handguns.
- There are no longer any slots underneath where the magwell sits. This provides more stability.
- Improved (I think) side connectors. Easier to print, easier on your hands when installing them and they look cleaner.
- Overall slightly stronger design without going overboard on the filament usage and time to print.
- Magazine holders now have a universal outer body, with swappable custom sized inner sleeves. There may be some room for improvement on these, but I’ll see how things go. A fully adjustable universal magazine holder is also not out of the question.
- The Mod Rack name has been removed from the front of the model and is now in a more discrete location.
- Added mounting holes for #6 wood screws in case you want to securely mount it to a solid surface.
- And finally, the overall aesthetics have been slightly improved.
Printing Tips
Make sure your build plate is very clean! I use Dawn dish soap and hot water. PLA, PLA+, PLA pro and PETG are all good options for this model. Be carful with matte and silk PLA. Some of them don't have great layer adhesion and a part like the mag insert can break if printed with it. I tried to keep the tolerances loose enough to accommodate a wide range of printers. These parts have been tested on multiple printers with different types and brands of filament and I haven't had any issues. It's always a good idea to calibrate your filament and make sure you aren't over or under extruding. If you encounter any printing problems, don't hesitate to reach out to me.
I designed the screw to have plenty of tolerance between it and the module but if you want the screw that attaches the wheel to be more snug, scale it up to 105%-106%. If you want the base connectors to be tighter or looser, you can scale them up or down slightly as well.

Update to bolt design
I changed the style of the bolt and now you have two options. The regular one on the left pictured below and the locking one on the right. The regular one when tightened will still allow the adjustment wheel the spin. When you tighten the locking one, it will look the wheel in place. This is handy if you take you rack to the range, or move it around frequently. There are several pre scaled bolts to choose from. On my printer the 105% works perfect

Printing text on the name plate in the Bambu slicer
Select the blank name plate and click the add text icon. Set thickness to 1, pick a font and type what you want it to say.

You can reposition the text by clicking on the objects tab and then on the text shape. That plate is already set up to change color once it reaches the text as long as you are printing in .2mm layer hight.


Alternatively you can print out the blank plate and add your own label to it or use a piece of scotch tape and a marker. There are a lot of options with fonts and colors. Or you could get fancy and add a logo to the plate.

Assembly instructions:
After you print out all the parts, you'll have to assemble the adjustable module which consists of 5 pieces. It's very easy and should take you less than a minute.
First remove the 3 tree supports and 2 brim tabs. The base connectors also have 2 brim tabs on each one that have to be pulled off.


These are the pieces that you should have now.

Take the right side L bracket marked with an “R” and insert in into the module on the right side also marked with an “R”. Push it all the all the way in until it stops.

Take the left L bracket and insert it into the left side.

Make sure it looks just like this before continuing to the next step.

Take the wheel and align the dot with the line on the back of the module.


It should sit completely flush. If it doesn't, make sure the brackets are in the right position. The wheel will only sit flush with the brackets on the correct sides, centered in the module and with the dot on the wheel lined up with the center line on the back.

Then screw in the bolt. Hand tight should be sufficient. If you printed the locking bolt, adjust the brackets to the desired opening, then tighten the bolt. This will lock the wheel in place.

Next make sure the locking tabs are in the upright position.

Insert the module into the tower at the desired height and push the locking tabs down.

Slide the tower into the base.

If you have more than one Mod Rack 2.0 and would like to connect them together, take 2 of the connectors and insert them into the base locking holes. Push them all the way down until they sit flush.

If you are using magazine holders, carefully pinch the sides in slightly and insert the sleeve into the base.


And that's it!

Additional Notes
There currently is not a base that can fit on the A1 Mini build plate. If there is enough demand for a smaller one, I'll look into the possibility of making one.
If there are any mag holder sizes that you would like, please provide the exact width and depth of the magazine.
If you have any questions, comments or pictures of your model, please share them below!
Introducing the Universal Mag Holder Beta!
Test #2 has been uploaded
I added some steps to the bottom and added 10mm the the height of the holder.
I've been thinking of how to make a mag holder that works with pretty much all mags, and this is what I came up with. It's just in beta form, so I'm relying on you all for feedback so I can make any needed changes. If your magazine has a metal sleeve, it should work with this holder. Magpul Glock mags will not work with this, you will need to use the original mag holder with the Glock insert.
It's a one piece design with 2 imbedded 12x3mm magnets from Bambu. There is a built in pause in the print profile at layer 259. At that point drop in the two magnets and resume printing.
Let me know how you like this new design!


<<<<UPDATES>>>>
12-4-2024
Added magazine insert for FN 502
Added battery tray for 123a batteries.
Updated VP9 magazine insert to include cutout for mag catch notch
Added magazine insert for 1911
Added magazine insert for HK USP 45
12-5-2024
Added small tray for 9mm ammo
Added small open tray
Updated bolt design
Added a locking style bolt that will tighten down on the wheel and keep it from moving
Updated main 3mf file with changes
12-8-2024
Added a second set of brackets for thinner guns.
12-13-2024
Added a solid magazine insert for making custom sized holes

https://buymeacoffee.com/jbcustomdesigns
If you are interested in a commercial license for this model or any of my others, please visit my Patreon page.
https://www.patreon.com/c/JBCustomDesigns
Membership
Interested in selling these models? Sign up for the commercial license.
License
You shall not share, sub-license, sell, rent, host, transfer, or distribute in any way the digital or 3D printed versions of this object, nor any other derivative work of this object in its digital or physical format (including - but not limited to - remixes of this object, and hosting on other digital platforms). The objects may not be used without permission in any way whatsoever in which you charge money, or collect fees.
Comment & Rating (1236)