Search models, users, collections, and posts
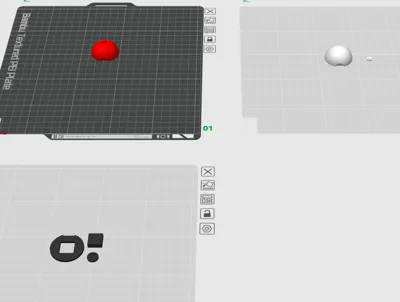
Pokeball Keychain

Print Profile(10)

All
P1S
P1P
X1
X1 Carbon
X1E
A1
A1 mini
H2D
H2D Pro
H2S
P2S
H2C
X2D
A2L

0.12mm layer, 2 walls, 15% infill
Designer
1.2 h
3 plates
4.9(818)

0.12mm layer, 2 walls, 15% infill - Single plate for AMS
1.1 h
1 plate
4.9(69)

A1 Mini x6 - 0.12mm layer, 2 walls, 15% infill
5.5 h
3 plates
4.9(46)

Organized by object and multi-color for A1
1.3 h
1 plate
4.8(19)
Click to see more

Open in Bambu Studio
Boost
9935
24614
1217
652
24.2 k
14.7 k
Released 

Bill of Materials

Maker's Supply Kits and Parts
Select all
25mm Silver Keychain (10pcs) - MA001

Description

Content has been automatically translated.
Show original

The model has been remodeled and optimized based on numerous existing model files on the market.

Solves the problem of difficulty in locating during assembly and simplifies assembly difficulty.

Maximizes the guarantee of good surface quality.

And no need to use AMS.

Comment & Rating (1217)

(0/1000)

Print Profile
0.12mm layer, 2 walls, 15% infill
great print but do yourself a favour and scale the attachment cube to 99% and just glue the parts together. <3
16
Reply
I wish I saw your comment before printing a bunch!
(Edited)
1
Reply
hello how can I do that please
0
Reply
What do you mean by coupling cube
Show original
0
Reply
Am I the only one facing issue with assembly? White part does not fit the square at all, it leaves a gap so can't even glue it together. What am I doing wrong?
7
Reply
It's so hard. idk how the other posters are not only printing one... but multiples!😵‍💫 I tried to file down the pieces so that they fit together but it's a giant headache
1
Reply
Me too.. how to sand it
Show original
0
Reply
I understand that a layer needs to be removed from the inside for everything to fit properly
Show original
0
Reply
Print Profile
0.12mm layer, 2 walls, 15% infill
printed these and there's a square that prints, but there is no way to install it, because there is no way to dig out the middle of the red and white, to install it. I'm fairly new to printing, but to me the square in the red and white should be hallow and then use a support to print.
0
Reply
thats a joke just use some pliers to get it out. If you are new to printing dont give a bad rating just because you cant figure out how to remove supports.
(Edited)
11
Reply
Replying to @inevitable1 :
Was it necessary to be so rude to the person
(Edited)
Show original
4
Reply
Replying to @eads6041 :
its not harsh to tell someone to use pliers, giving a bad review because you cant take supports out isnt fair.
(Edited)
15
Reply
Are you supposed to remove the inner square of the red and white halves? If so, how? I can't really dig it out.
14
Reply
Yes you have to remove it. I used a X-acto, it's a thin layer, just pull it off with the blade.
2
Reply
Beautiful ✌🏻
Show original
6
Reply
Do you have to glue the pieces together or do they screw in together? Also what keychain did you use?
0
Reply
Replying to @Socom :
Yes I glue the pieces, I find the keychain on Amazon, set of 100. I think you can find it also in AliExpress
0
Reply
Very nice well-proportioned keychain With a small modification for the Super ball
Show original
4
Reply
Boosted
Beautiful, could I have the design Thank you
Show original
0
Reply
Do you have the design for this pokeball? thank you!!
Show original
0
Reply
Print Profile
0.12mm layer, 2 walls, 15% infill
checked from work looks good
2
Reply
so you just cloned them so you made more of them at once ?
0
Reply
Replying to @sidd81 :
@Matic indeed I also had the bottom printing on my A1
0
Reply
Print Profile
A1 Mini x6 - 0.12mm layer, 2 walls, 15% infill
Nice print profile. Assembly is a bit tough because parts are very tight fitting. Removing support material from the 2 hemispheres is also a bit tricky. The end result looks pretty nice!
The profile uploader has replied
1
Reply
Thanks for the rating, I didn’t design it, only make the profile for the A1 Mini. I didn’t have any issues with fitting on mine though.
0
Reply
what is the black box for? how to assemble this?
0
Reply
Replying to @SGH2025 :
The black square is used to keep the three pieces well aligned It must be inserted in the center sandwiched between all the parts
(Edited)
Show original
0
Reply
How to remove the square block between the red and white parts It cannot be removed it cannot be assembled
Show original
0
Reply
You need to use a x-acto to remove the first layer of the square to access the hole
0
Reply
Replying to @K43D3 :
I used a utility knife, but it wasn't working even after cutting for a while. Do I need to cut deeper THX
Show original
0
Reply
Replying to @K43D3 :
It's around 1mm deep, no need to cut deeper. I made two prints, one very small and the creator size, you can see the piece I took from the bigger model. You need to peel it, like an orange but with a x-acto or knife XD
(Edited)
2
Reply
Print Profile
A1 Mini x6 - 0.12mm layer, 2 walls, 15% infill
very good
The profile uploader has replied
1
Reply
Looks great!
0
Reply
you use glue on it?
0
Reply
Replying to @Reality52 :
yes
0
Reply

License

This user content is licensed under a Standard Digital File License.

You shall not share, sub-license, sell, rent, host, transfer, or distribute in any way the digital or 3D printed versions of this object, nor any other derivative work of this object in its digital or physical format (including - but not limited to - remixes of this object, and hosting on other digital platforms). The objects may not be used without permission in any way whatsoever in which you charge money, or collect fees.