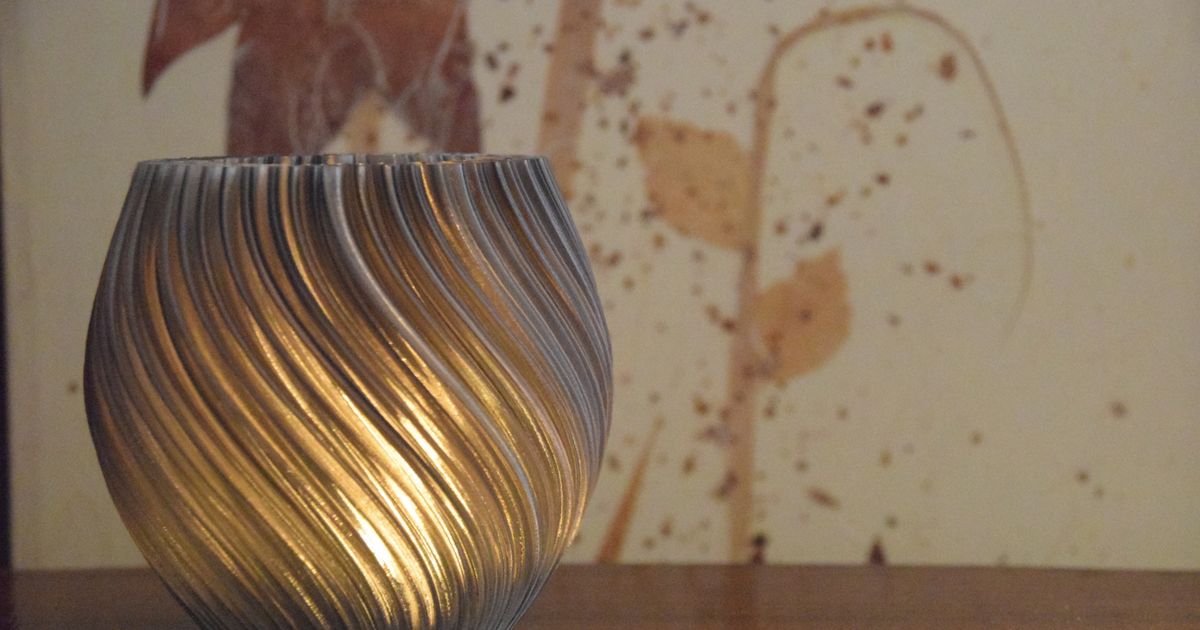
Lamp Pellucid Sweep 25cm (IKEA Fado Base, E14)


Print Profile(3)


Description
I became captivated by the tealight design crafted by voidbubble (all credtis for the tealight/lamp shade design go to him), which inspired me to craft a matching tealight holder base—this design will be made available in a separate upload. My journey continued as I played with various sizes, quickly realizing that the luminosity of the tiny LED tealights was a bottleneck, nudging me towards larger alternatives. After considering factors like cost-effectiveness, safety, widespread availability, and user-friendly assembly, the IKEA Fado emerged as the superior choice. Motivated by this, I designed an adapter to repurpose the 17cm Fado variant into a lamp shade base. This particular size is not only the most economical option (approximately 10€ in Germany) but also seamlessly integrates with the dimensions of this specific design.
The adapter set is designed for versatility, consisting of three individual components:
Part A: Inside adapter ring
Part B: Outside base
Part C: Outside decorative rim
This project is available in multiple sizes:
Print instructions
Parts A and B are engineered for their utility and don't demand specialized print settings; this allows for prioritizing print speed. For these components, I selected Jayo white PLA Meta for its reliability. Conversely, Part C serves an aesthetic purpose as a decorative rim, prompting me to use Jayo Silk-PLA in a striking red copper hue, printed at a reduced speed to accentuate its finish. Its design is delicate, comprising mostly a single layer perimeter, which necessitated the addition of a supporting rim. Exercise caution during the removal of this rim, as the part is particularly prone to weak layer adhesion. For a safer detachment, initiate the peeling process from the side opposite the power cable entry and gradually progress towards it to minimize the risk of damage.
The printed components are precision-engineered for a press-fit assembly, ensuring tight tolerances for a seamless and secure connection without the need for adhesives.
- Position part A on top the IKEA Fado Base, carefully aligning the recess—which serves as a removal notch for the adapter—with the designated power cable entry. Apply steady pressure to secure part A into place, referencing the accompanying image for guidance.


- Guide the lamp's cord through part B, as illustrated in the image. Line up the part with the power cable entry and press it firmly into place until you hear or feel a click, indicating it has securely snapped in.


Ensure the bottom of the part is aligned to sit flush with the bottom of the lamp base, creating a smooth and even finish. It is crucial to verify that Part A and Part B are correctly connected as depicted in the accompanying photograph below:
- Guide the lamp's cord through part C, as illustrated in the image. Line up the part with the power cable entry and press it gently into place. Depending on the material used you might notice significantly less friction (for example when using Silk-PLA) compared to the other parts. If Part C sits too lose, you might have to use some glue.


Part C is intentionally 2mm higher than the base so that it makes contact with the lamp shade:
- Position the lamp shade over the base, and carefully apply pressure to the inner rim of the shade until it clicks securely into position, engaging with the eight hooks of part A designed for this purpose. Avoid applying pressure directly to the lamp shade, as this can cause it to warp and sustain damage. If you encounter resistance when fitting it into place, gently combine a downward force with a subtle outward motion to ease the assembly.


- To complete the setup, install a light bulb. I recommend using this 2.5W bulb (https://amzn.to/3R69Tgh *). It is ideally suited for this model since the LED's orientation directs light outward, enhancing the lamp's illumination effect.:

*affiliate link