Sword Stalfos (Zelda - Link's Awakening)


Print Profile(3)


Description
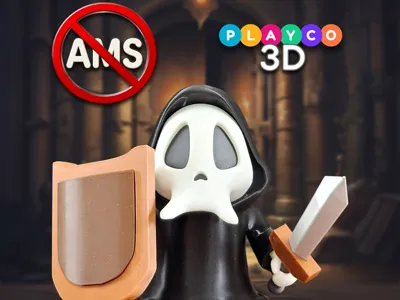
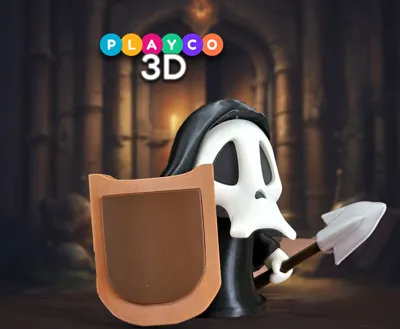
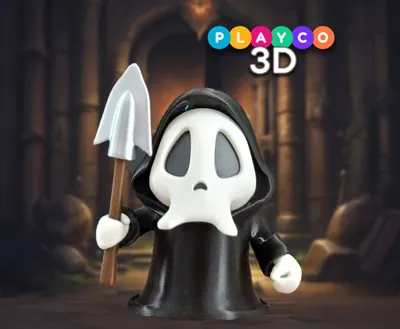
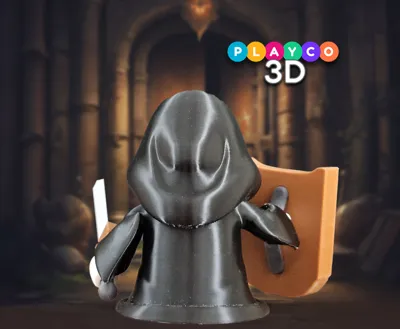
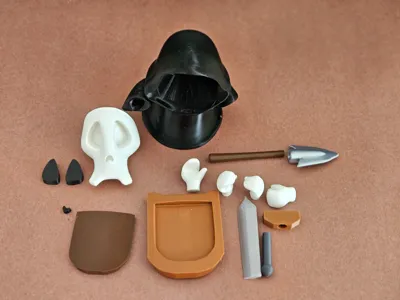
I really like the look of the Stalfos enemy from Zelda: Link’s Awakening, known for its grim reaper-like appearance. This model is known as the Sword Stalfos, which wields a sword, but I’ve also included the spear that can be swapped in. The model features interchangeable hands (four in total): two for holding the sword or spear, one for holding the shield, and one semi-closed hand.
Print Profiles:
- Sword Stalfos
- Spear
Dimensions:
- Stalfos stands approximately 4.5 inches (114mm) tall and 5 inches ( 127mm ) long at 100% scale. Scaling up or down should be fine, shouldn’t pose much of an issue.
Colors Used:
- Elegoo: Matte White, Black, Brown
- Overture PLA Pro: Chocolate
- Geeetech: Silver
- Sunlu Hi Speed: Grey
Printing Tips:
- Supports: Required for the body, (make sure to add extra supports under the left arm), supports for the hands, shield handle and spear tip
- Rafts: Use for the sword, and the wooden spear.
Assembly Tips:
- Weapon Attachment: Insert the sword handle or spear from the bottom of the hand up, then attach the remaining pieces.
- Its best to print multiple hands holding each weapon then glue them all together but not in the body, that way it’s easier to swap out the hands holding each weapon.
Assembly Steps:
- Attach the eyes and nose into the face, then glue the face to the body.
- Glue the inner shield to the shield, and attach the shield handle.
- Glue on the hand that holds the shield to the handle. Test the fit before gluing.
- Assemble the remaining hand and weapons, then attach them to the body. Do not glue to the body if you want to keep the option to swap hands and weapons
Thank you guys for all the support, and enjoy your new Zelda enemy!
License
You shall not share, sub-license, sell, rent, host, transfer, or distribute in any way the digital or 3D printed versions of this object, nor any other derivative work of this object in its digital or physical format (including - but not limited to - remixes of this object, and hosting on other digital platforms). The objects may not be used without permission in any way whatsoever in which you charge money, or collect fees.
Comment & Rating (18)