
Rolling Panda


Print Profile(3)


Description
This Panda loves to roll, so let it spin!
Assembly
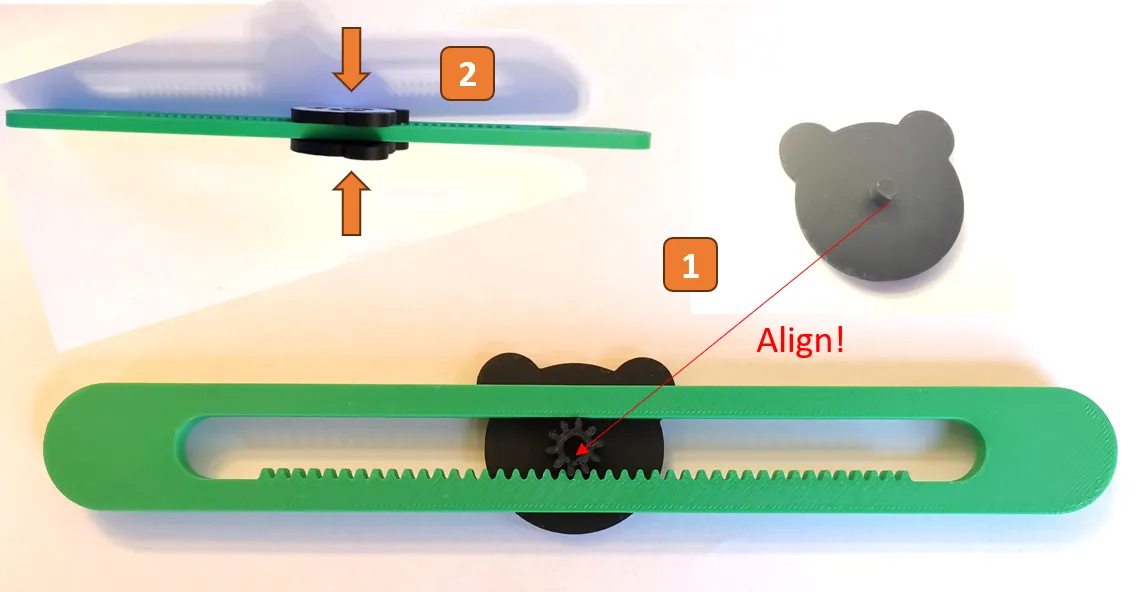
Assembly is super easy. Just make sure to align both faces with the notch. Firmly press and both sides should easily but definitely connect. Make sure that the pin fully slides into the hole on the counterpart. If you like add a few drops of oil (e.g. nano oil, knife oil, sewing machine oil, etc.) to the gear and it will spin smoother in the end positions. But this is optional and absolutely not required. The version shown in the video didn´t have any lubrication and spins well.
Printing
Printing is a breeze. However as the rack is quite long I used a brim on the outside to make sure that it doesn´t lift up so that you don´t need to worry about failed prints. I recommend using a chisel or better a deburring tool for removing the rest of the brim. Because of the simple geometry this shouldn´t be an issue. If you are printing from the computer and you are feeling sure you might remove the brim in the slicer on your own risk.
License



Comment & Rating (10)