Hueforge Frame 1200mm x 1000mm modular


Print Profile(3)


Description
Boost Me (for free)
Thanks for your Boost :-)
Modular Frame Assembly Guide
Introduction: The modular frame is designed to securely and stably mount an image that has been divided into multiple parts. The base of the construction consists of a grid (substructure) on which the image parts are attached. Once the image is fixed to the substructure, it can be placed inside the frame. The substructure is then secured with braces, which are pressed into the frame to provide stability.
1. Preparing the Image HELPING TOOL FOR CUTTING KLICK
- The image needs to be divided into 20 x 20 cm parts. You can use the Bambulab Slicer or any other slicer program for this purpose.
- Make sure the image is slightly smaller than the substructure for a perfect fit. For a frame size of 1200 x 1000 cm, it’s recommended to resize the image to 1198,.5 x 998.5 mm to allow a little margin for adjustment.
Cut Information for the Image 1200x1000 mm (English):
---------------------------------------------------
1. Cut 1 horizontal upper edge at 498.5 (tolerance cut 1.5mm)
2. Cut 2 vertical right edge at 598.5 (tolerance cut 1.5mm)
3. Cut 3 vertical 400.75
4. Cut 4 horizontal 300.75
5. Cut 5 right vertical strip 300.75 to have the upper right corner which is 198.5 x 198.5
6. Cut 6 upper horizontal strip vertical cut at 300
7. Cut 7 part below vertical cut at 300
8. Cut 8 upper horizontal strip vertical cut at 200
9. Cut 9 part below vertical cut at 200
10. Cut 10 upper horizontal strip vertical cut at 100
11. Cut 11 part below vertical cut at 100
12. Cut 12 at 0
13. Cut 13 at 0
14. Cuts 14-19 vertical strips (6 pieces) at 200
15. Cuts 20-25 vertical strips (6 pieces) at 100
16. Cuts 26-31 vertical strips (6 pieces) at 0
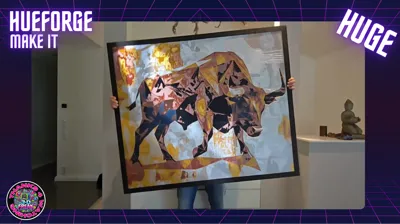
If you also want to print the bull, you will also find it in the print files.
If you want to use the same filament, you will need the following filament:
Swap Instructions:
Start with Black
At layer #10 (0.88mm) swap to Silk Copper
At layer #13 (1.12mm) swap to Silk Gold
At layer #16 (1.36mm) swap to Silk Silver
At layer #18 (1.52mm) swap to Silk White
2. Preparing the Substructure
- The substructure consists of modular parts that are assembled according to the instructions. Each image part will be glued onto a corresponding segment of the substructure.
Tip:
Apply double-sided tape on the substructure, ensuring that all corners of the image part are well-secured. Add an additional adhesive point every 10 cm along the edges for extra security.
I recommend using this tape, which I have had good experiences with
3. Mounting the Image on the Substructure
- After preparing the image parts, carefully attach them to the substructure. Make sure each part is precisely aligned to form the complete picture when assembled.
4. Placing the Substructure into the Frame
- Once all the image parts are fixed to the substructure, carefully place the substructure into the frame. Ensure that the image is oriented correctly, with the top side of the image aligned to the appropriate wall mountings.
5. Securing the Braces
To give the substructure stability, the braces need to be pressed into the frame. It is important to ensure that the braces are not pressed too hard—just enough so that they gently clamp the substructure. Press only until the braces lightly touch and hold the substructure.
Tools:
- Pressing tool: Used to press the braces into the frame.
- Rubber mallet: Used to gently tap the braces into place.
Procedure:
- Position the braces in their designated slots within the frame.
- Place the pressing tool on the brace and gently tap it with the rubber mallet until the brace is fitted.
- Be careful to press only until the braces lightly hold the substructure—do not press too hard.
- Ensure that the substructure is securely held between the braces and the frame.
6. Fitting the Middle Braces and Connectors
- When installing the middle braces, it is advisable to place a spacer underneath the brace to provide stability while pressing the other part into the frame.
- The connectors for the frame can also be gently pressed into place using the rubber mallet.
7. Final Check and Completion
- Ensure that the image is correctly positioned in the frame, with the top of the image aligned with the wall mounts.
- Check that all braces are securely in place and that the image is stable within the frame.
8. Alternative Image Sizes
It is also possible to use this modular frame system for different image sizes, such as 800 mm x 800 mm. The same principles apply, allowing for flexible use with larger or smaller images. The minimum image size that can be mounted with this system is 600 mm x 600 mm. The size can be increased without limit in increments of 200 mm. For a 400 mm x 400 mm frame, I use the following model:
https://makerworld.com/en/models/659887#profileId-587032
Follow me on my channels!
Hey, want to see more cool projects? Then check out my channels! You’ll find not only interesting news but also tips, tricks, and insider info about my models. And the best part? You can ask me questions directly, and I'll be happy to answer with a smile!
- TikTok: https://www.tiktok.com/@toktikker46 – Want short, entertaining clips? Follow me here, and you won’t miss a thing!
- YouTube: https://www.youtube.com/@jonnydasilva2311/videos – Interested in detailed videos and tutorials? A subscription would be a nice “thank you,” and I promise you’ll get loads of exciting content in return!
- Facebook Group: https://www.facebook.com/groups/3dmulticolor – Join the group! It’s all about sharing, asking questions, and connecting with other cool people!
Stop by, hit the follow button, and be part of it – whether on TikTok, YouTube, or Facebook... or best of all, everywhere! I’m looking forward to seeing you there!
License
You shall not share, sub-license, sell, rent, host, transfer, or distribute in any way the digital or 3D printed versions of this object, nor any other derivative work of this object in its digital or physical format (including - but not limited to - remixes of this object, and hosting on other digital platforms). The objects may not be used without permission in any way whatsoever in which you charge money, or collect fees.
Comment & Rating (24)