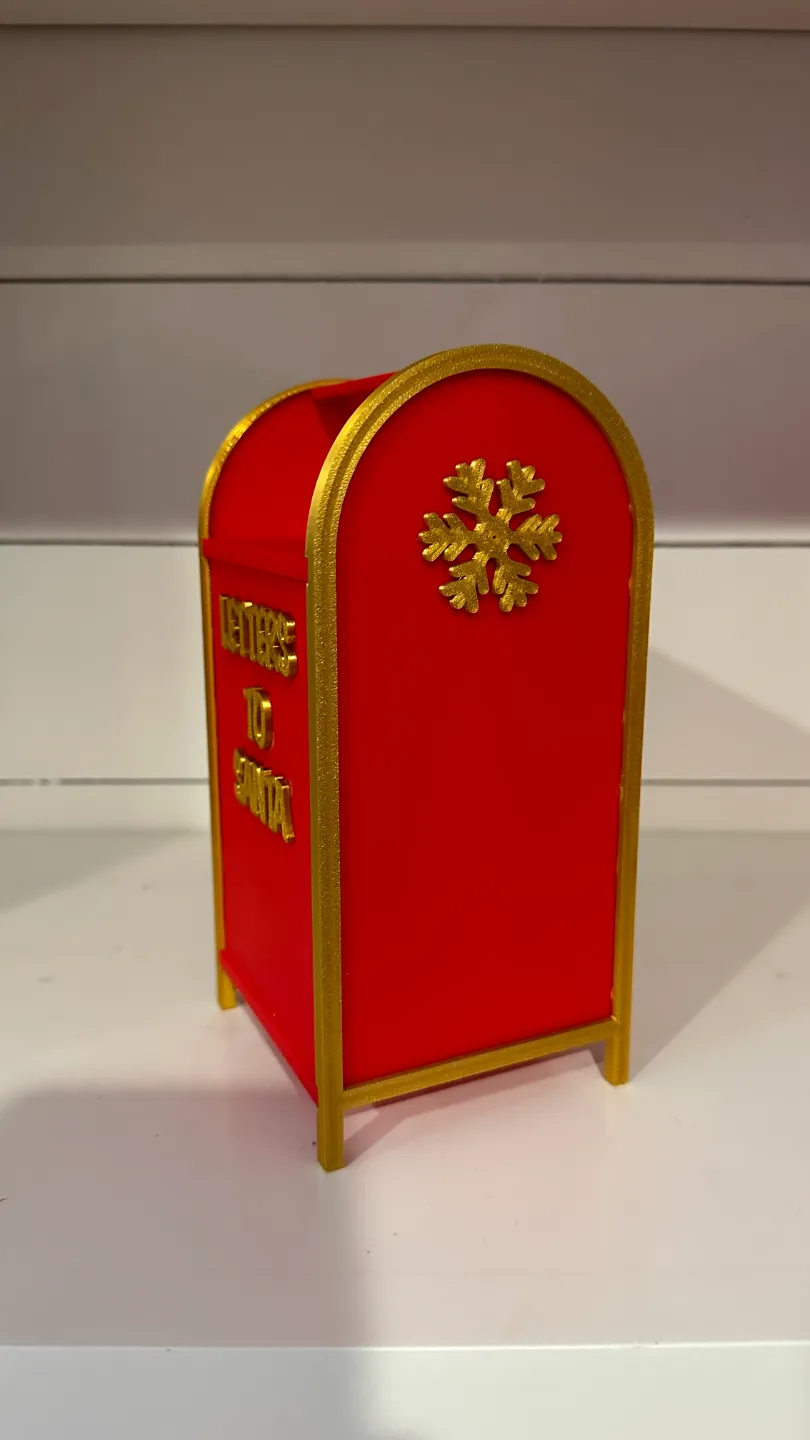
Letters To Santa Mail Box
Letters To Santa Mail Box


Print Profile(3)


Description
Merry Christmas!
I designed this “Letters to Santa” Mail Box for the upcoming holiday season. There are 5 pieces total (not including embellishments) that will need to be glued together. I designed it this way to give it the best possible finish. I also kept the embellishments separate from the mail box in case you want to add your own to it, or simply print it in blue for a USPS mailbox replica.
I have included three variations:
- The main body has a slot to allow 3D printed letters to be dropped in. Or you could fold up a Post-it Note and drop in a real letter. There is an access hole in the bottom back.
- The main body has no opening to the inside. You can glue a fake door to the front (the door is not functional).
- The main body has an opening and a functional door (will need to print with supports. See end of description for assembly instructions)
Size: It's roughly 7.5" tall (193mm). I have scaled it down to 75% and it printed out nicely.
Printing Instructions:
I printed this in PLA. It looks really good at 0.2 layer height, but of course it'll look even better with 0.15 or 0.01
The only thing that MUST be done is 100% INFILL on the Side Panels. Set it to 100% infill, or increase the number of top or bottom layers so the panel is solid. The only supports that will be needed are for the Main Body with a functional door. The Main Body needs to be printed on it's side.
Assembly Instructions:
It's a good idea to do a test assembly or dry assembly before gluing it together. That way you understand how it'll go together and where you need to apply pressure during glue up.
First, glue one Panel into each (left and right) Frame. USE GLUE SPARINGLY, especially if you use a glue that leaves a white residue. To avoid the white residue, you could use 5-minute epoxy and use rubber bands to hold everything in place while it sets up. (Ignore the gold star in the pictures below - I created some models with the star attached, which I did not provide).


Next you'll glue each side panel assembly (frame + panel) to the corresponding side of the Main Body.


The video below is the assembly instructions for the main body with the functional door. You can use either a piece of filament or toothpicks to act as a hinge. There are two options for doors. One door swings freely in and out. The other door only pushes in and will not swing out. Both doors assemble the same. Make sure you install the door BEFORE gluing on your sides.
That's it! Now just glue your embellishments or decorations to it! I have included a few in the files! You can print each component in different colors or keep it all the same!

Comment & Rating (19)


