
FilaVilla: Sleek Storage for Filament Spools

Print Profile(2)

Description
Boost Me (for free)
It costs you nothing, but allows me to keep making silly things 😗
I'm just a small fish on MakerWorld, so your boost goes a long way.

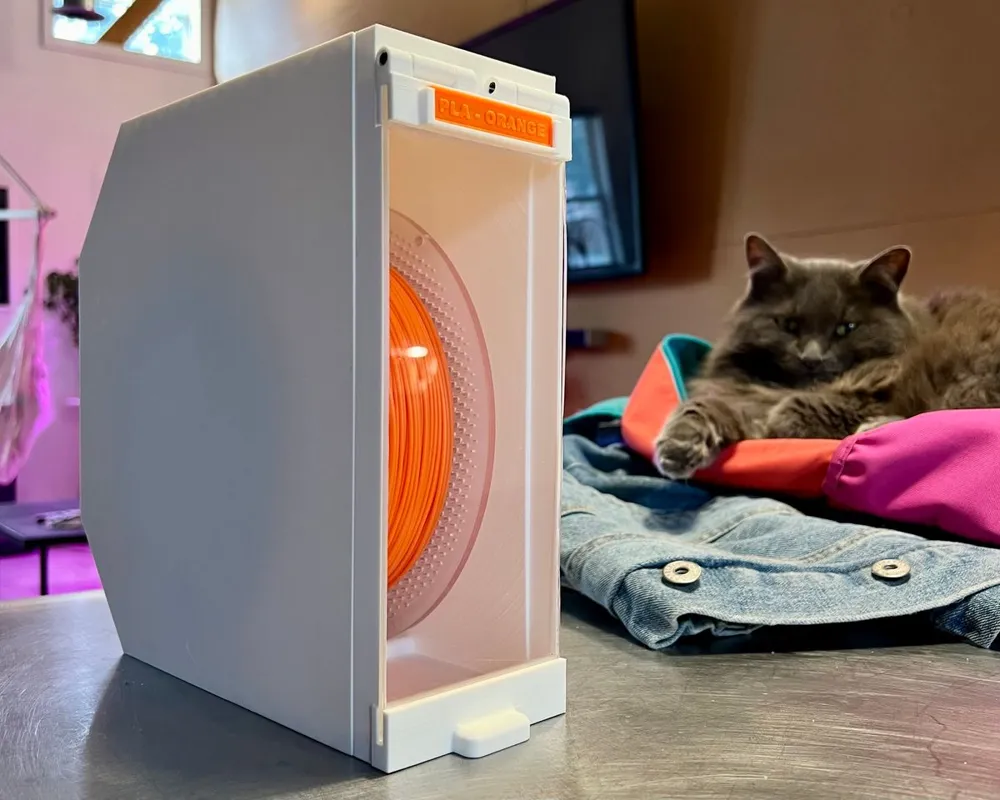
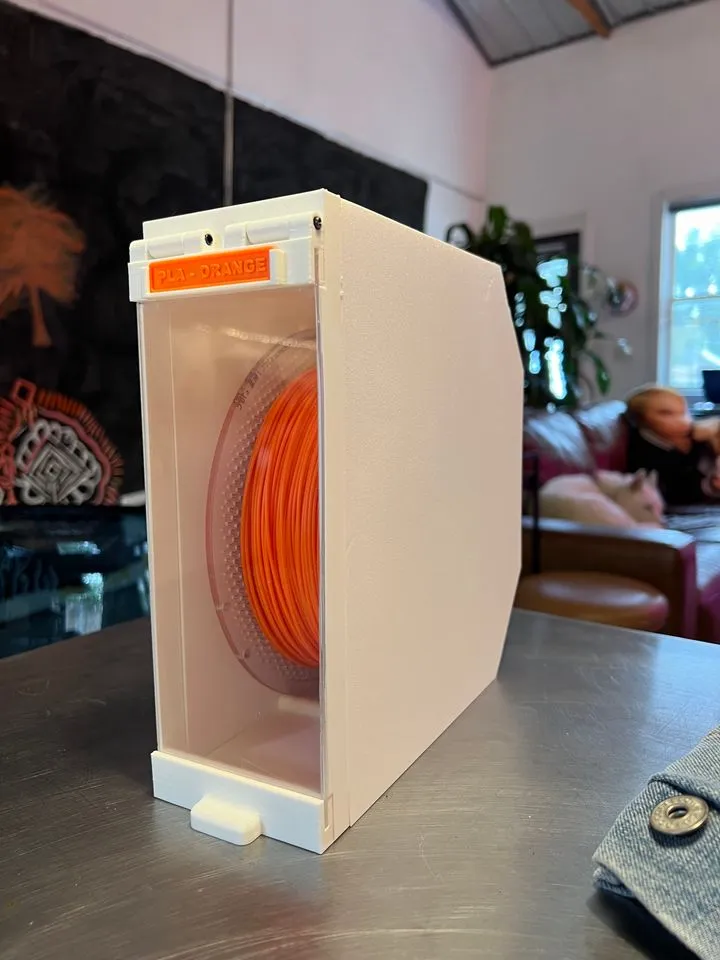
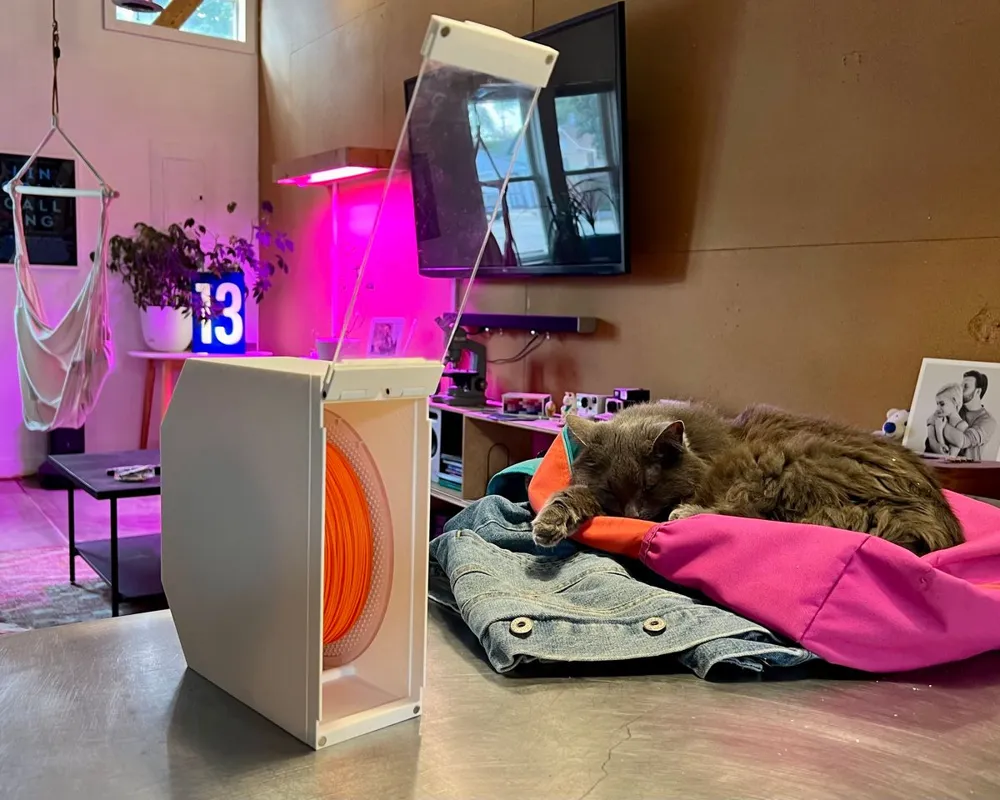
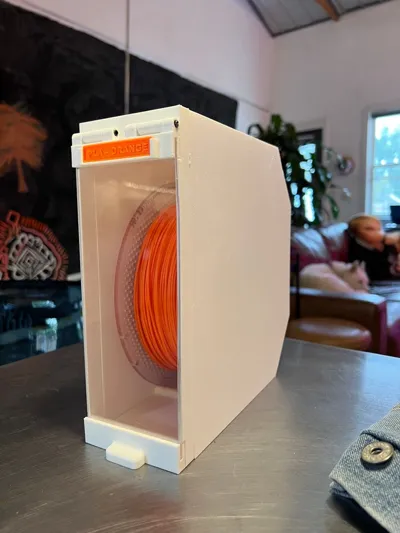
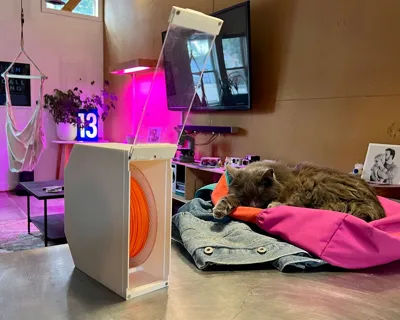
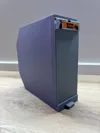

FilaVilla is a filament dry box solution that combines practical utility with contemporary design principles. It offers an organized, snug, and dry home for your spools that's as pleasing to the eye as it is functional, ensuring they're both accessible and neatly displayed on your shelf. This filament storage box is a great way to impress Tinder dates, finally get your kids to respect you, and show your nosy neighbors that they're messin' with the wrong guy.
Design Principles
I designed this filament dry box because I didn't really vibe with any other designs on here. They were either all ugly, over-engineered, took a whole spool to print, or took five days to print. These were my mandatories when designing:
- Affordability. The box must be as optimized as possible for cost-saving and print speed. I have a lot of spools and it's not plausible for me to spend an entire month and hundreds of dollars just to print filament boxes
- Moderate Protection. I mostly print with PLA and PETG, and don't need the box to be an airlock on the USS Enterprise, but still need it to be overall protected from the elements
- Simplicity. I wanted something with as few parts as possible that could connect in a straightforward and easy-to-assemble way. I didn't want any visible lips and as few seams as possible.
- Modular Library Design. I wanted something that could be assorted in a row and look nice on a shelf.
- Filament Visibility. I love the different colors of filament I have- I think the specific combination of colors that I choose to buy really showcases who I am as an artist and designer. Therefore, I wanted some form of window to not only show them off but also for quick selection.
- Strength. There's a natural balance you have to strike between design aesthetics and product strength. My goal was to find that balance the best I could and develop something that was nice to look at / interact with while still maintaining as much structural integrity as possible.
- Accessible. This is my first major project, and I was pretty overwhelmed by a lot of the other options out there. The goal of this was to make it easy for me to understand and build. The instructions below are pretty intense/detailed, but I know that's what I would prefer if I were a 3D printing newbie. If you can assemble an IKEA dresser, you can print and assemble this.
Features
- Silica Gel Shelf: Easy to access and replace silica gel desiccant chamber to maintain dryness over time.
- Acrylic Clear Window:
- Magnetic Door: Ensures a secure and easy-to-use closure system for quick access.
- Raised Base: Elevates the box to protect from potential liquid ingress and facilitates easier handling.
- Filament Label Slot: A handy feature for labeling and organizing your filament types for quick identification.
- Basic Moisture Protection: It's definitely better than leaving it in a messy stack on your desk
- Fits Most Filament Brands: Hooray
Print Time & Cost (With Overture PETG on a P1S)
I highly suggest you use PETG, especially if you plan on stacking them.
| Part | Est. Print Time | Est Filament Usage | Est Cost |
|---|---|---|---|
| Left Side Wall | 1 hr 42 min | 85g | $1.89 |
| Right Side Wall | 1 hr 42 min | 85g | $1.89 |
| Shell | 3 hr 53 min | 161g | $3.44 |
| Front Panel | 55 min | 39g | $0.82 |
| Top Hinge | 28 min | 10.25g | $0.22 |
| Bottom Handle | 24 min | 10.25g | $0.22 |
| Filament Swatch | 10 min | 1.5g | $0.03 |
| Alternative Window* | 57 min | 35g | $0.74 |
| TOTAL: | 9 hr 21 min | 399g | $8.51 |
Total cost per box w/ parts: $11.37
*I know some people may be intimidated by plexiglass, so included is a printable window cover that can be used instead. Price not included in total. Also included is an alternative hinge that doesn't have a label slot on it.
Bill of Materials
The following list will provide you with enough materials to print 25 boxes.
Transparency note: The following links are Amazon Affiliate links and I get a couple cents if you use them. It's an easy and free way for you to support me ;)
| Parts | Quant. | Required? | Est. Cost | Link |
|---|---|---|---|---|
| Hinge Pin 38x4mm | 2x | Yes | $26.56 (50x) | Amazon |
| 11x14" Plexiglass (See Below) | 1x | Yes | 11x14: $56.73 (48 Panels) | Home Depot |
| 6x2mm Magnet | 4x | Recommended | $12.99 (300x) | Amazon |
| 10g Desiccant Pack | 1x | Optional | $13.99 (30x) | Amazon |
| TOTAL: | $26.56 Required $39.54 Total |
| Tools | Required? | Est. Cost | Link |
|---|---|---|---|
| Super Glue | Yes | $8.64 | Amazon |
| WD-40 | Optional | $6.65 | Amazon |
| Sealant Spray | Optional | $14.94 | Amazon |
| Deburring Tool | Optional | $14.99 | Amazon |
| 11/64th Drillbit | Optional | $3.45 | Amazon |
| Hobby Knife Set | Optional | $14.03 | Amazon |
| Plastic Cutting Tool | Depends on how hardcore you are | $8.20 | Amazon |
| TOTAL: | $8.64 Required, $62.70 Total |
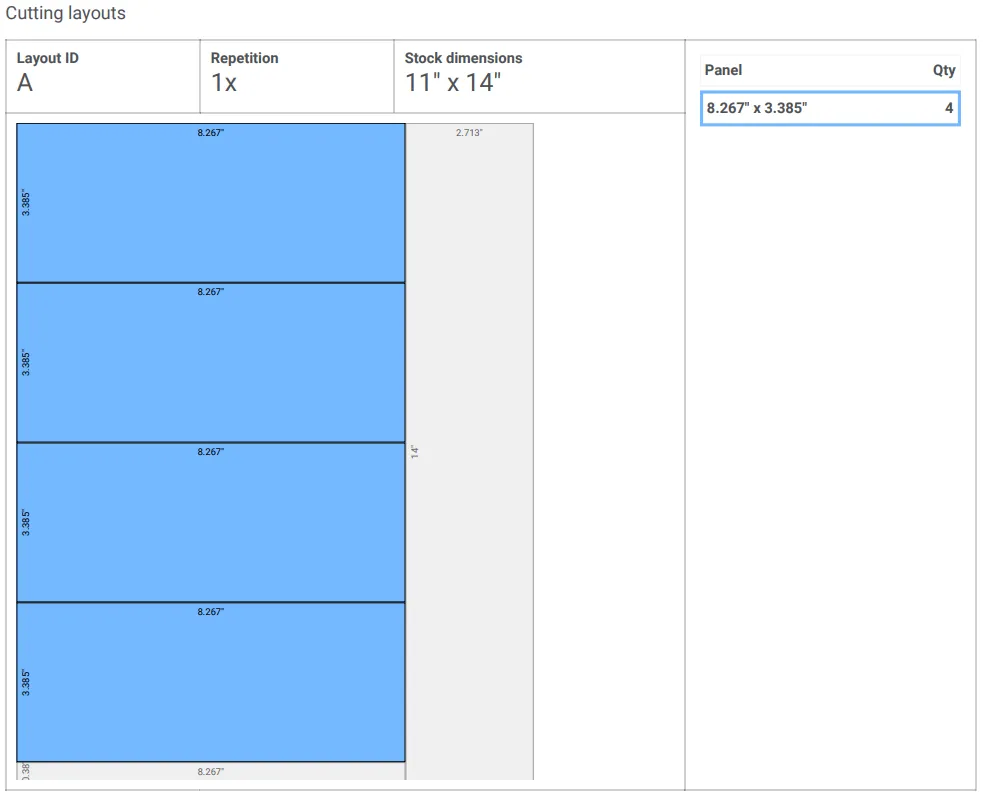
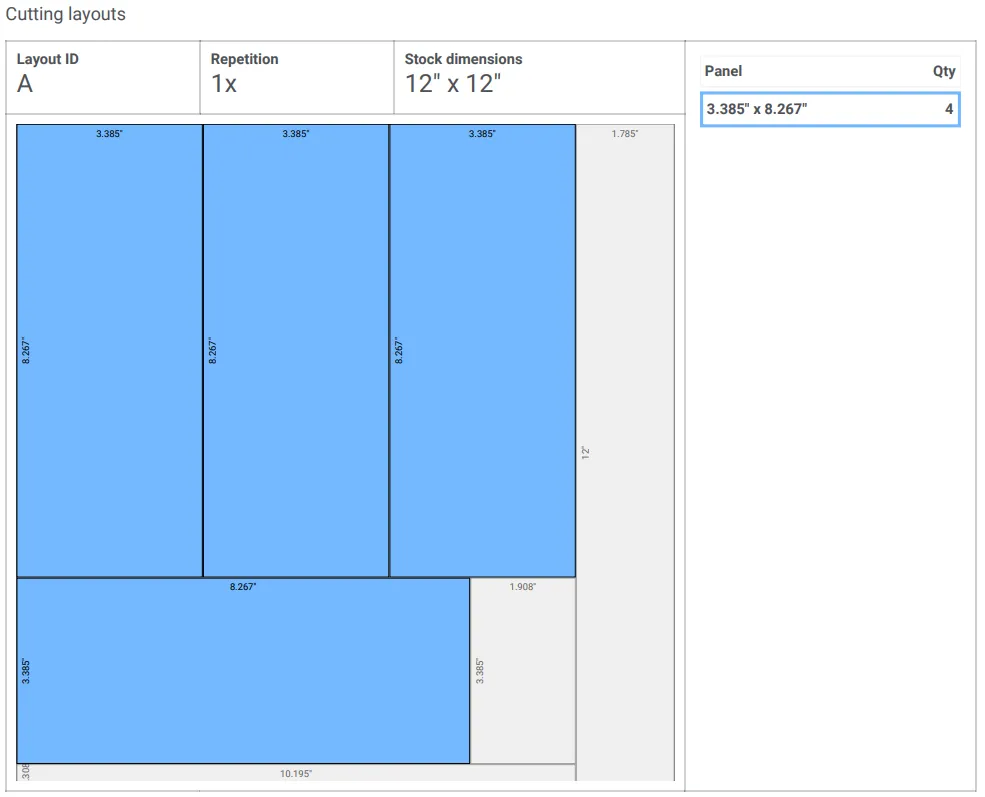
Plexiglass info:
Thickness: 0.36mm - 0.093" - 3/32"
- Note: The tolerance for the hinge/handle slots is 2.5mm, so there's room to increase the thickness if you have a hard time finding the right source. It'll just be a tighter fit.
Width: 86mm - 3.385"
Height: 210mm - 8.267"
I'm doing my best to accurately source the right size sheets to minimize waste. Let me know if you find more optimal sheets. So far I've found two options:
12x12 Sheets Can't Source For Cheap Yet
- 4 Panels/sheet
- 77.75% Optimization
- Pros: Extra room for different blade thicknesses
- Cons: Different cut patterns. Extremely expensive
11x14 Sheets Recommended
- 4 Panels/sheet
- 72.7% Optimization
- Comes in a
- Pros: All linear cuts, most cost-efficient
- Cons: Slightly more waste, I hate Home Depot, Can only buy in bulk
Printing Instructions
All Parts
- Sparse Infill: 15% Gyroid. Grid Infill is not welcome in this household.
Side Panels
- Wall Loops: 4 (Since most of the printing time will be spent on infill, this won't add much to the time, but it will ensure that the attachment pegs are nice and strong)
- Layer Height: 0.20 - 0.28
- If possible, use variable layer height and drop the value low for the layers that the tabs are on.
- Ironing: Off
- Supports: Yes (Important!)
- Type: Tree (Auto)
- Style: Tree Slim
- Remove Small Overhangs: On
- I was trying really hard to find a way to build this without needing supports. Hopefully, I'll get that sorted out in a future version. The side panels are the only parts that require supports
- The All Parts build plate included above has support reinforcers in it all ready for you
- Brim: None
- For some reason, Orca thinks it needs a brim. This is a lie and a waste of filament.
- Slow Down For Overhangs: On
- Convert Holes to Polyholes: Off
- We use the bad mathin' the printer does to make the pegs snap tighter into their holes.
Shell
- Wall Loops: 2 or 3. 3 if you have time.
- Brim: Auto/On
- Convert Holes to Polyholes: Off
Front Panel
- Wall Loops: 3
- Layer Height: 0.2 - 0.28
- Ironing: All Top Surfaces (I do ironing a bit differently, see this Reddit post for details)
- Speed: 150 mm/s
- Flow: 38%
- Line Spacing: 0.20mm
- Brim: Outside Only, 5mm
- Turn on Variable Layer Height for best results
- Convert Holes to Polygons: Enabled
Top Hinge
- Wall Loops: 2
- Layer Height: 0.16
- Ironing: Optional
- Brim: Enabled
- Convert Holes to Polygons: Enabled
Handle
- Wall Loops: 2
- Layer Height: 0.16
- Ironing: Optional
- Brim: Enabled
- Convert Holes to Polygons: Enabled
Filament Labels
Included below is a Fusion 360 file to customize the labels with text. There are single and double-line options, along with all the generic filament types. I also included the filament swatch model that I use for funzies.
- Layer Height: 0.16
- Ironing - All Top Surfaces
- Speed: 150 mm/s
- Flow: 38%
- Line Spacing: 0.20mm
Assembly Instructions
Step 01 - Attach the Side Panels to the Shell
Use a deburring tool to clean off the edges of the panels and the shell. Align the panel pins with the shell's holes and gently slide them in 25% of the way. From here, assess if you have enough clearance in the pin holes. If not, use an 11/64th drill bit to slowly and gently boar out more material from the shell's holes. Making passes, reinsert the pins one at a time in increments of 25% until all pins are snugly in the holes. Apply a final pass of pressure and you should hear them snap into their final resting position.
For added strength, you can use a drop of crazy glue before inserting them. This isn't necessary, but I could see why someone would want to. If you use crazy glue, do it after you've done your first 25% insert assessment.
For an overkill amount of added protection, use the super glue brush and paint over the inner ledges before attaching the pieces.
Step 02 - Attach the Front Panel
You'll need a flat blade of some sort to shave the excess overhang support material off of the triangular notches. Be gentle and kind when you do this. I added a link to the hobby knife set I use to the bill of materials.
Step 03 (Optional) - Spray Box W/ Sealant
Make sure you do this before you add the hinges and plexiglass. Follow the instructions on the can. Go slow and use light spritzes. Avoid getting sealant on the front plate's face.
Step 04 - Cut and Install Plexiglass
The plexiglass panel should be 86x210mm. There are three main ways to cut acrylic sheets: 1) by hand, 2) with a circular/jig saw, and 3) with a CNC machine or laser cutter. I'm not going to go into detail on how to do this since there are a billion YouTube tutorials on it.
Step 05 - Install Magnets
Don't be a silly goose- make sure your poles are aligned properly. Once you're certain, add a drop of super glue into the magnet cubby and drop the magnet in on top of it. Make sure the glue is dry before allowing the magnets to connect. Two magnets on the front plate, and two opposite-sided magnets on the handle.
Step 06- Assemble the hinges
Place the window unit into its naturally closed state, ensuring that the magnets are aligned and the window is snug with the bottom lip. Align the hinges and slowly insert the hinge pins. You may need to use a ball hammer to gently tap them into place. You may need to use an 11/64ths drillbit to clean out the inside of the hinge holes on both the front plate and the hinge plate. Be gentle and slow if you do this. Reverse the drill to back out and don't just pull it back. I use a spritz of WD-40 on the hinges before inserting them to make the opening experience a bit smoother.
Step 07- Insert Silica Packet
Self Explanatory. I hope.
Step 08 - Start drowning in hot babes.
Hope you packed a snorkel.
To-Do / Future Versions
- Add printable hinge pins
- Find a way to build side panels without supports
- Might design a reusable container insert for loose desiccant beads
- Create a magnet jig
- Create a version with a pneumatic connector / possibly bearings
- The goal of this box was simplicity, and I feel like that might be breaking that design value. TBD.
- Find a way to make them more stackable
- Discover if there are potential optimization routes to further reduce filament usage
- Some of the support structures might be overdoing it and over-engineered. I want to experiment to see if I can optimize/reduce the support beams while still maintaining structural integrity
- Create different hinge/handle window slot thicknesses for more plexiglass options
Changelog
11/9/2023
- Added printable hinge pins
- Added new faceplate for those who don't want a door at all / aren't afraid of moisture and just want to show off those hot hot spools.
Support Me
If you dig this model, I'd sure appreciate it if you could kick me over a $1 so I can buy my wife the occasional bottle of wine for having to put up with my chaotic and messy hobbies: https://www.buymeacoffee.com/jordyjordy

Support Me
If you dig this model, I'd sure appreciate it if you could kick me over a $1 so I can buy my partner the occasional bottle of wine for having to put up with my chaotic and messy hobbies: buymeacoffee.com/jordyjordy

Documentation (3)
License

You shall not share, sub-license, sell, rent, host, transfer, or distribute in any way the digital or 3D printed versions of this object, nor any other derivative work of this object in its digital or physical format (including - but not limited to - remixes of this object, and hosting on other digital platforms). The objects may not be used without permission in any way whatsoever in which you charge money, or collect fees.


Comment & Rating (25)