Search models, users, collections, and posts

Consumable Drying Bracket
IP Report


Print Profile(1)

0.2mm layer, 4 walls, 15% infill
Designer
4.2 h
1 plate
Open in Bambu Studio
Boost
3
4
0
0
11
0
Released
Description
BOM:
3.5*8或3.5*10螺丝*8
3.5螺母*8
608zz轴承
组装教程:
BOM:
3.5 * 8 or 3.5 * 10 screws * 8
3.5 Nut * 8
608zz bearing * 4
Assembly tutorial:
1. Install the printed parts into the nuts as shown in the picture, preferably with glue for easy installation later on
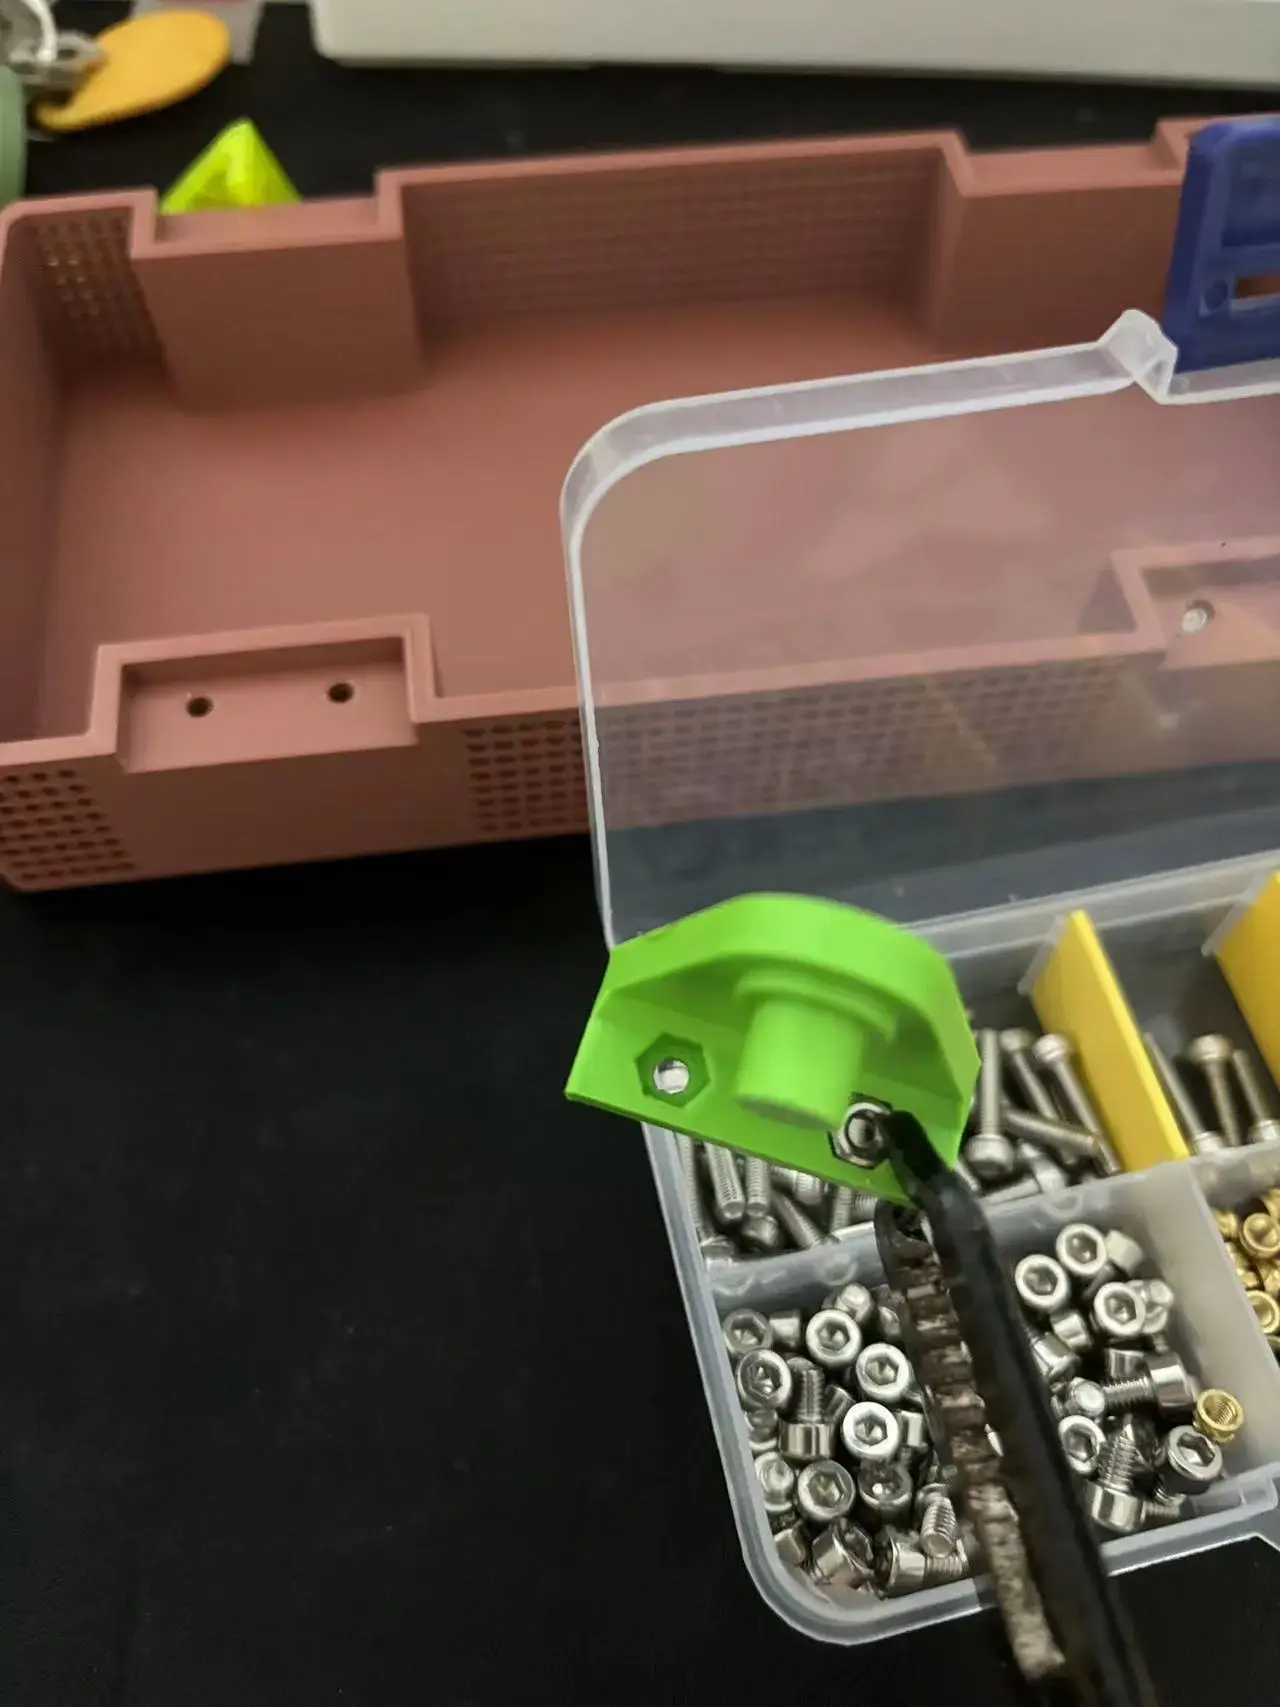
2.将转轴安装完成如图所示
2. Install the shaft as shown in the figure
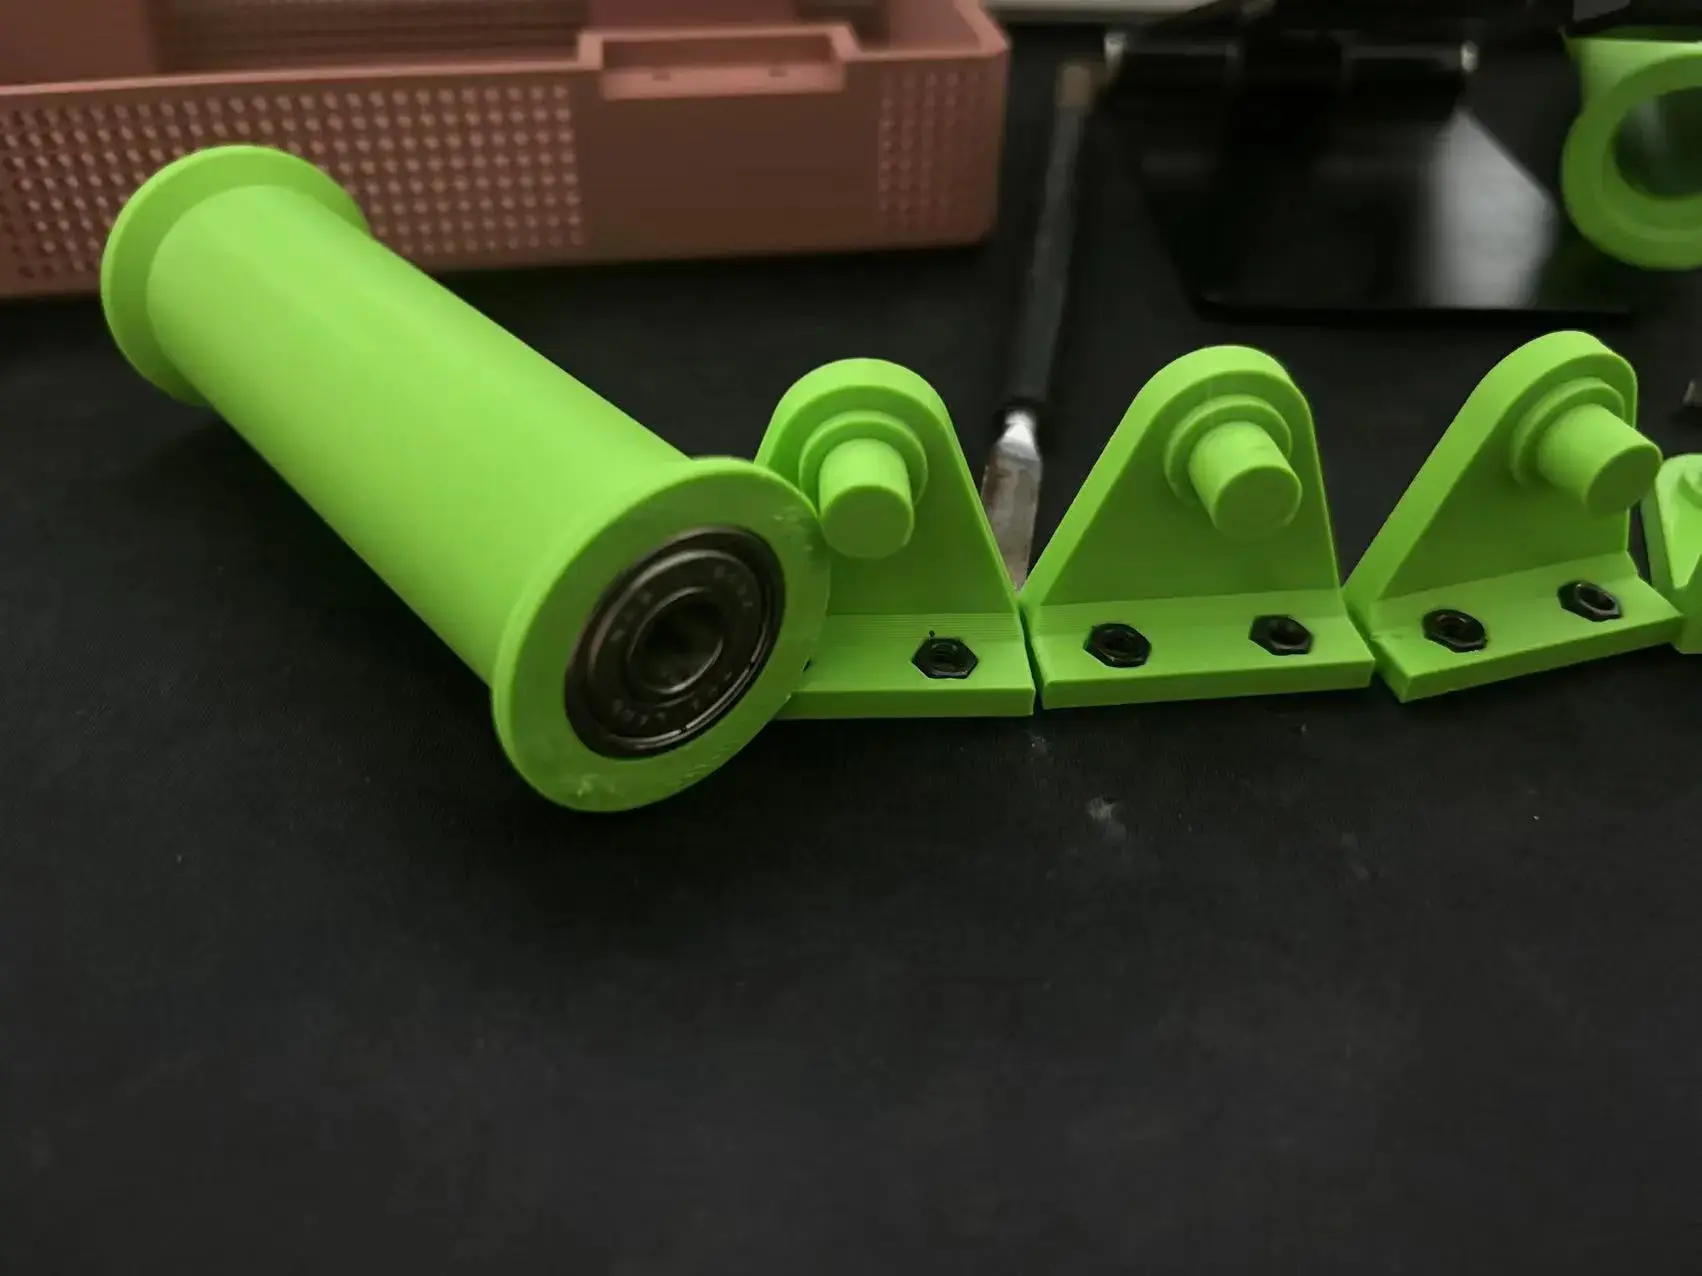
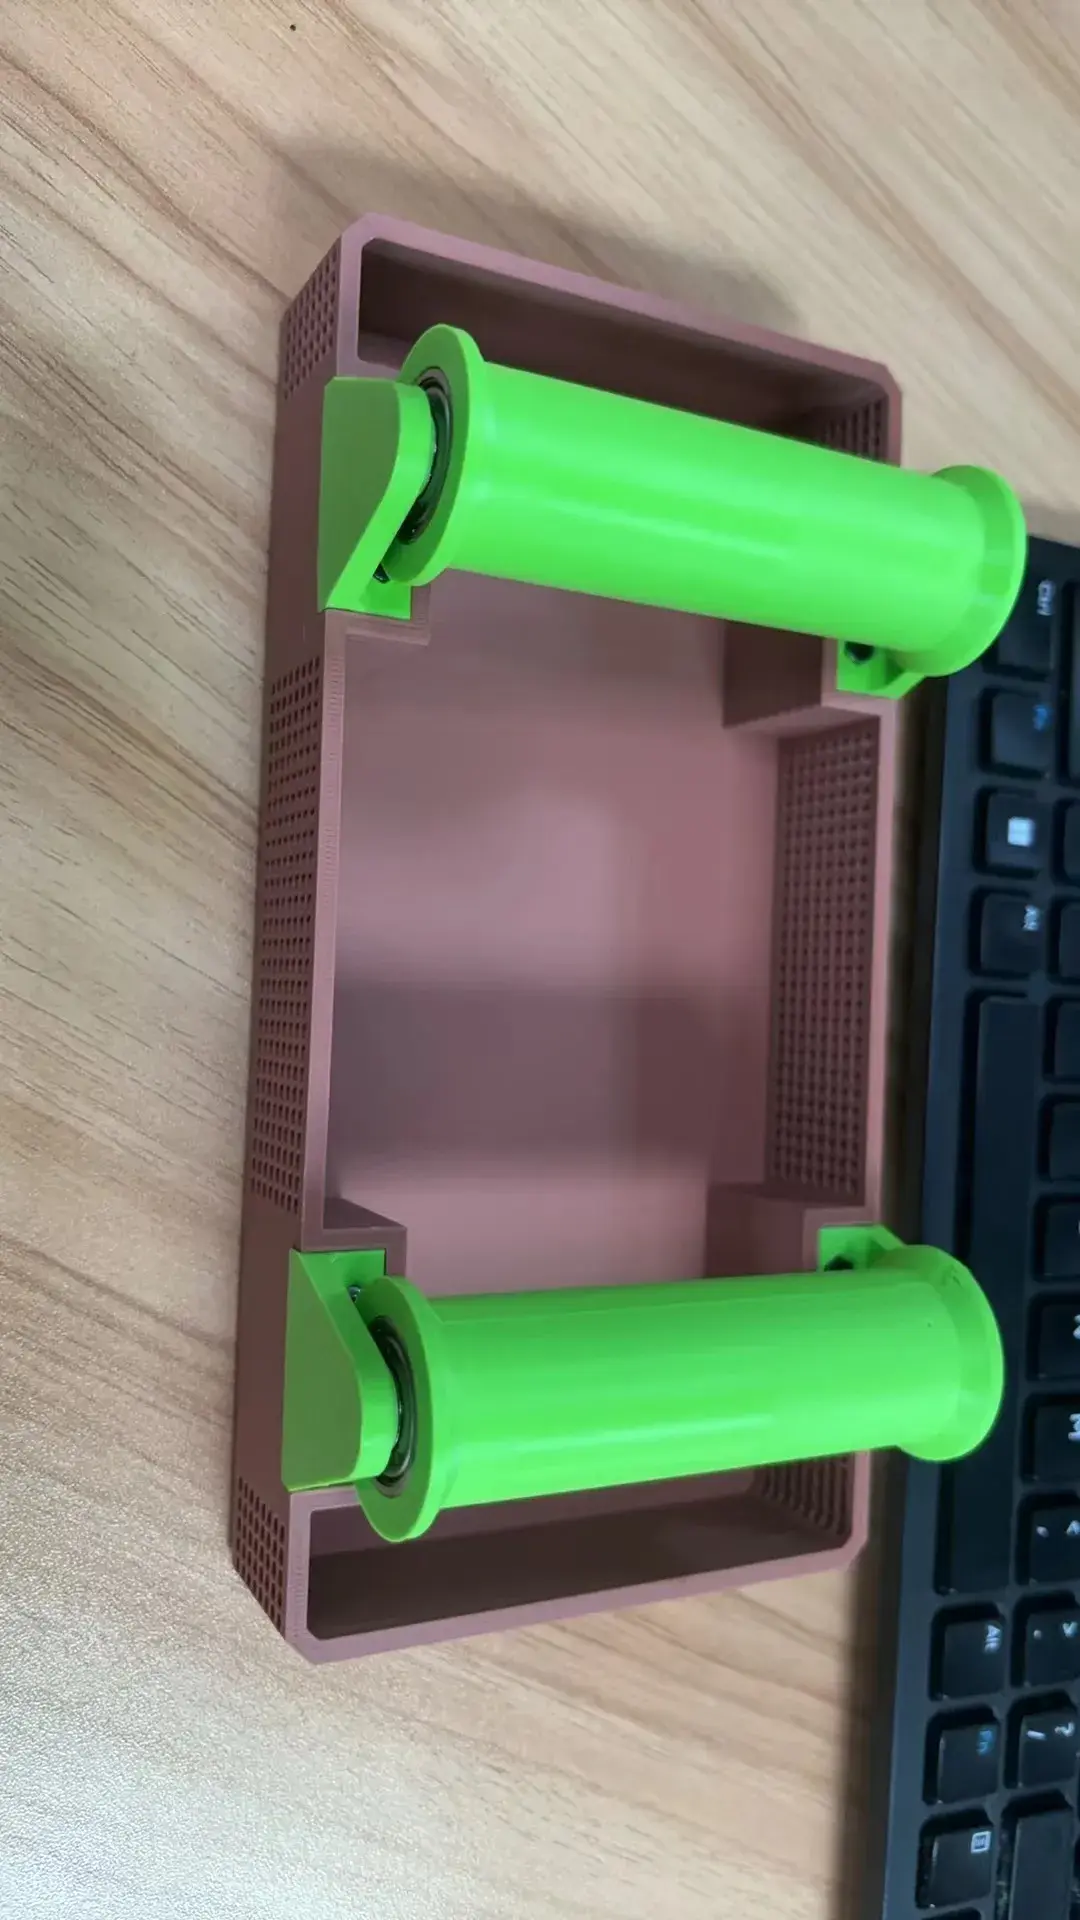
3.将螺丝从底部打入注意螺母位置,安装完成即得到终极成品。
3. Insert the screw from the bottom and pay attention to the position of the nut. Once installed, the final product will be obtained.
PS:期间不需要任何支撑如图
PS: No support is required during the period as shown in the picture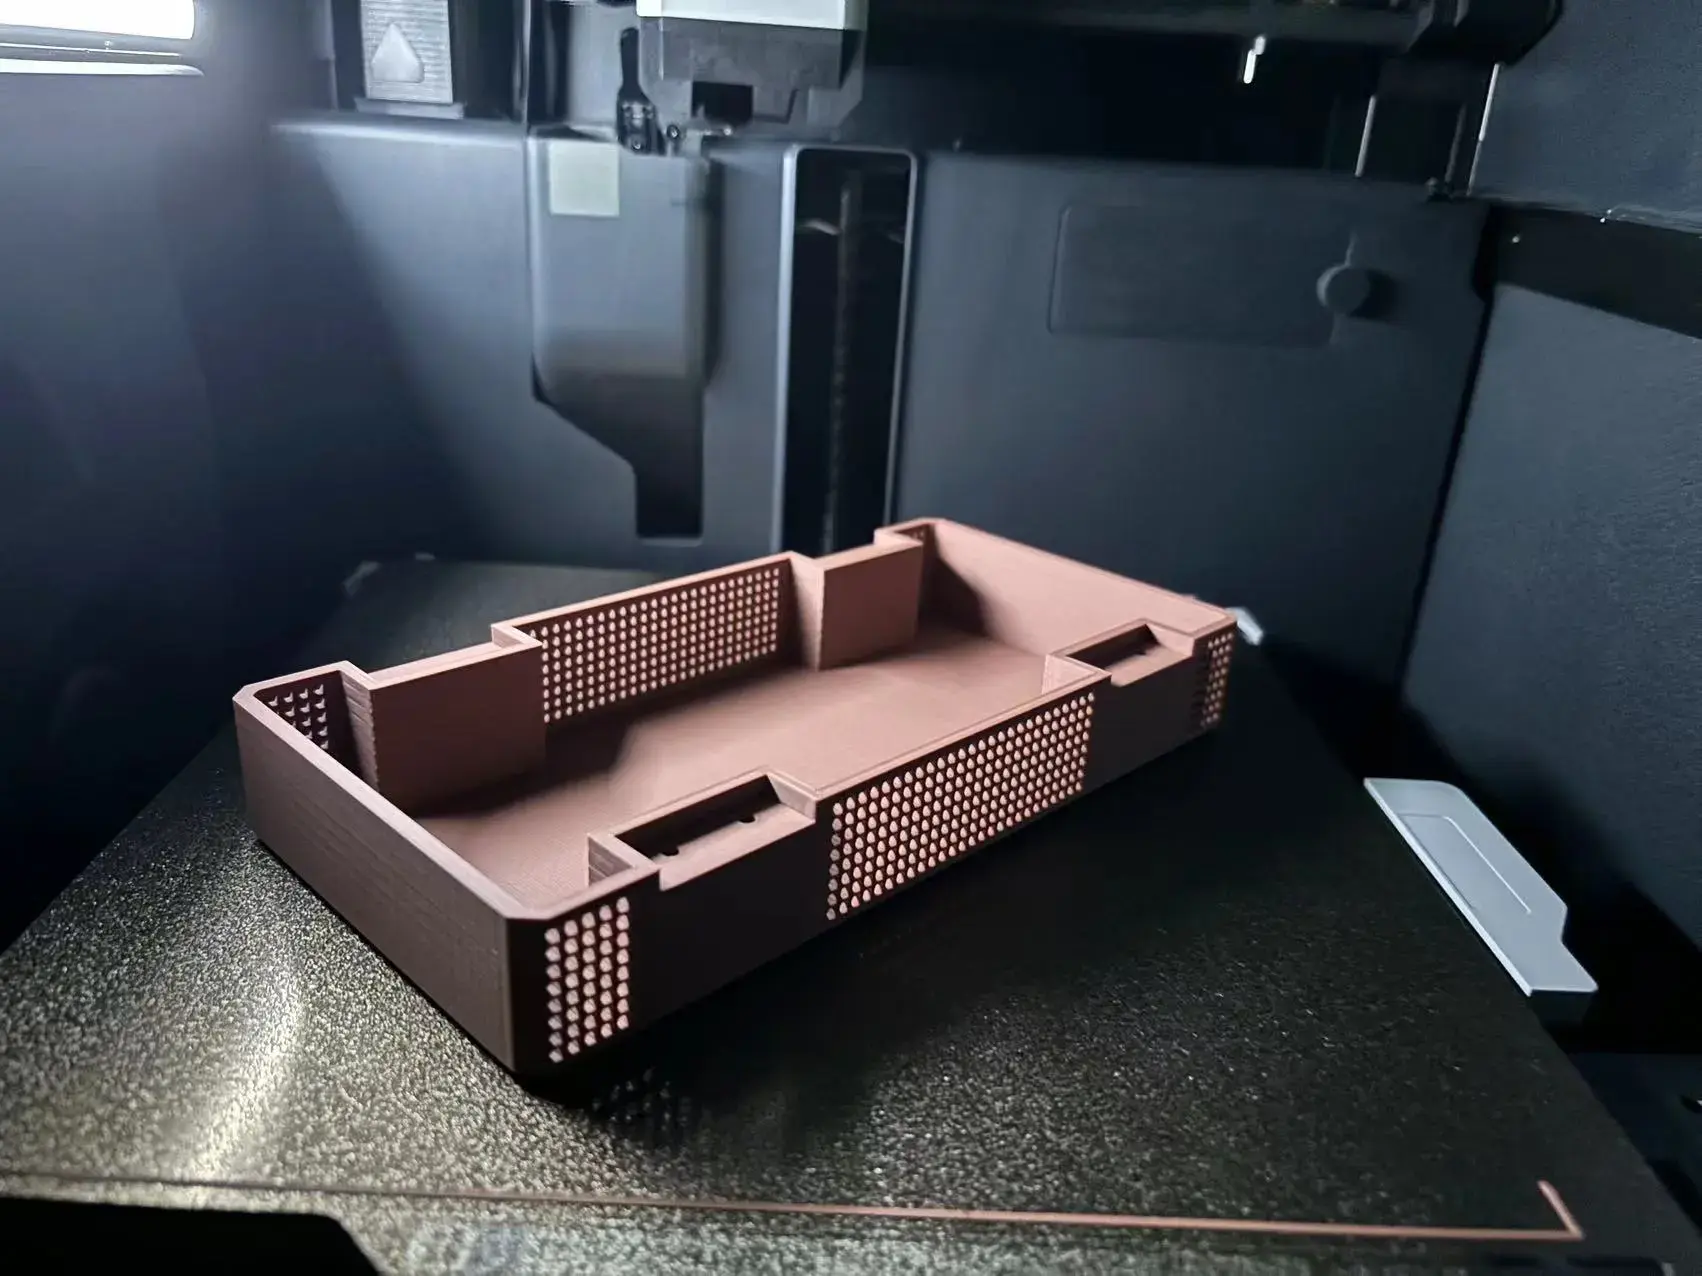
License

This user content is licensed under a
Creative Commons Attribution-Noncommercial-NoDerivatives


Comment & Rating (0)