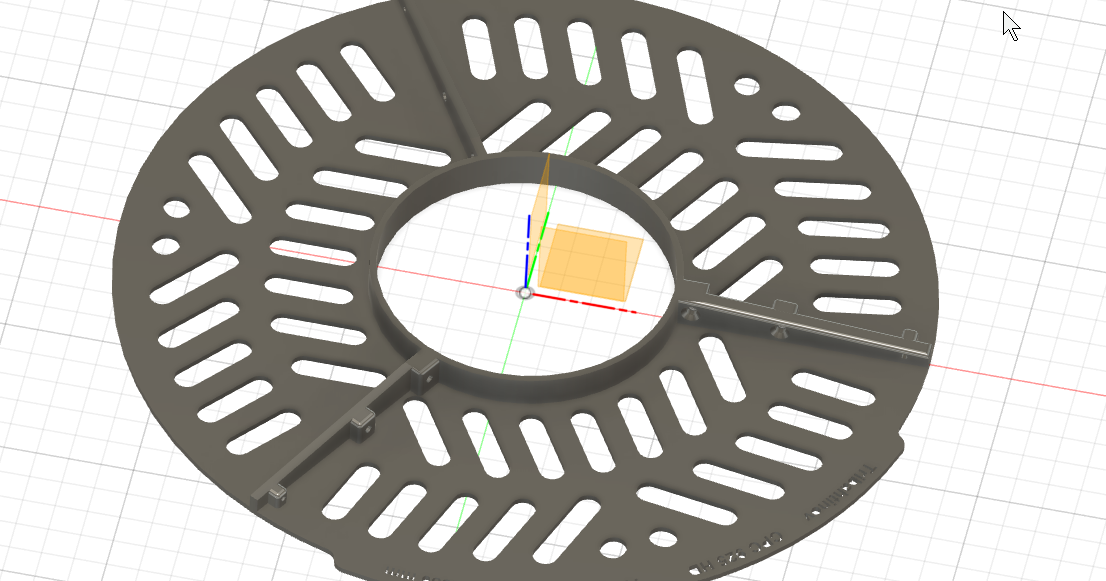
Tribahtinov mask for Celestron CPC 925 Edge HD
Tribahtinov mask for Celestron CPC 925 Edge HD
Print Profile(1)

Description
My notes:
Below Axel mentions using nuts & bolts. I found that the holes are small enough that I threaded in 2x M3x12mm screws in each piece (6 total) and didn't use the M2 or any of the nuts.
Axel's Model from Printables:
https://www.printables.com/en/model/731680-tribahtinov-mask-for-celestron-cpc-925-edge-hd
Per Axel (edited):
Description
A symmetric and rounded Tribahtinov mask for the Celestron 925 Edge HD.
Based on the Satakagi Tribahtinov web calculator. Also included M3 knobs as a replacement for the original screws.
Tribahtinov mask
Parts:
- 6 x M3 / 10 mm (2 per parts)
- 3 x M2 / 10 mm (1 per part)
You can also glue the parts together. Super glue is perfect for this. But screwing is more safe in many aspects, that's my opionion. And you can fix a part, if broken (or melted in the sun).
!!! Super glue WARNING:
Be absolutely sure, that the glue is completetly dry, when you put the part onto the Schmidt plate. Super glue emits very fine spurious gases even after hours, which will stick onto the glass on a molecular level. You will NEVER be able to remove this fine film. So, if you glue with super glue, let the part dry and evaporate out on a warm place for at least a couple of hours!
Be warned.
"Mask" for the mask
To be able to collimate each screw, I added a simple mask for the mask :-) You then can collimate number by number each screw.
For how to do this, see the attached picture. Lose or tighten the RED screw and counter screw the BLUE one. Do this for all three directions.
Usage
The usage of the Tribahtinov mask for collimation is not often shown. I designed a “mask” for the mask, so that one can collimate each screw after the other.
First step:
Align the little protrusion with the numbers. Or if you built the three part one, align it where the three parts come together.
I call the lead screw the most important one - it is the one opposite to the little protrusion (and number). There is a little notch in the inner ring, that indicates for this screw, which is the main one for the direction to collimate.
Look at the pattern of the star in a live view (this should be done with a camera).
There are two lines in an 30° angle, and additionally one, that is between or parallel to the middle line of this two. This one is the collimation line. You have to put it into the middle of the two others. When you loosen the lead screw, you can detect the direction.
Start with LOOSEN (!) this lead screw for 1/6th (not more). Then immediately after, TIGHTEN the other two screws about 1/12th.
You should see, if the middle line goes into the right direction. If not, LOOSEN BOTH opposite screes to the lead screw 1/12th and TIGHTEN the lead screws 1/6th.
This is only for the first time to determine the direction to collimate.
Then go further only by loosen or tighten by a 1/10th or 1/20 respectively.
Do this as long, as you ROUGHLY are in the middle.
Then go to the next screw, and the next, and start over again. After several passes, you should have every single screw aligned.
- Use several passes
- Do not overtighten the screws
- Take your time
- Use a camera and a tablet/handy while collimating
Cheers, Axel


