AtomRC Swordfish O3 Nose Mount
AtomRC Swordfish O3 Nose Mount


Print Profile(0)
Description
Summary
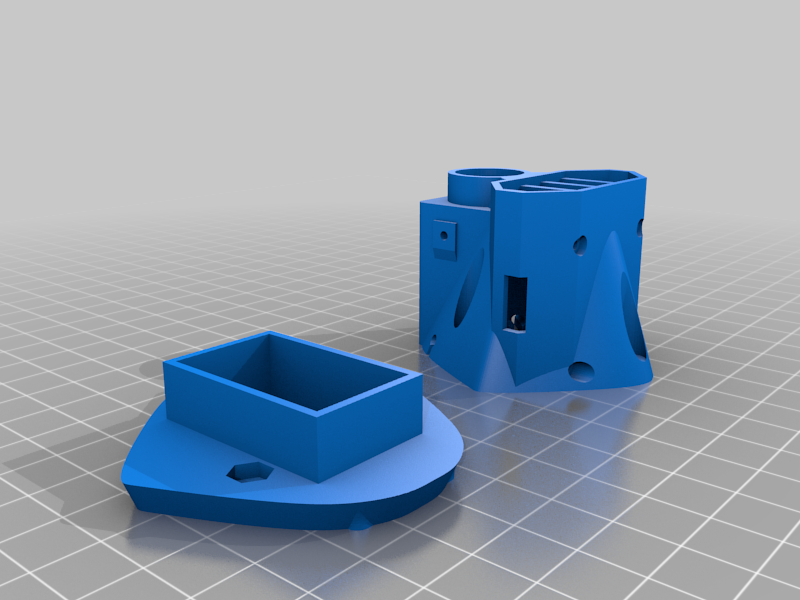
I modified Gizfpv's excellent nose mount to work with the DJI O3. It works well. There are a few considerations:
1 - Screw holes
2 - Mounting the O3
3 - Top vent
4 - Ballast
5 - Antenna
6 - Hardware
7 - Supports
8 - Instructions
For #1 (screw holes), the diameter of the mounting holes for the screws was too small initially. I drilled mine out and updated the design - it should work better, but I haven't tested it (don't want to reprint and waste). If they're too small, just use a 1/8" drill bit.
2 - Mounting the O3. I chose not to hard mount the air unit (the camera itself is hard mounted of course). I didn't have the right sized screws to hard mount the O3 and it doesn't matter much anyway. I added little side bars to hold it in place in the design. To reduce vertical movement, I just stuck some padded tape to the top of unit and left on the backing, so it could slide in and out. It's fairly well mechanically secured.
3 - Top vent. The air coming in the nose needs somewhere to go. So I also designed a replacement for the top panel that you can print that allows air to vent out the back. I'll upload it to my profile. Also my cat chewed on the default EPP part so I needed a new one.
4 - Ballast. This makes the plane slightly nose-heavy. I had to add about 20g of weight on the back of the plane.
5 - To mount the antenna, just pick a side, force the antenna mount into the slot, and glue it in place. You can use a zip tie to secure the antenna to the mount.
6 - I used metal M3 hardware.
7 -All of these parts are designed to print without supports.
8 - See the original design (Gizfpv's) for instructions.
I butchered the Fusion360 file from Gizfpv, but I've included it here in case you want it.