P1P MCU fan holder (Noctua)
P1P MCU fan holder (Noctua)


Print Profile(2)


Description
Hi,
I made this fan bracket due to the fact that other designs required bolts and were hard to mount without taking down the shoot and main reason is that my heatsink is different compared to other models - ! please check if you have the same otherwise it is not compatible!
I would like to thank u/Goliadthedark from Reddit for posting his tutorial how to wire Noctua fan to P1P/X1C.
What you need?
- printer to print the bracket of course
- PETG or ABS/ASA (after few months of use PETG holds without any issue on my printer)
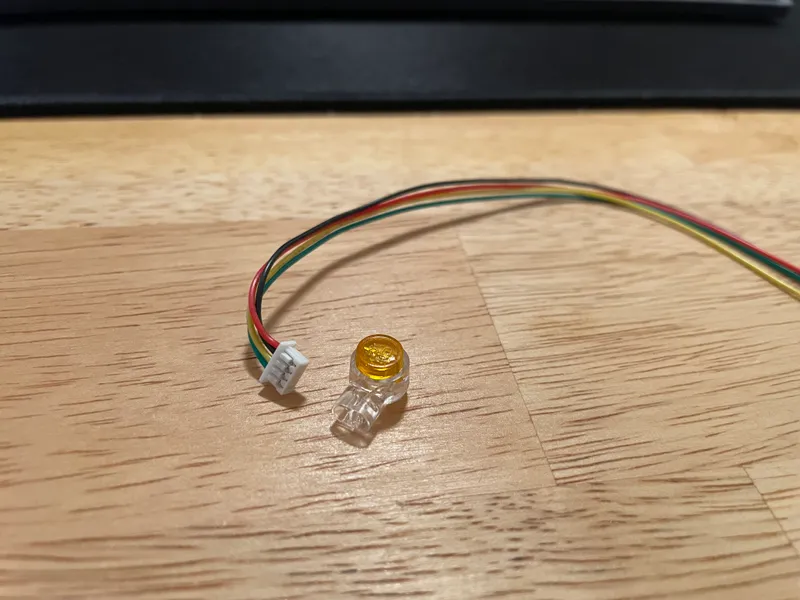
- Micro JST 1.25mm 4 Pin connector with cable - I got this from aliexpress
- Noctua NF-A4x10 fan - link (or 20mm version - up to you)
That is it, you do not need any extra tools or bolts, or crimpers!
How to do it?
Print the bracket, I used 0.16mm default profile for P1P and it worked great, no supports or brim is needed at all, I used PETG from Sunlu.
The fan is small and not noisy at all and comes with accessories such as cables and most importantly small orange connectors.
1) Turn off the printer and disconnected power cable
2) Remove the back cover - see official tutorial
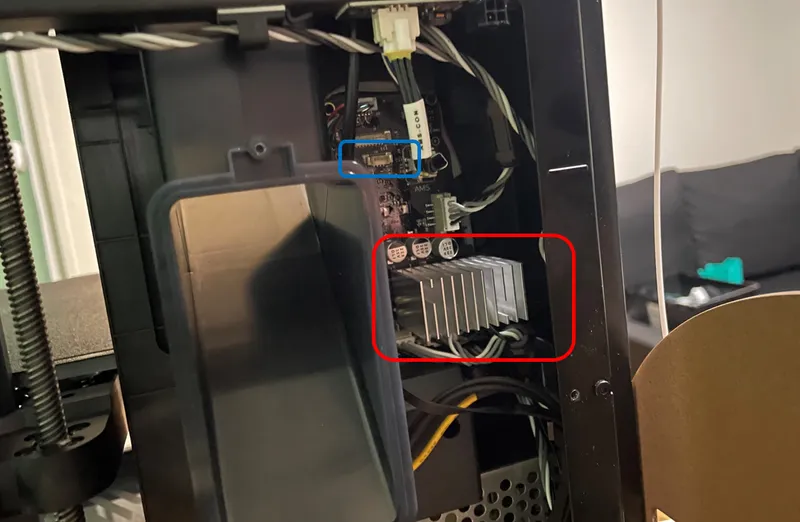
3) Check if you have same heatsink as me, there are different ones and it is the main reason why I had to design my own bracket - see red rectangle
4) Cut yellow and green wire from JST connector since you will not need them
5) Cut cable from the fan in the middle and connect red - red and black - black from the fan to the connector. Do this with that orange connector that come with the fan, insert cables inside all the way and then press them with pliers.
6) Insert the connector into corresponding empty connector - see blue rectangle above
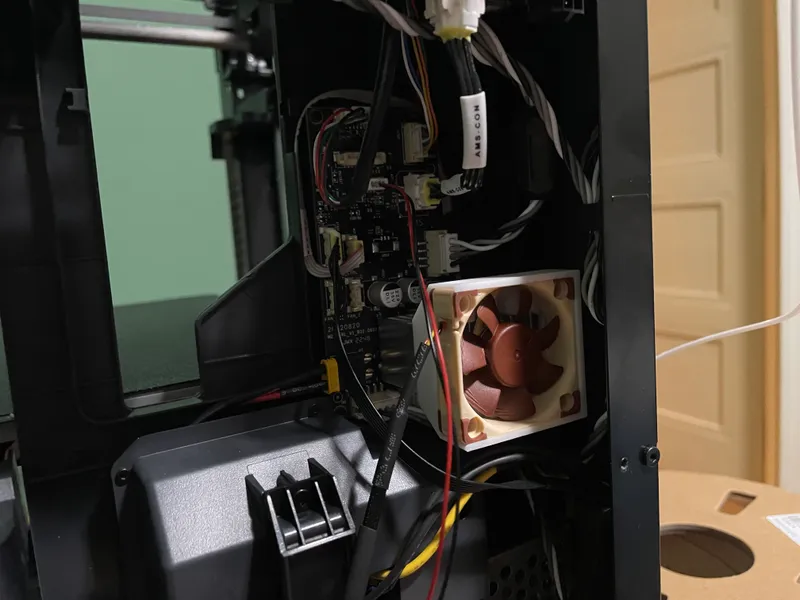
7) Insert fan into the frame, it should just slide easily and install it on the heatsink. There is no need to remove the shoot even though it is removed on the picture below.
Now it is good time to power up the machine and see if the fan spins.
If it does just cover it back up and you are good to go.
UPDATE:
Added 20mm version - slightly tweaked dimensions for better fit.


