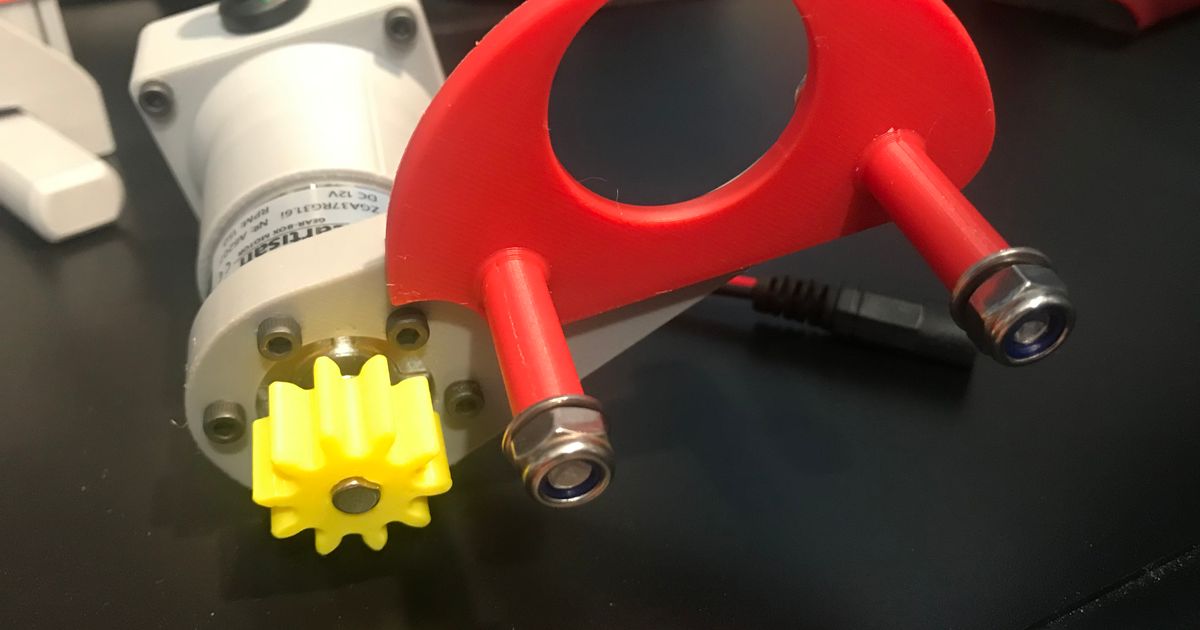
Pastamatic dual motor mod
Remixed by
Copyright Claim
Pastamatic dual motor mod
Remixed by
Boost
20
46
7
Print Profile(1)

0.2mm layer, 4 walls, 100% infill
3.5 h
1 plate
Open in Bambu Studio
Boost
20
46
7
1
86
46
Released
Description
My single motor just didn't have enough torque when the spool was more than halfway loaded so I remixed this setup for my controller and a dual motor setup.
Inspired by this great mod (https://makerworld.com/en/models/30150#profileId-26573)
EDIT: 12/22/23 added a step file for the box
Comment & Rating (7)
All
For those looking for screw sizes, here's what worked for me:
Controller Board: M2.5x4mm
Motor Mount: M3x8mm
Case: M3x16mm
Suggestion for designer: the bottom hole for PSU wires isn't in a good location with this controller, since the connections are at the bottom of the controller. I suspect that this was designed with a different controller in mind originally. I drilled out a hole on the right side to use instead. Just some thoughts.
Overall, very effective design.
I'm using this add one as well that others have mentioned for drive spindle retention:
https://www.printables.com/model/621425-pastamatic-axle-holder.
I'm also using on of these clips on the opposite end of the driven spindle for retention as well:
https://www.printables.com/model/499110-pastamatic-retrofit-for-better-target-spindle-rete/comments for retention.
I posted the same in the Printables version of this item, I hope that's OK.
Since someone asked about parts, here's a list:
Controller x1 https://www.amazon.com/dp/B071H2YQG5?psc=1&ref=ppx_yo2ov_dt_b_product_details
Power Supply with Connector x1 https://www.amazon.com/dp/B09ST95SW5?ref=ppx_yo2ov_dt_b_product_details&th=1
Motor x2 https://www.amazon.com/dp/B08D3SSG55?ref=ppx_yo2ov_dt_b_product_details&th=1
M3 Screws from here https://www.amazon.com/dp/B0CBMMPPKF?psc=1&ref=ppx_yo2ov_dt_b_product_details
M2.5 Screws from here https://www.amazon.com/dp/B0CLM8HY63?ref=ppx_yo2ov_dt_b_product_details&th=1
For the Spindle retention parts, here's what I used also:
608 Bearings https://www.amazon.com/dp/B073ST742Z?psc=1&ref=ppx_yo2ov_dt_b_product_details
M6 Screws https://www.amazon.com/dp/B0CDSDTMK3?ref=ppx_yo2ov_dt_b_product_details&th=1
M5 Screws https://www.amazon.com/dp/B0CDSHNRXK?ref=ppx_yo2ov_dt_b_product_details&th=1
I hope this helps someone out. :)
(Edited)The designer has replied
4
Reply
I think m2.5 will work, I ended up using the nut that hols the control knob onto the box , didnt see the need for PCB screws. Thanks for the comment.
0
Reply
Boosted
Great mod. I didn't like using my drill and this was a perfect solution. Works great with no issues.
The designer has replied
0
Reply
Thank you ! Im glad you enjoyed it!
0
Reply
How did you do the power supply? Is it possible that you can list witch parts you have bought?
0
Reply
Print Profile
0.2mm layer, 4 walls, 100% infill
0
Reply
Print Profile
0.2mm layer, 4 walls, 100% infill
0
Reply
No more
This remix is based on
License
This user content is licensed under a
Creative Commons Attribution-Noncommercial-Share Alike


