Upgraded Drivetrain - Pasta Machine for Playdough
Upgraded Drivetrain - Pasta Machine for Playdough


Print Profile(4)


Description
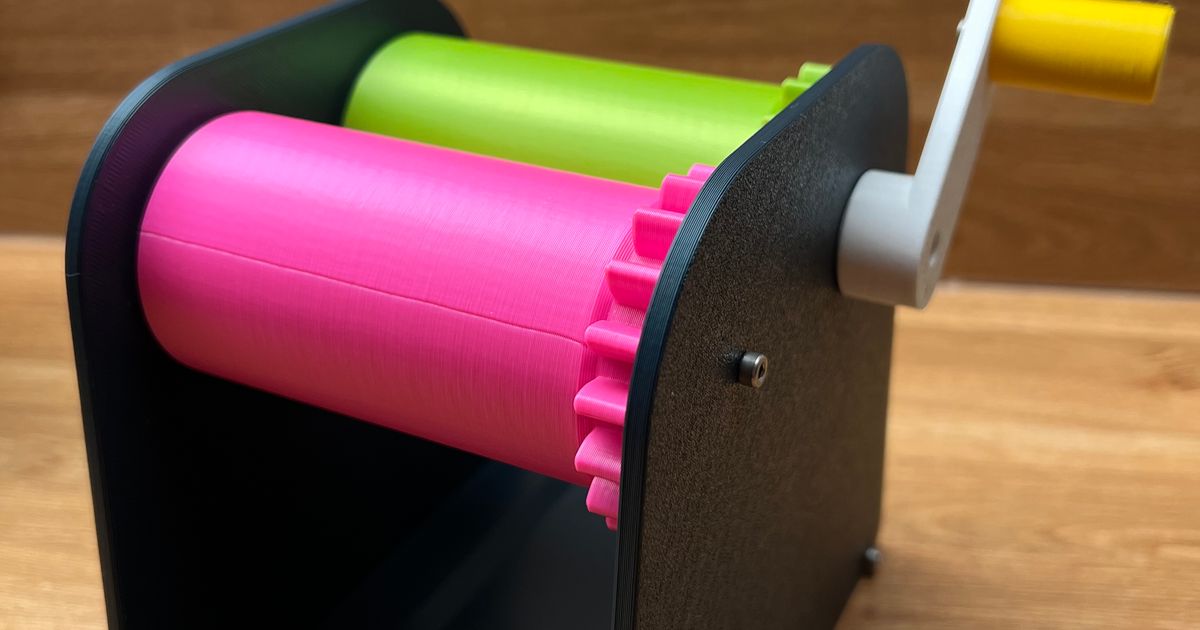
I liked the original Pasta Machine for Playdough by edelsteff a lot but ran into the problem where, sometimes when the play dough gets really old and tough, the crank would spin free, meaning the self-tapped thread inside the roller had been compromised.
I therefore created a triangular connection which makes it impossible for roller and crank to spin independently from each other. I also slightly increased the depth of the crank‘s “spacer” through the pasta machine wall. This enables you to glue both parts together without the need for a screw. Remember to first put the wall inbetween though :-)
21.12.2023 UPDATE: I added some files for a snap fit handle, eliminating the need for a screw to connect handle and crank. |
The crank‘s screw hole is 17 mm, so pick an M3 screw of ~22-25 mm to connect crank and roller. Other than that I went with 16 mm M3 screws for the whole assembly.
Print settings:
- 0,2 mm layer height
- 3 perimeters/top/bottom
- 15% gyroid infill
For the snap-fit handle I recommend something other than common PLA. I printed in SUNLU black PLA+, which turned out quite forgiving and has yet to break. A regular SUNLU PLA snap-fit handle didn't even last a single assembly! Therefore choose something with a little bit of give.
In addition to this upgraded drive train you will need the following from the original model:
You can grab those files from here! |
I‘d appreciate a “like” if you do and look forward to your makes <3 also please share your feedback on the design!
Thanks to the original author for the model!