IKEA LACK Resin Printer Enclosure parts
Remixed by
Copyright Claim
IKEA LACK Resin Printer Enclosure parts
Remixed by
Boost
1
2
0


Print Profile(1)

0.2mm layer, 2 walls, 20% infill
Designer
1.1 h
1 plate
Boost
1
2
0
0
2
0
Released
Description
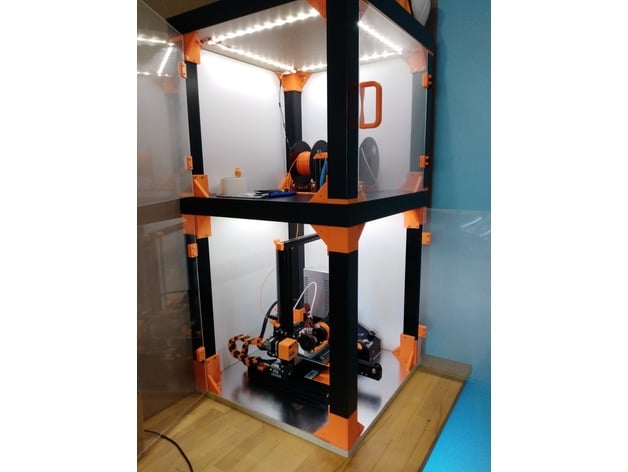
A simple 3D print for IKEA LACK tables, that allows a person to easily build a 3D printer enclosure for FDM or resin.
1) Place 2 IKEA LACK tables on top of each other
2) Place one of these printed parts into each of the 8 corners
3) Use screws to attach the printed parts to the legs/surfaces of the tables
4) Use M4 nuts and bolts to attach side panels to the printed parts
5) Optionally use sealant around the edges of the panels to make them airtight
Personally, I used magnetic cabinet door attachments for the front panel to make a removable door for the cabinet. However, there are many ways to do this.
Comment & Rating (0)
All
No more
This remix is based on
License
This user content is licensed under a
Creative Commons Attribution-NoncommercialRelated Models


© 2024 MakerWorld