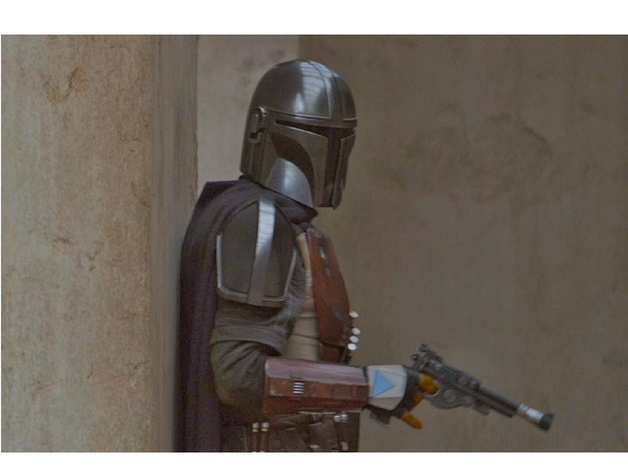
Mandalorian Blaster on One Plate
Remixed by
Copyright Claim
Mandalorian Blaster on One Plate
Remixed by
Boost
87
166
36
Print Profile(1)

0.2mm layer, 2 walls, 15% infill
Designer
5.6 h
1 plate
Boost
87
166
36
0
263
267
Released
Description
This is a Mando blaster, configured to be printed on a single plate with all the right supports to improve the chances of a good print. This is based on the original Mando blaster from Thingiverse but configured for a P1S printer.
This should take about 5 hours or so with standard speed.
Happy Printing
Comment & Rating (36)
All
Printed in Sunlu PLA Silk Silver (Gun) and Sunlu Burly Wood (Grip). No post processing other than removing supports and gluing pieces together based on OP's image! Love the model and it printed excellent first try with the new profile from OP!!
(Edited)

2
Reply
The print profile is no longer public
Most of the pieces printed well, but the main barrel had some really weird spaghetti going on and the tallest thin piece failed.
I reran it with just those two pieces with the same results. I'll have to look and see if there's something weird in the settings.


The designer has replied
0
Reply
@dekopuma - thanks for feedback - the tall spike was wobbling around quite a bit - I've slowed that item down to run at about 50mm/s and uploaded the updated file. It's currently being verified so it may take a little while to appear (but if you select object 3 and set its speed to 50mm/s that'll do it too).
0
Reply
salut je n'ai eu aucun problème sur la A1

0
Reply
Print Profile
0.2mm layer, 2 walls, 15% infill
turned out great. an assembly guide would have been nice to have- as it took a bit to figure out where each part went.


0
Reply
hola. que color usaste para pintar
0
Reply
excelente

0
Reply
Print Profile
0.2mm layer, 2 walls, 15% infill
The result is amazing! Couldn't have looked better, highly recommended! Thank you :)

0
Reply
Print Profile
0.2mm layer, 2 walls, 15% infill
amazing in rose gold silk pla

0
Reply
Any tips on how to get a finish like yours? Thank you!
The designer has replied
0
Reply
Sure, happy to walk you through what I do, it's all reassuringly low cost and low skill. For assembling the model you'll need:
- some clamps (like these: https://www.silverlinetools.com/en-GB/Product/ProductDetail?ModelName=250108)
- good glue. I use Gorilla super glue gel
- wood filler (seriously) for filling in seams and joins. It's cheap, sticks to PLA really well and is sandable
- some sandpaper (180 grit and higher)
And, above all, take your time!
0
Reply
Clamp each bit you glue together and leave it for 10-20 minutes. It's the kind of thing you do while watching a TV show or listen to a podcast.
Painting is next. You can choose between an airbrush and a paint-brush and each have very different techniques. I like using an airbrush and there are about a million videos on Youtube that will explain how to paint better than I can! I use an iwata CR brush. Brush and pump cost about £180.
0
Reply
Even if you get an airbrush you'll still need some basic paints and brushes if you want to make it "next level". If you look for "dry-brushing" and "weathering" videos on Youtube you'll see several people showing you how to paint props and give them that "used"/"loved" look.
It takes (some) practice, but it will massively improve your print.
Finally, spray it with some varnish (Klear Kote) to protect the paint from scratches, etc. Spray varnish is cheap and easy to apply (Youtube!).
1
Reply
Is this model true-to-size? Some of the other blaster models come out too small.
The designer has replied
0
Reply
Here's one I printed recently. This should give you any idea of how it looks and it's scale. does this help?

1
Reply
Replying to @emp3thy
It does, thanks very much!
0
Reply
Print Profile
0.2mm layer, 2 walls, 15% infill
Printed good but some small pieces that could've been been joined with other's but overall good
0
Reply
will this fit mini?
0
Reply
This remix is based on
License
This work is licensed under a
Creative Commons Attribution-Noncommercial


