Lever Action Blaster | Working Slingshot Toy


Print Profile(2)
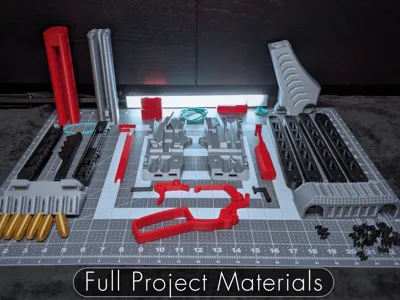
Bill of Materials


Description
This model is a low-power, custom-built toy blaster of my own original design. Ensured to have no internal functionality related to actual complicated gas powered, dangerous mechanisms, methods of modifying them, or inclusion of similar parts or aesthetics. This is strictly a slingshot mechanism, that is tensioned by a lever and connected by snap joints. Functionally and aesthetically, it is the equivalent of a foam dart blaster.
All future projects strictly follow these standards, and I will now communicate this directly, not indirectly.
— — — — — — — — — — — — — — — — — — — —
Boost Me (for free)
This took 4 months, boosting helps support my work and keeps it free. Any funds helps me finance my mechanical engineering degree.
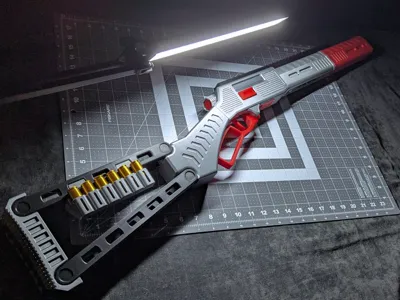
[ "Reaper-26" | Lever Action Blaster ]
[ Assembly tutorial, More showcases, and rubber band sizes below ]
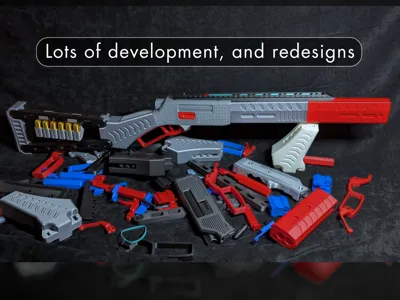
After 4 months of designing and the headache of 100+ reprinted parts from failed tests, I am glad to finally share my hard work here, free of charge, of course. I am finally glad to get this off my back. I will try to upload another model in… 2-3 weeks?…. As long as everything works.
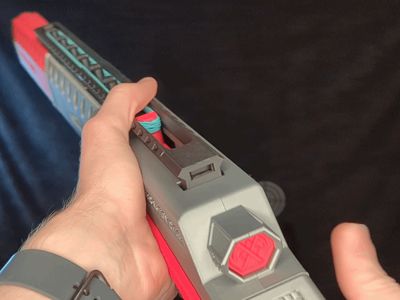
This lever action blaster, which I have named the Reaper-26, is a fully functional toy slingshot powered by rubber bands. I designed this to give a satisfying process of individual round loading and a lever action mechanism that makes handling it a satisfying process, even outside of launching toy bullets.
The video below will demonstrate the satisfying clicking sounds the blaster makes when loading.
Showcase and Assembly Video:
Please watch the last 30 seconds of the video, it contains essential information about how to load it. Improper loading can cause jams and not allow more prop bullets to be inserted.
For those who do not have access to YouTube, I am in the process of making an instruction PDF in 2-3 days, these take a lot of effort, almost as much as the video itself.
List of features I want to highlight:
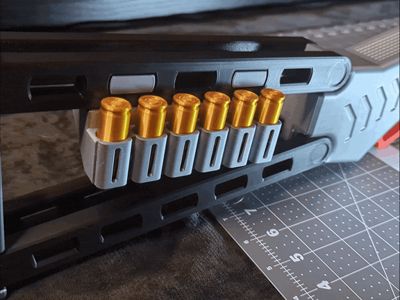
- Individual round loading
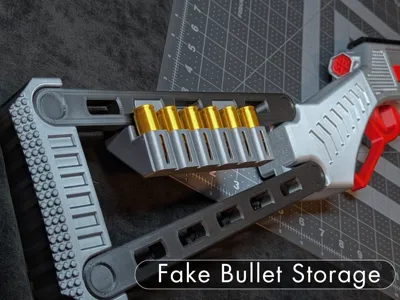
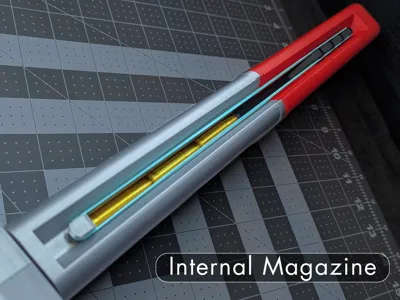
- An internal magazine, that stores fake bullets in the lower barrel.
- Fake bullet storage on the stock, allowing quick reloads after you empty the internal toy magazine

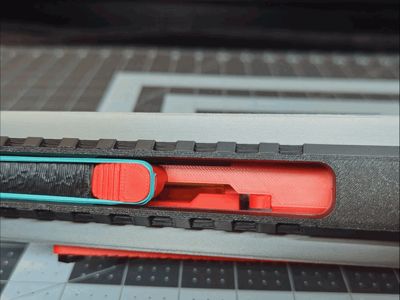
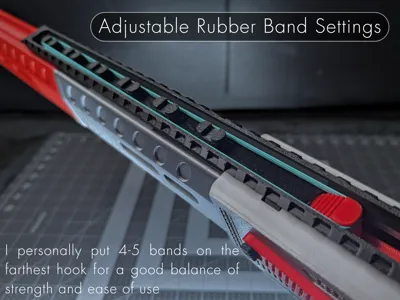
- Adjustable and variable rubber band hooks, which I implemented so that many different rubber band diameters can work (I hope this helps with accessibility).
- The slingshot, magazine, and trigger rubber bands can all be accessed externally without taking the whole thing apart, which is an improvement from my previous model.
- Unlike traditional bullet launching devices, this toy blaster is 65% more effective because it utilizes the entire projectile, rather than leaving the cartridge to waste.

Distance:
Averaging from various tests from eye level:
5.0-5.7 Meters
16-18 Feet
The launching distance is the same as the my former Deagle. If yours does not reach this distance, then you need stronger bands or they are getting caught and causing friction. Thick rubber bands give more power, please don't use very thin ones. I saw a lot of people do that on my last model…
Rubber bands used:
Just because I used these exact ones doesn't mean you have to. In fact, these were just lying around my house, so maybe yours could perform even better.
The rubber bands attached as part of the Makers Supply are as close to the dimensions as possible.
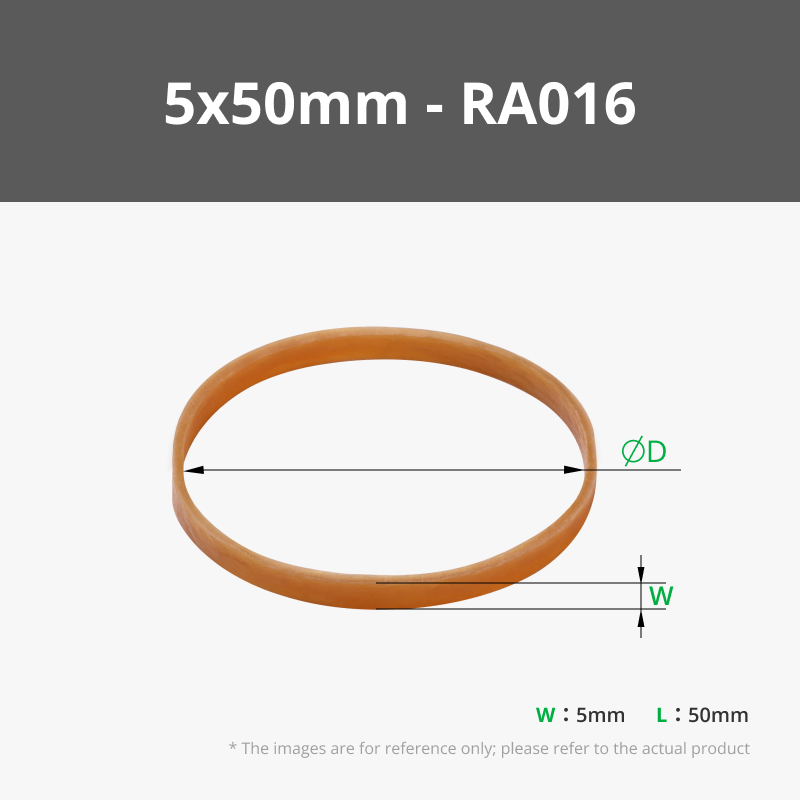
- Slingshot, trigger, and magazine feeder rubber bands (Blue)
Height - 3-4mm
Diameter - 50mm
5-7 rubber bands, with 3-5 being on the slingshot
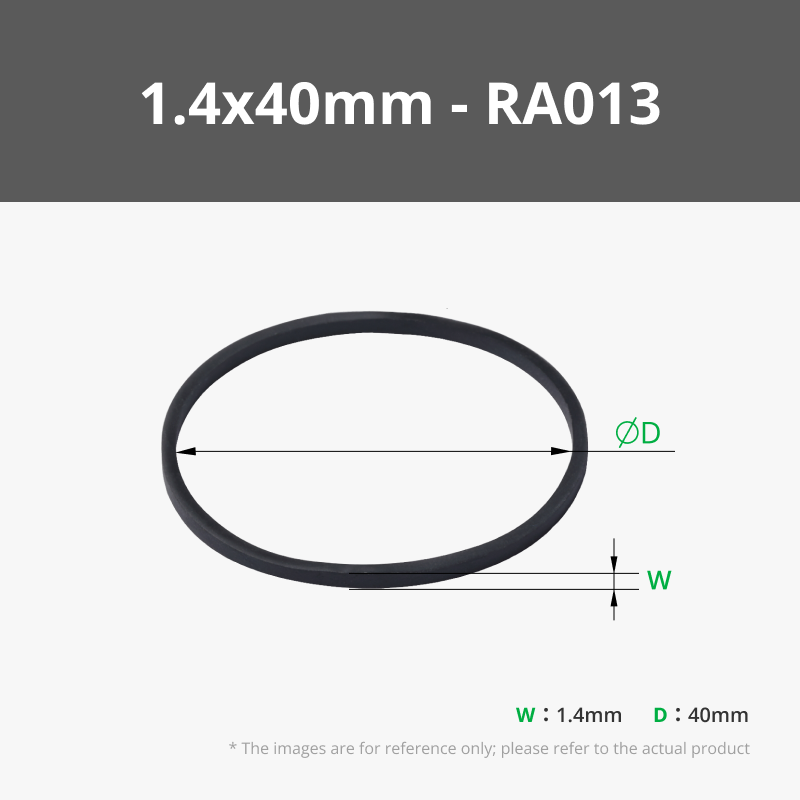
Internal feeder rubber band (Purple)
Height - 1.5mm
Diameter - 40mm
One rubber band used
I primarily designed this model to be as accessible as possible. It only requires rubber bands and one spool; every part snaps or slots together without the requirement of glue or screws. The snap joints allow you to disassemble the blaster whenever you want by using a lot of force. There are no permanent joints, but they are strong enough to where you cannot break them unintentionally.

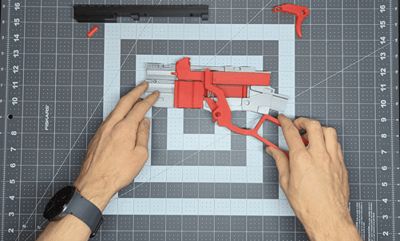
The project is for those seeking a more sophisticated and functional model with many parts. The assembly is a hands-on and enjoyable process in itself. If you enjoy working with intricate projects, snapping and slotting parts together, or building, then you will find the assembly enjoyable like I did.

Membership
Earn a stream of revenue and stand out from the crowd by selling my unique and interactive model for a premium, start now by signing up for my commercial license.
Custom Toy Attachments:
I loved how there were people on my former model who would tweak the parts aesthetically or functionality, and I want to support that. There is currently a snap joint on the top rail that can suit an attachment.
I uploaded one design of my own as a print profile. But if you want to make one yourself and upload it, there is a file of the rail attachment piece, that you can easily add a model of whatever you want to.


Once you are done, you can attach it as a print profile for others to try out!
Reward the points to yourself, not me.

Miscellaneous:
- The project unfortunately is too large to be printed with the A1 mini, I promise any dedicated A1 mini users that my next model will be supported by it, I plan to upload it soon in the near future (2-3 weeks if my idea works easily).
- I would like to thank @luca_dilo for the targets, I used his target print profile for his “Spring Gun V3” and they turned great. Go check him and his models out! These targets were actually my first ever multicolor print.
By downloading, printing, or utilizing this design, you agree to the following terms and conditions: I assume no liability or responsibility for any injury, damage, or loss resulting from inappropriate use of the toy. Users accept all risks and responsibility associated with the design, and release the creator and platform from any claims or liabilities arising.
Do not shoot or aim at people, pets, or cowboys without their permission (good luck getting it from your dog)
Even though it is a toy, like most toys, it still poses danger to your eyes, so exercise caution.
Do not look into the barrel, even if you think nothing is inside of it.
Keep out of reach for children under 6 years old. The small parts could present a choking hazard.
Treat this blaster legally as an airsoft or foam gun, and follow any regulations or local laws regarding them. This includes private property requirements or printing the barrel in orange.
— — — — — — — — — — — — — — — — — — — —
Things that can go wrong on your end and the solutions:
Last time 20k people downloaded my former model, and at that scale there might be issues or missed steps for some.
So, I want to improve the process by adding this section here. These are all the potential issues I can think of or have occurred to me in the past 4 months of designing. This is a complicated model so these might not be intuitive.
| Jams or cannot be loaded | The projectile slips out when pushing back or unresponsive trigger | Weak/no launching |
-You inserted the toy bullets in a way where they are angled slightly, and they are getting caught on something. When loading, make sure they get straightly positioned and resting on the elevator wall | -The trigger tension is too low and cannot hold the projectile in place while it is tensioned, or it does not have enough strength to go back into place -The trigger insert came out a little bit and the transfer bar is uneven. This can also cause an unresponsive trigger -There is already a projectile hidden improperly inside the barrel. Hold the trigger and shake to drop it out (this happens to me) - Way too much slingshot tension | -The strength and number of your bands are the biggest factor, thin bands might not be strong enough to fire. - The bands are rubbing against the sides - You just need to add more, ideally you want 4-5 bands that extend to the furthest hook for maximum acceleration - You are not pulling the lever back into place - There is something hidden in the barrel (this happens to me) |

Also if you ever encounter any jams, removing the rubber bands on the slingshot easily loosens everything up.
Rubber bands breaking:
Use thicker rubber bands, I have been using this model consistently and tested it to ensure no breakage.
Parts not joining well:
Different printers and colors can cause size variation, which is frustrating as a designer, but I have added elements to prevent this. For the best chances to get your parts like mine, print yours in the same color. A P1S is also how I printed mine incase you have one.
I hope this helps facilitate the process, if you are encountering a different error, please double check your assembly or print quality. But if you have a genuine issue, you can DM me and will be glad to help if you double checked everything.
Thank you to everyone that prints this project!!!
Photos of your prints are appreciated, I see every one of them and I am curious what you think!
(I only see a lifeless download statistic if you don't)

Also please thank my girlfriend in the comments for helping me write/edit the description, and for helping out with other parts of the project. She would love to see them!

I love creating models to share for free |
License
You shall not share, sub-license, sell, rent, host, transfer, or distribute in any way the digital or 3D printed versions of this object, nor any other derivative work of this object in its digital or physical format (including - but not limited to - remixes of this object, and hosting on other digital platforms). The objects may not be used without permission in any way whatsoever in which you charge money, or collect fees.
Comment & Rating (78)