Thermal Printer Stand with Decorative Face Plates


Print Profile(6)


Description
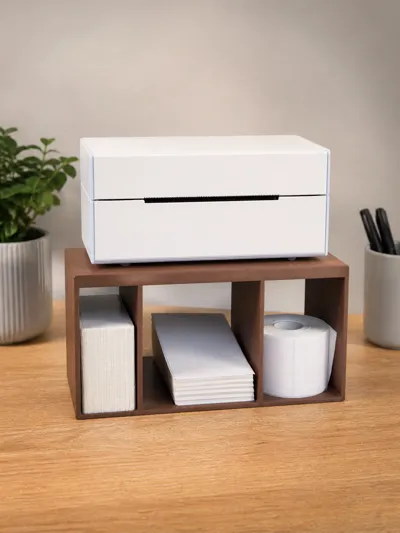
Designed to turn a pile of loose labels and a desktop thermal printer into a tidy workstation.
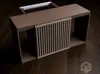
This desk-friendly storage stand for desktop thermal label printers keeps label stock organized, accessible, and out of sight. The stand provides dedicated storage for both fan-fold and roll labels while using interchangeable magnetic front panels to conceal supplies and customize the appearance.
Features
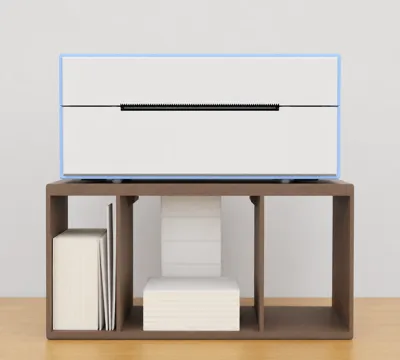
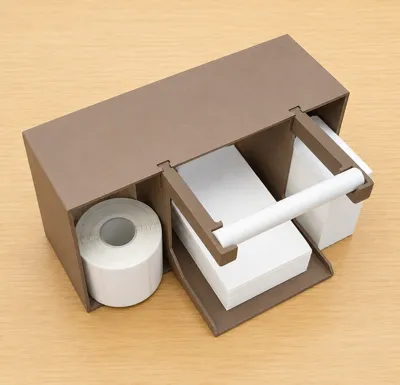
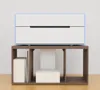
- Side compartments for storing spare fan-fold labels and label rolls
- Center compartment for active fan-fold labels
- Rear-mounted spool holder for roll labels
- Magnetically attached decorative front panels
- Multiple front panel styles included
- Compact footprint
- No supports required
Two Sizes
The Standard Version supports printers up to:
240 mm wide, 125 mm tall, 85 mm deep
Overall stand dimensions:
240 mm wide, 125 mm tall, 165 mm deep
The Deep Version supports printers up to:
240 mm wide, 125 mm tall, 115 mm deep
Overall stand dimensions:
240 mm wide, 125 mm tall, 195 mm deep
Decorative Front Panels
The decorative front panels are completely optional. They can be swapped easily, allowing the appearance of the stand to be changed to match your decor or mood.
Current panel styles include:
- Plain
- Telekon
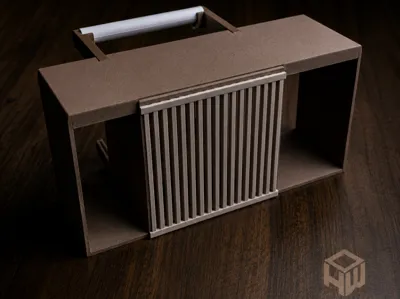
- Vertical Slats
- Hexagonal Grid
Each design is provided in two formats - A single-piece panel, and three-piece split panels. The decorative panels are held in place with magnets - the stand requires 7 magnets, and each full decorative panel requires an additional 7 magnets. Magnets are standard 6 mm × 2 mm Gridfinity-style.
Printing
The main body is printed with the front face against the build plate. No supports are required.
Because the footprint is relatively small compared to the overall size of the print, good bed adhesion is important to prevent corner lift or warping.
The supplied 3MF files already have brims enabled.
Recommended:
- Clean the build plate thoroughly before printing
- Use brims or mouse ears if printing from the STL files
- Consider a high-adhesion build plate such as a Biqu CryoGrip if available.
Assembly
Assembly is very simple and does not require any tools or glue.
Main Body
The main body prints as a single piece.
Spool Arms
The spool arms slide into the dovetail slots at the rear of the stand.
Spool Rod
The spool rod is printed in two halves that slide onto the included dovetail rail to create the finished rod. The completed rod simply rests in the saddles on the spool arms and can be removed easily when changing rolls.
Magnet Installation
The magnet pockets are designed for a press fit, although a small amount of glue may be useful depending on your printer tolerances. A long nail and a chopstick or dowel make installation much easier:
- Place a magnet on the head of the nail.
- Position the magnet in the pocket.
- Hold the magnet in place with the dowel.
- Carefully slide the nail away.
- Press the magnet fully into the pocket.
- Ensure all magnets are fully seated below the surface.
Boost Me (for free)
Boosts are greatly appreciated and encourage me to create and release more designs!
License
You shall not share, sub-license, sell, rent, host, transfer, or distribute in any way the digital or 3D printed versions of this object, nor any other derivative work of this object in its digital or physical format (including - but not limited to - remixes of this object, and hosting on other digital platforms). The objects may not be used without permission in any way whatsoever in which you charge money, or collect fees.
Comment & Rating (0)