"Working" Hoverboard


Print Profile(1)
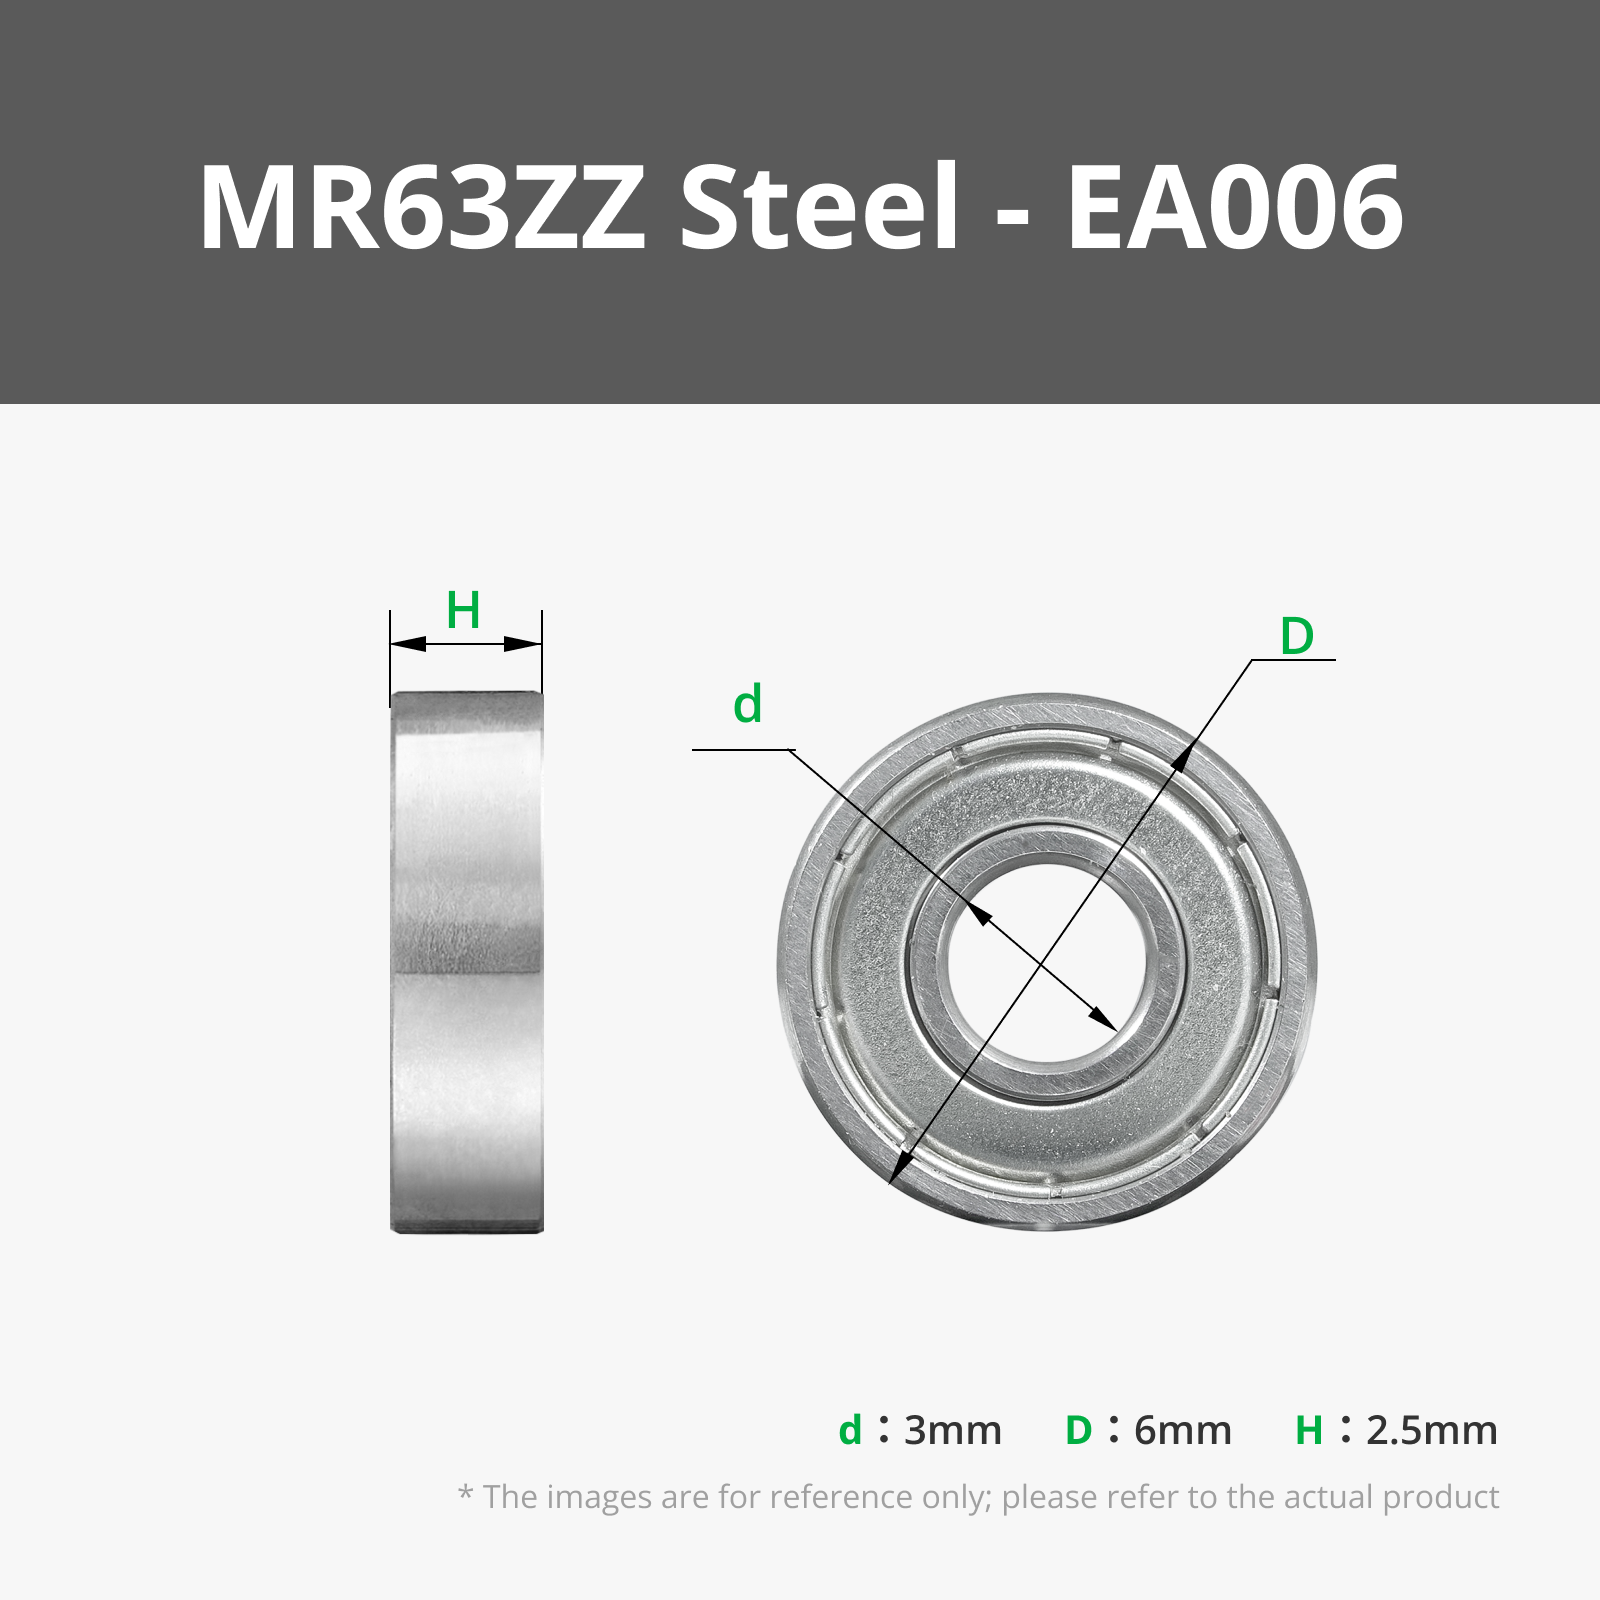
Bill of Materials


- 2mm Hex Key x 1:
Description
Inspired by Creator Collin Furze!
Watch the video about what he made here:
https://www.youtube.com/watch?v=yzXZ7cZXifo
About
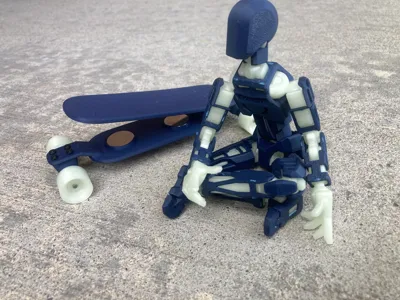
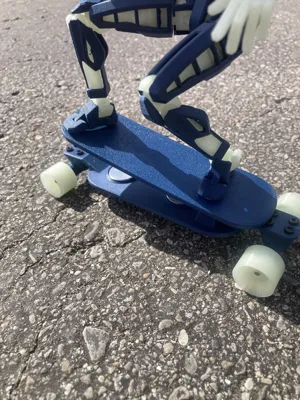
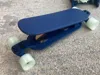
This is a functioning small-scale hovering longboard/skateboard inspired by the concept that Colin Furze demonstrated in his YouTube video.
- I built this because I thought the concept was incredibly cool. While a full-size hoverboard isn't very practical for me to make, a miniature version definitely was!
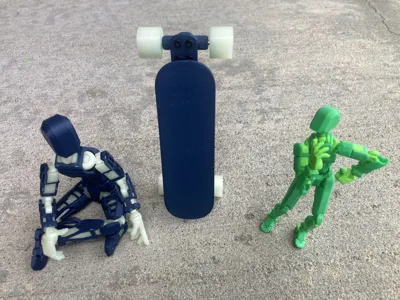
- The blue Dummy 13 shown in the photos is scaled to 160%. I would recommend using a 175% Dummy 13, although any size between 150% and 200% should work well for display. The green Dummy 13 is a standard 100% scale model and is shown only to provide a size reference.
- If you find the magnets too strong or too weak, feel free to request that I alter/update the model for you prefrences.
- There are 5 wall loops for a couple parts. This is intentional—you'll want the extra walls for strength.
Assembly Instructions
This model is not difficult to assemble, and you can probably figure it out on your own, but here are some basic instructions.
Required Printed Parts
You should have printed:
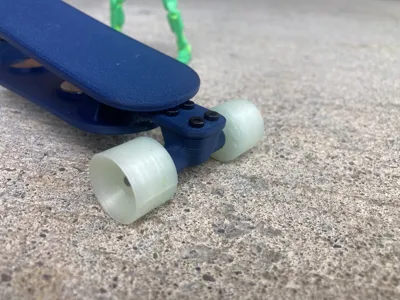
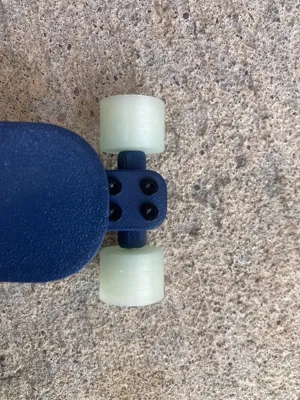
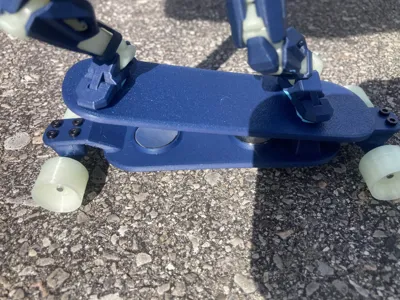
- 2 × Trucks
- 1 × Rider Deck
- 1 × Chassis Deck
- 4 × Wheels (TPU recommended)
- 2 × Washers
Assembly
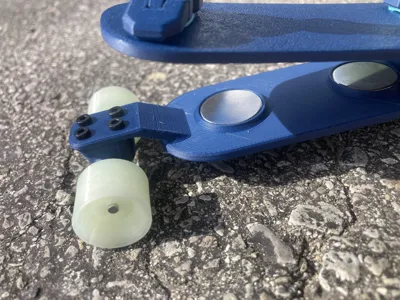
1. Install the Truck Bearings
Press-fit 2 bearings into each truck, for a total of 4 bearings for both trucks.
2. Assemble the Wheels and Axles
Take 2 of the 50 mm steel shafts and press-fit 1 wheel onto each shaft.
Note: Wheels printed in materials other than TPU may be difficult to press-fit, but it is still possible.
Insert each shaft through the bearings in the trucks. Then press-fit the remaining wheel onto the other end of each shaft. This will secure the wheel, axle, and truck assembly together.
3. Attach the Trucks
Screw the completed truck assemblies to the Chassis Deck, useing a 2mm Hex Key.
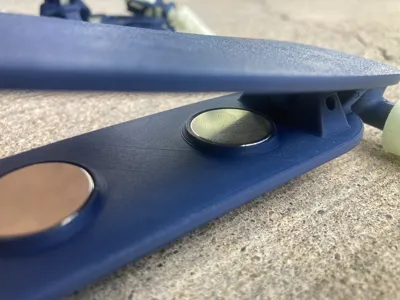
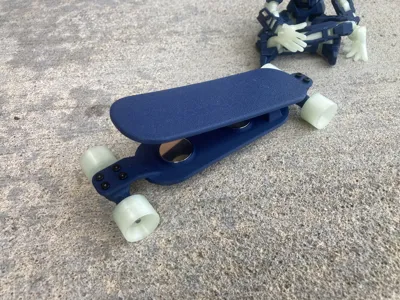
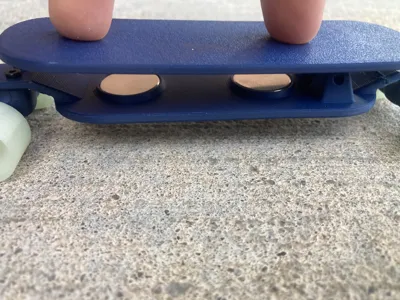
4. Install the Magnets
Insert the magnets into both the Rider Deck and the Chassis Deck.
Make sure the magnets are oriented correctly so that the decks repel each other.
5. Connect the Decks
Press-fit 2 bearings into the Rider Deck.
Place the 2 printed washers into the hinge mechanism between the Rider Deck and the Chassis Deck. These washers help reduce play in the hinge and improve tolerances.
Use the 20 mm steel shaft to connect the Rider Deck to the Chassis Deck through the bearings and washers.
6. Finished!
Your miniature magnetic hoverboard is now complete.
Boost Me (for free)
If you enjoyed this model, a boost would be greatly appreciated!
Happy Printing!
License
You shall not share, sub-license, sell, rent, host, transfer, or distribute in any way the digital or 3D printed versions of this object, nor any other derivative work of this object in its digital or physical format (including - but not limited to - remixes of this object, and hosting on other digital platforms). The objects may not be used without permission in any way whatsoever in which you charge money, or collect fees.
Comment & Rating (0)