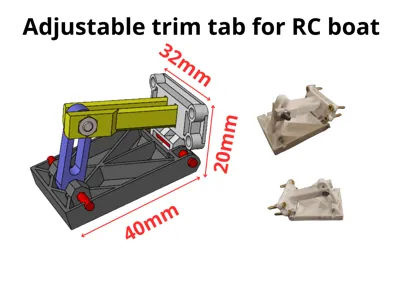
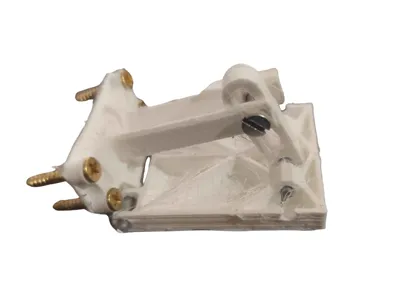
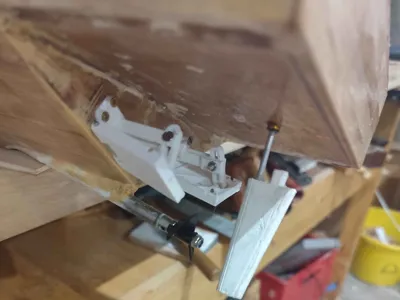
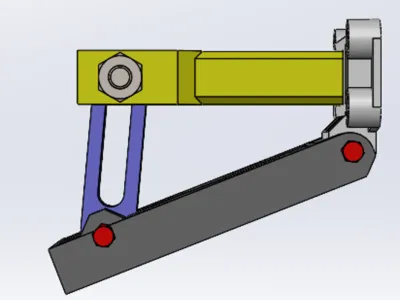
Adjustable trim tab


Print Profile(0)
Description
Boost Me (for free)
Saving up for a printer with better quality than my ender 3!
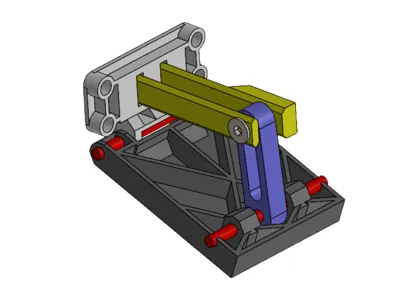
Used iron wire for the red pins, M3 screw and nut through the yellow part.
For assembly :
- Press both of the yellow parts in the white part slots (pay attention to the hexagonal hole orientation), glue
- Get pins/iron wire through the hinge between white/gray , gray/blue, might need glue depending on the fit
- Press the M3 nut onto the hexagonal hole in the white part
- Add an M3 screw through both the yellow parts and the blue part in b
- etween
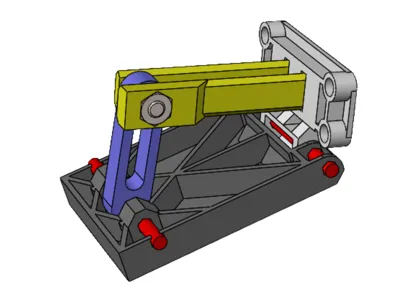
Setting angle :
- Untighten the M3 screw enough for you to be able to slide the blue part
- Get your desired angle, you can use shims to get both trim tab at the same angle
- Tighten the screw again, done
As it's one of my first model, I'd love to hear recommendations and advice on it, working on a version that requires less assembly, through live hinge, as well as an easier and more sensitive way of setting the angle.
Tip here :
https://ko-fi.com/thatoneandonlyusername
License
You shall not share, sub-license, sell, rent, host, transfer, or distribute in any way the digital or 3D printed versions of this object, nor any other derivative work of this object in its digital or physical format (including - but not limited to - remixes of this object, and hosting on other digital platforms). The objects may not be used without permission in any way whatsoever in which you charge money, or collect fees.
Comment & Rating (0)