Microphone Stand Collar


Print Profile(2)
Bill of Materials

- M6 25mm bolt, hex head x 1: for each collar
- M6 nut, hex head x 1: for each collar
Description
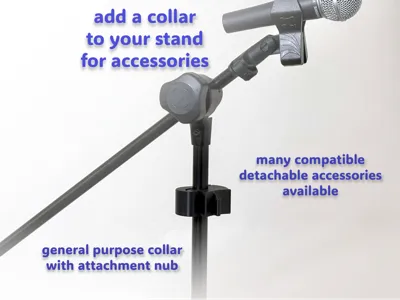
The Ropeless Microphone Stand Accessory System is a mix'n'match system for securely attaching accessories to a microphone, instrument, music, or speaker stand. The accessories are great for performance and rehearsals when you want to keep the stage clear and safe.
This is a model for the clamping collar in that system. Multiple sizes of collar are available to cover all the standard pole sizes, 15mm to 35mm.
Printing and assembly is easy. The only extra parts you need are an M6 bolt and nut. No glue - no print supports - no AMS - no pausing to insert the nut.
If you want to see the full range of accessories in this system, check out the MakerWorld collection. Each accessory has a slot in its side, which slides over a nub on the collar to join them together. Note that the first time you slide an accessory onto a collar it may be a little tight. It will loosen up with use. If it is tight, you can connect or separate the collar and accessory with some firm tapping. I recommend taking the collar off the stand to do this.
Two enhancements are available for a collar:
- an Articulated Extension Arm which lets you extend the distance between a collar and accessory, as well a vary the angle of the accessory
- a Multi-Accessory Adapter which lets you attach multiple accessories to a single collar.
This system satisfies a real need we have in our band. We printed in PETG-HF and the result is excellent for us. Please share any feedback or suggestions to make it even better!
UPDATES
Two print profiles are now provided. In the original profile an M6 nut is added after printing and a filler part is included to block the hole. In the second profile a “pause” command is used to capture an M6 nut during printing, and the filler part is not required. The instructions below are for the original profile.
Another collar compatible with the Ropeless Microphone Stand Accessory System is here. It uses heat-set inserts and is by Jason and a bunch of wires.
Printing
To make a collar you need:
- the five printed parts
- an M6 25mm, hex head bolt and nut.
The collar comes in several sizes: 15mm to 35mm, in 1mm increments. Parts for each size are provided on a separate plate. There are five printed parts for a collar which are explained in the assembly instructions below.
You can choose a collar size by using calipers to measure the diameter of the pole on your stand. Choose the smallest size that is no smaller than your measurement. E.g., if the measured diameter is 18.6mm, choose size 19mm. If you don't have calipers, or you have many stands to measure, you may like to print my pole sizer.
Assembly
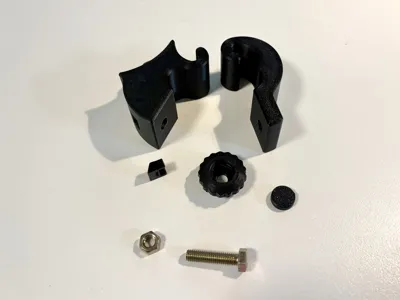
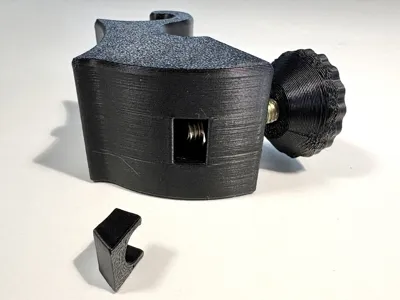
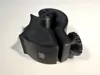
The collar consists of five printed parts:
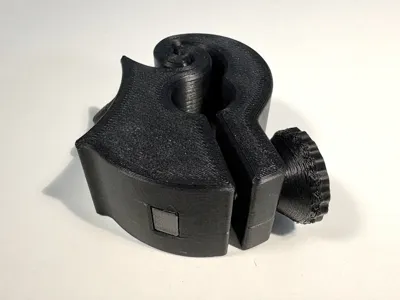
- the joiner, which is the largest part and has a nub for connecting to a holder
- the clamp, which is the second-largest part and is shaped like a question mark
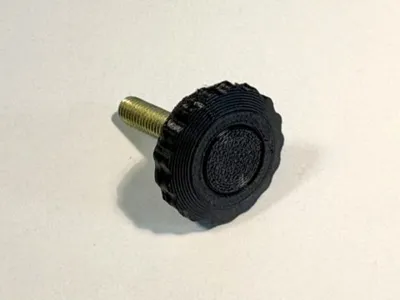
- the knob, which is a large round part with knurling
- the cap, which is a small disk-shaped part
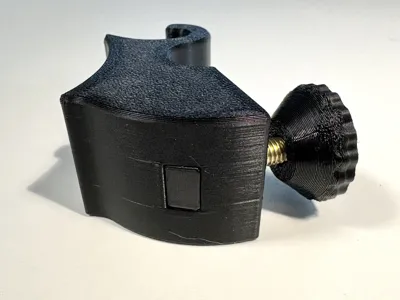
- the filler, which is a small rectangular part with two prongs
and two hardware parts:
- an M6 25mm hex head bolt
- an M6 hex nut.
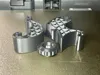
Key points in the assembly process are shown in the photos. Here are the steps.
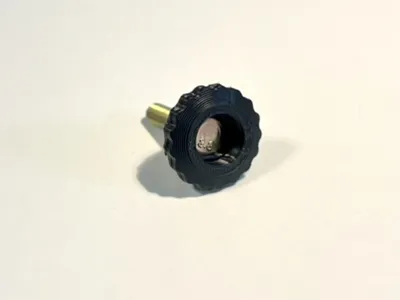
- Insert the M6 bolt into the knob, such that the head of the bolt is fully inside the knob.
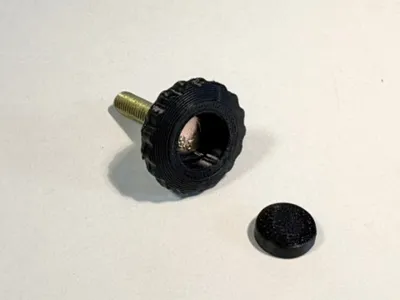
- Press the cap into the knob to secure the bolt. The cap is tapered so that the face which was on the build plate is left visible after fitting the cap. You can see this in the photos.
- Insert the nut into the slot of the joiner and slide the nut into the recess. I find it helpful to use the bolt to position and pull the nut into position, but you may use other tools.
- Insert the filler into the slot of the joiner, prongs in first. Warning: only do this after the nut is properly in place in the joiner. Once the filler is pressed in, it can only be removed destructively.
- Test the collar by connecting the joiner and clamp and screwing them together with the bolt. You can see how they fit together in the photos.
- If the collar operates correctly, then connect it to the pole of your stand. The nub of the collar has a flat end and a slanted end. Ensure the slanted end is up and the flat end is down. I.e., the face that was on the build plate should be facing up.
- Confirm the collar is secure on the stand.
- Finally, you can slide an accessory onto the collar and check it all works.
License
You may create derivative works based on this object, provided that all such derivative works are published exclusively on the MakerWorld platform and include proper attribution to the original creator. You may not share, upload, host, distribute, or publish this object—or any derivative work of this object—on any other digital platform, marketplace, or distribution channel. Commercial use of this object and any derivative works is strictly prohibited. This includes, but is not limited to, selling, renting, sublicensing, or using the object in any context in which you receive monetary compensation or other financial benefits.
Comment & Rating (6)