Customizable Switching Power Supply Box


Print Profile(1)
Bill of Materials

Description
🚀 Support My Creative Journey🚀
If you find my designs helpful or inspiring, there are two ways you can help me keep creating:
Boost Me (for free)
If you're on MakerWorld, a "Boost" helps me reach more makers and keeps the filament flowing! It's Free!!🚀
Buy me a coffee☕: For those who want to go the extra mile to support my work and my family.
⚡ Transform Your Power Supply Into a Professional Assembly
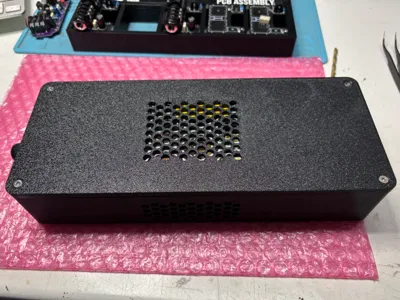
This parametric enclosure is the ultimate solution for neatly housing standard Mean Well switching power supplies (and similar compact PSUs). Say goodbye to exposed wiring and bare components—bring industrial polish to your projects.
📦 What's Included: A fully parametric design that adapts to your exact specifications. Simply input width, height, depth, and mounting hole positions (X and Y offsets for both holes), and wall clearance is automatically calculated for perfect fit and airflow.
💾 A print profile template is included in this project—use it as a starting point for your Bambu Studio settings!
🎯 Smart Design Features:
- 🔌 VDE Inlet Housing: Recessed cavity on the front for secure VDE plug mounting (2× M3 screws)
- 📤 Cable Exit: PG7 connector opening on the rear—install your own cable assembly and connector
- 🔩 Brass Inserts: Pre-sized for 8× M3 threaded brass inserts for durable, reusable fastening
- 🛠️ Hardware Required: 6× M3 countersunk screws + 2× M3 socket head or cross-head screws
🌡️ Material Recommendation: Print in PETG or ASA for excellent thermal resistance—these PSUs generate heat, and you'll want materials that won't warp.
📏 Minimum Enclosure Size: 80×60×34 mm (L×W×H)
📋 ASSEMBLY INSTRUCTIONS
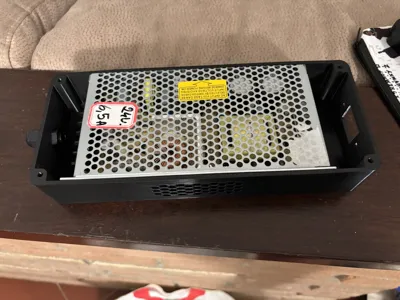
1️⃣ – Measure Your PSU Gather the exact dimensions of your Mean Well (or compatible) power supply. You can measure it directly or refer to the official datasheet for accuracy.
2️⃣ – Locate Mounting Hole Offsets Note the X and Y distances from the PSU's edge to each mounting hole. (Refer to the reference image below)

3️⃣ – Generate the Main Enclosure Open the parametric box model and input:
- 📐 Width, height, and depth of your PSU
- 📍 X and Y offsets for hole 1
- 📍 X and Y offsets for hole 2
Download the generated file in STL or 3MF format.
4️⃣ – Generate the Lid Open the parametric lid model and input the width and length only. Download in STL or 3MFformat.
Note: The lid may appear elevated from the build plane when generated—don't worry. It will automatically drop to the correct position once imported into your slicer.
5️⃣ – Prepare for Printing Import both models into Bambu Studio (or your preferred slicer).Use the included print profile template as a starting point for your settings. Optionally, add custom text using the text modifier for labeling.
6️⃣ – Print Print both parts in PETG or ASA for thermal stability.
7️⃣ – Install Brass Inserts Press 8× M3 brass inserts into the pre-drilled holes using a soldering iron or insert tool.
8️⃣ – Mount Connectors
- 🔌 Secure the VDE inlet to the front using 2× M3 countersunk screws
- 📤 Insert the PG7 cable gland into the rear opening
9️⃣ – Connect & Test Route your power cables through the PG7 gland and connect to your PSU. Power on and verify correct operation.
🔟 – Calibration (if needed) If your PSU has a trim potentiometer, adjust it after connecting the unit to its intended load for optimal voltage output.
💡 Perfect for: Audio gear • Industrial projects • Lab equipment • Professional power solutions
License
You may create derivative works based on this object, provided that all such derivative works are published exclusively on the MakerWorld platform and include proper attribution to the original creator. You may not share, upload, host, distribute, or publish this object—or any derivative work of this object—on any other digital platform, marketplace, or distribution channel. Commercial use of this object and any derivative works is strictly prohibited. This includes, but is not limited to, selling, renting, sublicensing, or using the object in any context in which you receive monetary compensation or other financial benefits.
Comment & Rating (9)