DaVinci's Cryptic Lantern


Print Profile(1)


Description
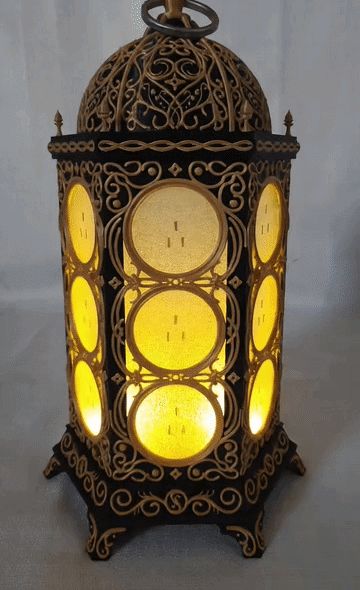
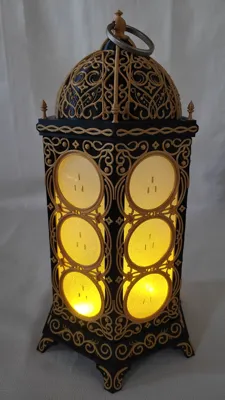
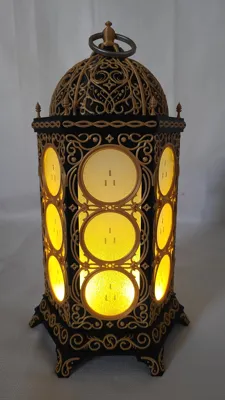
Unearthed from a forgotten corner of a Florentine workshop, this lantern was whispered to be Da Vinci’s final vessel for light, a cryptic masterpiece where ancient secrets and hidden mechanisms guard a glow that only the worthy can unlock.
DaVinci's Cryptic Lantern
A puzzle box that doubles as a lantern and triples as an art piece/conversation piece
Disclaimer: This is a time consuming model that requires patience and a steady hand
Second disclaimer: if you want to actually try and solve this puzzle box, have someone else print and assemble it for you and read no further
Third disclaimer: printing the dome, top plate, and base in a solid color saves about 19 hours of print time. You could do them in either all gold or all black and I think it would look just fine. These parts are where the majority of print time comes from due to the color changes. If you do choose to do the full color changing model, make sure to select purge to infill (already enabled on print profile).
Required Materials
- Frosted Acrylic
- Alternatively, you could apply frosting film to clear acrylic which is what I did
- Lantern Lights
- Polarizing Filter Paper
A Primer on Light Polarization
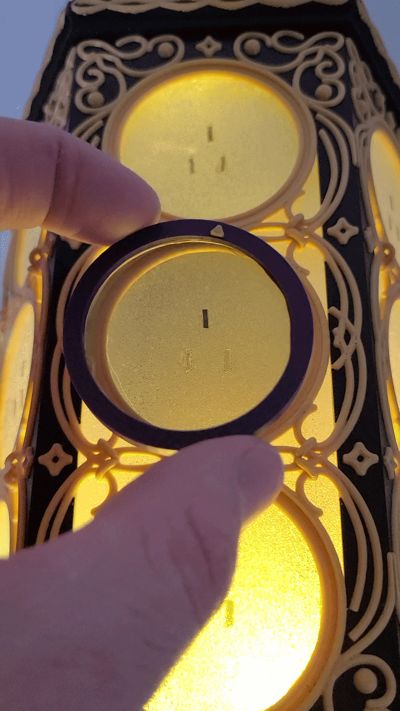
To understand the magic of the cryptic lantern, you have to understand how polarization filters work. when you layer two pieces of polarizing filter paper on top of each other they may or may not block the light depending on how they are oriented with respect to each other. If the two layers are 90 degrees rotated with respect to each other, the light is blocked. However, if they are aligned (either 0 degrees or 180 degrees) the light still gets through. See the graphic below. When the horizontal group of indicators is turned vertical they are now polarized to the right. As such, when you overlay the lens which is polarized vertically, the light is blocked. But since the lens is polarized in the same direction as the group on the left, then light still gets through.

Build Instructions
Ok let's get into how to build it. Here is the main workflow for assembling the lantern:
- print all 9 plates (you will need an AMS for the black/gold and purple/gold combos)
- optionally (but highly encouraged) print the gluing guides
- laser cut the acrylic (see associated laser model) which includes the 6 lantern panes and the lens
- laser cut the polarizing paper for both the lens and the indicators. You may want to remove the protective sheet from both sides prior to laser cutting. If you do this, the power parameter on the laser may need to be adjusted so that you don't scorch the polarizing paper. If you don't remove the protective sheets now, it is very tedious to remove them after cutting. Alternatively, you could just leave the protective sheets on, they are not very noticeable.
- Superglue each of the 6 pieces of acrylic into their frames. I used a small dab in each corner and a bit down the rails to make sure it was secured well
- 1-by-1, superglue each side panel of the lantern together. I preferred to glue the panels using the optional (but highly encouraged) gluing guides. For me, this was much easier than trying to use the top and bottom of the lantern as guides. If you are using the guides, ensure that you are not gluing the lantern panels to the guide, only to each other. Another benefit of using the guide is that you less likely to have misalignment issues. The tolerances are pretty tight, so slight misalignments in the gluing could mean that it doesn't fit into the top and bottom pieces. My process for using the guides was to put the first panel into the guide, apply glue to one side of second panel, put the second panel against the first by inserting it into the guide, the finally adding the top gluing guide to ensure top alignment. hold the pieces together securely at the seam for 30 seconds while the glue dries
- Attach the polarizing paper lens piece to the acrylic lens piece with the adhesive that comes on the polarizing paper (Be careful not to get fingerprints on either the acrylic or polarizing paper. I actually chose to wear gloves during this process). If you got a different version of polarizing paper that doesn't have adhesive, simple sandwhich the polarizing paper between the acrylic lens and the lens frame
- Attach the assembled acrylic lens to the 3d printed lens frame (I used a small amount of superglue on the inside wall of the lens frame. This ensures that no glue leaks out onto the lens). It is important here that the acrylic piece is inserted into the frame such that the polarization aligns with the gold arrow on the frame. It doesn't matter which way, as long as it is not polarized diagonally. You can you use a spare piece of polarizing paper to check the polarization of you lens.
- This next step, gluing the indicators to the lantern, is the tedious part. My laser cut file cuts about double the number of indicators that you actually need because it is easy to lose them. These bits are tiny and fidgety, and slip out of your hands a lot (I recommend a pair of precision ESD tweezers). Feel free to make the indicators slightly larger in the associated .dxf laser cut file if you don't want to deal with the tiny fiddly bits. If you did not remove the protective sheet prior to laser cutting, you can remove them now (this is the much harder option).
- First, sort the indicators into two piles depending on the polarization.
- Then, superglue three indicators to each pane, as seen in the pictures (one on top, two on bottom). The trick is that the single indicator on top should be polarized differently than the two indicators on the bottom of each circle section of the acrylic panes. Gluing tip: use a precision superglue applicator because you only need a VERY small amount of glue for each one. If you add too much glue, it will look messy and lessen the effect of the polarization blocking. Try to randomize which indicators are polarized in certain directions between circle windows. Always use your lens to verify that the bottom two are polarized in one direction and the top one is polarized opposite before gluing, it will save you headaches down the road.
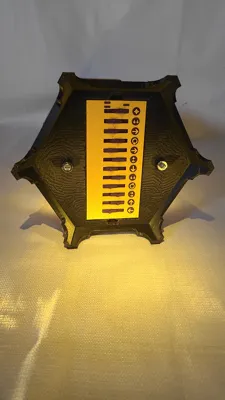
- Once you have 3 indicators glued to each circle window, you are ready to start designing your puzzle solution/path on the switch plate. Start by putting the three small 3d printed indicators (these are the small purple rectangles) into the switch plate. They are press fit. The fit is very tight, but goes in well enough if you have good alignment.
- Next, map out your path on the lantern that you want for your solution. For example, move the lens down one circle window, then go left one window, then rotate the lens (the rotation means 90 degrees), then go down one, etc. etc. You will need 11 movements (plus 1 for the starting window) for a total of 12 switch positions.
- After mapping the path, place the corresponding symbols into the switchplate. The diamond symbol is used in the first slot and indicates the starting position. From here you can use any combination of a single arrow, double arrow, rotate arrow to demonstrate the path that should be taken
- Now that you have transferred the lens path to the switch plate by adding the correct symbols, add the switches the switchplate so that it matches your path's solution. See the image below.
- Slide the switch plate lid into place to secure the switches

Mark the starting window on the lantern with a diamond. You have a few options for this. I chose to cut a piece of vinyl with my Cricut, but you could use marker, paint, or the small 3d printed diamond in the additional files
- Now is the time for final assembly. Glue the assembled 6 panels to the base of the lantern
- Glue the lantern assembly to the top plate of the lantern
- insert the lens into the corresponding cut out in the top plate ensuring that the part closest to the edge is flush. I like to leave the other end sticking up a bit so that it is easier to remove
- Place the dome on top (do not glue it)
- Screw in the topper piece (Please note that this is a left threaded screw and a part of the puzzle. think righty loosy, lefty tighty)
- I found an old ring in my garage for the handle. If you are like me, you may also a have a bit or bob that would be perfect for this. If not, you can leave it without a handle.
- Install the switch plate into the bottom of the lantern with the switches facing out. Once it is in place, randomize the switches
- Finally, press fit the lights into the corresponding holes in the bottom
Cautions
Be very careful when handling the lantern or just the top plate. The tiny spires are prone to snapping.
Comment & Rating (4)