Playstation 5 Controller Mini Wheel


Print Profile(1)

Description
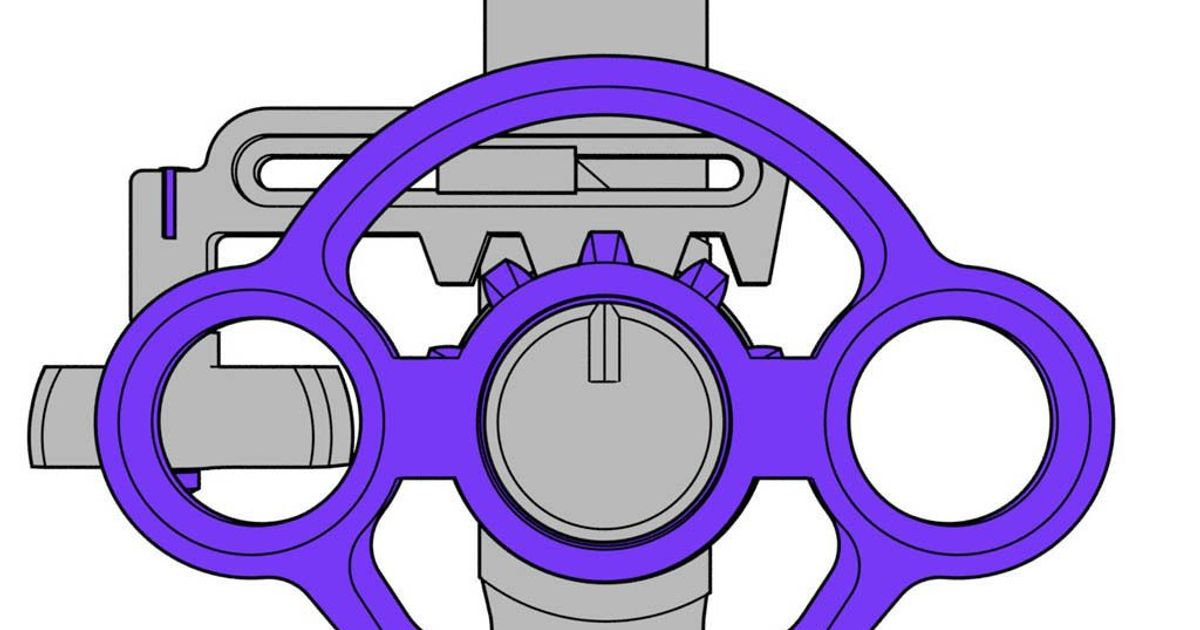
Made a few changes to original rack by making the gap smaller so when it's sliding back and forth it has less give. There's 2 versions along with the orignal rack so you can pick which tolorence works best for you. Also made the nub bigger so that it sits in the square hole better. Need to work on the home button some more, plan to put in a spring so it works nicer.
What you need:
608 bearing, 22mm diameter, 7mm thick, 8mm center. Skateboard bearing
1.6mm diameter metal rod X2 [butterfly paper clip/14 gauge finishing nail/wire] I used a m2x20
Superglue
Post-Printing
Break off the support piece
Attach the pivot to the rack:
Method 1: Screw m2x20 into the top of the rack and it will sit freely in the pivot.
Method 2:
Cut down a 14 gauge finishing nail to a length of 20 mm. Pass the nail up through the pivot and into the rack. The pivot should spin free on the nail with minimal play. Put a drop of superglue in the slotted part of the rack. A piece of paperclip [wire] works but it's tricky to get a tight bend on the end.
Method 2:
Kids, don't play with fire...
Take a straight piece of 1.75mm diameter filament and heat the end with a lighter for just over a second. Mash the end so it looks like a nail head. Pass the filament up through the pivot and into the rack. The pivot should spin free with minimal play. Trim the filament so 3mm sticks out of the rack. Heat with a lighter and mash flat.
Snap the rack onto the frame
Attach the assembly to the controller. Start by sliding the pivot on to the left stick. Clip the back of the frame on, then the front.
Glue a 22mm length of metal rod into the "nub". Pass this down through the bearing and frame. There is a step in the nub, have this on the left side.
Press the wheel into the bearing and glue the horn on the rod.
Crank up the in game sensitivity and enjoy

Comment & Rating (32)