Bosch Gridfinity L-BOXX 102 Lid Insert


Print Profile(1)
Description
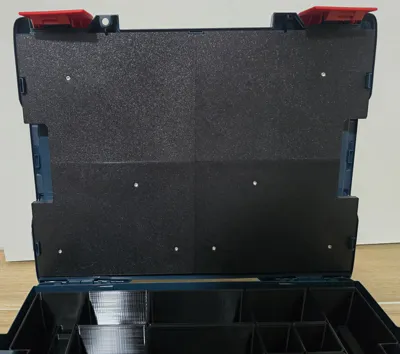
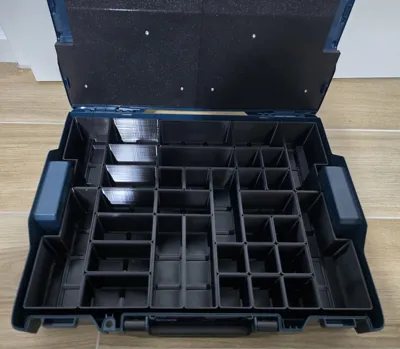
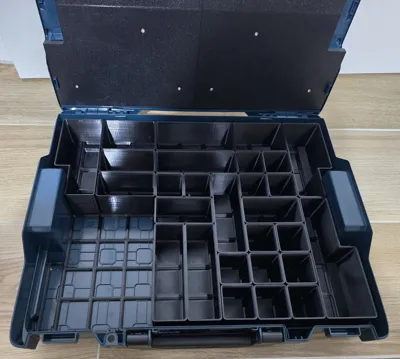
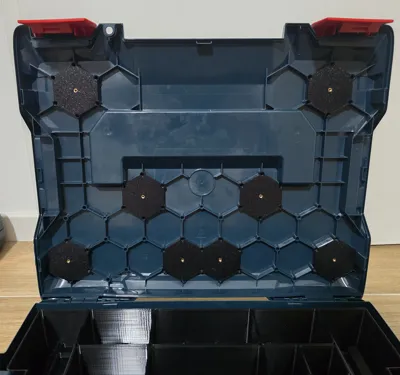
This lid insert is the perfect solution to securely keep small parts in your L-BOXX 102 in place. In combination with the Gridfinity system, the lid closes absolutely flush.
This prevents screws or small parts from mixing during transport.
Important: The design is optimized for a box height of 62 mm (external dimension).
Gridfinity base system and special containers: [Link]
Matching customizable regular containers: [Link]
Features
- Precision fit: Specially developed for the L-BOXX 102 and 62 mm high Gridfinity boxes.
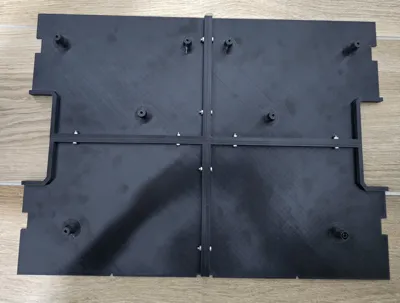
- Modular printing: The insert is printed in 4 parts, which also enables printing on smaller print beds.
- Maximum stability: Solid screw connection instead of simple clips.
- Transport secure: Lies flat on the boxes when closed.
Technical Details & Print Settings
The project was successfully realized on my system with the following parameters:
- Printer: Bambu Lab P2S
- Print bed: Bambu Original PEI Plate
- Filament: Eryone PETG (Black) [Link]
- Material properties: PETG is excellent for tool use due to its toughness and resistance.
Required Building Material (BOM)
Here you will find the small parts required for assembly:
Connecting the 4 parts of the lid insert:
Attachment to the honeycomb panels:
Installation in the L-BOXX lid:
16x M5 x 10 mm PC fan screws (2 pieces per honeycomb panel) [Link]
Customizations & CAD
For those who wish to make individual adjustments, I have also uploaded the .step files of the lid insert and the honeycomb panels. This allows you to easily edit the design in your CAD program.
Assembly Instructions
Screw the 4 segments of the lid insert together with the M3x14 Allen head cap screws and nuts to form a single unit.
Insert the M3 heat-set inserts into the designated honeycomb panels.
Screw the honeycomb panels directly to the L-BOXX lid with the M5 fan screws.
Finally, secure the complete lid insert to the already mounted honeycomb panels with the M3x25 Allen head cap screws.
License
You shall not share, sub-license, sell, rent, host, transfer, or distribute in any way the digital or 3D printed versions of this object, nor any other derivative work of this object in its digital or physical format (including - but not limited to - remixes of this object, and hosting on other digital platforms). The objects may not be used without permission in any way whatsoever in which you charge money, or collect fees.
Comment & Rating (1)