


Print Profile(1)


Bill of Materials


Description
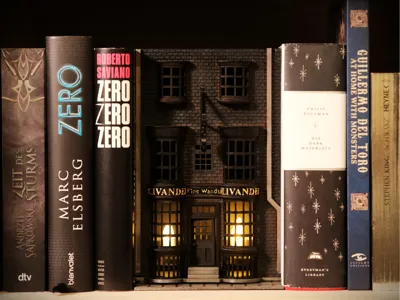
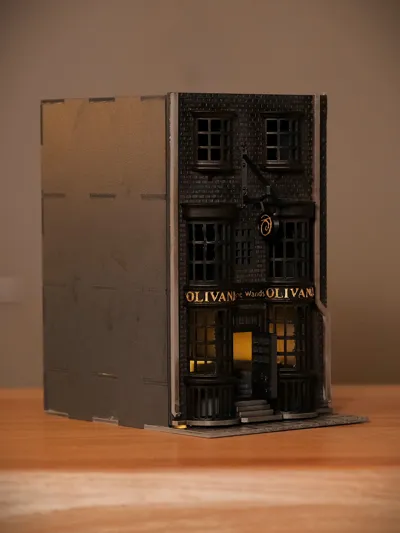
🪄 Ollivanders Fine Wands Book Nook - Hybrid Version🕯️
This Ollivanders Magic Wand Shop Book Nook is a detailed bookshelf insert designed to bring a cozy, magical atmosphere to your library or reading corner.
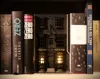
Placed between books, it creates the illusion of a hidden wizarding street tucked away inside your shelf.

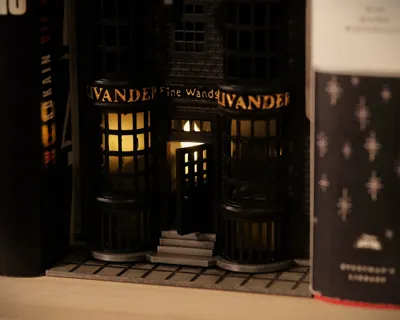
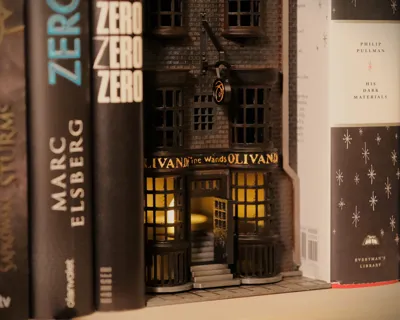
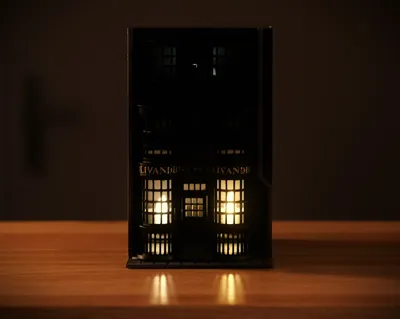
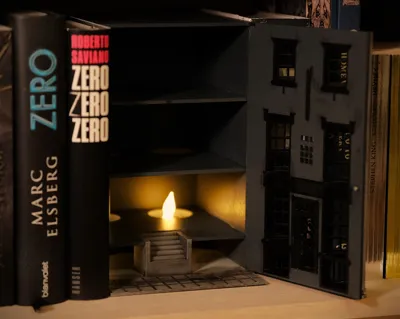
A special feature of this model is the openable front wall, which allows easy access to the interior. Inside, you can place electric LED tealights to illuminate the windows and create a warm, inviting glow. No wiring or electronics are required.
The Book Nook is designed as a decorative display piece and fits perfectly between standard books, making it an eye-catching addition to any bookshelf.
Find a detailed building instruction in the Documentation.
Find the 3D Printed Parts and the fully 3D Printed Version for this Project HERE.
Boost Me (for free)
If you like my work and want to support me, a Boost is greatly appreciated!
Membership
Interested in a commercial license? Check out my membership!
Paint or spray the wooden parts with black or anthracite paint. Paint the base plate gray.

Install the printed parts in the front panel using a little bit of glue.

First glue the center panels to the back panel, then the side panels. Make sure they are oriented correctly, the right side is slightly wider than the left.


Place the candle holders in the recesses from below.

Glue the cover and base together and glue the stairs in place.

Two holes must be drilled in the front panel for the hinge. First, place the front panel on the house to find the correct position for the holes. Drill the holes with a 1.5 mm drill bit. The wood tends to splinter when drilling in this direction, but this can be fixed by reinforcing the area afterwards with a little glue.

Two small nails are used for the hinge, which are simply inserted at the top and bottom.

(Optional) If you want, you can also place a magnet to keep the door closed. To do this, take a small magnet and a shortened nail and glue them to the opposite side.

Once the house is assembled, you can paint it to make it look more realistic (weathering). Thinned acrylic or oil paints in black and brown work well for this. Apply the thinned paint mainly in the corners and between spaces.


Then wipe away 90% of the paint. You should end up with a surface that looks old and worn. There is no right or wrong way to do this, so do it however you like.

Finally, paint the lettering in gold. I use the tip of a schaschlik skewer instead of a brush for this, as it makes it easier to paint small areas.

Place the electric tea lights in the house and now you can place Ollivander's Fine Wands Shop on your bookshelf.

I hope you had fun building it. I would appreciate a good rating!
Documentation (1)
License
You shall not share, sub-license, sell, rent, host, transfer, or distribute in any way the digital or 3D printed versions of this object, nor any other derivative work of this object in its digital or physical format (including - but not limited to - remixes of this object, and hosting on other digital platforms). The objects may not be used without permission in any way whatsoever in which you charge money, or collect fees.
Comment & Rating (3)