Search models, users, collections, and posts
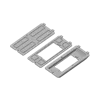
Bambu Lab P1 X1 Filter Cover 11/22
IP Report


Print Profile(3)
0.2mm layer, 2 walls, 15% infill
Designer
42 min
1 plate

0.2mm layer, 2 walls, 15% infill
15 min
1 plate

0.2mm layer, 2 walls, 15% infill
37 min
1 plate
Open in Bambu Studio
Boost
75
175
41
5
228
163
Released
Description
Bambu Lab P1 / X1 Series Filter Cover (4/25/2023)
Designed alternative filter covers for Bambu Lab printers.
Latest Update
11/22/2023
- Added additional size for the X1 filter covers that decreases or increase the distance from the hygrometer to the filer
- Base x1 file has 6.5mm of clearance
- The 5.5 mm version will add more clearance from the build plate but it will lessen the clearance to the filter
- The 7 mm version will add more clearance from the filter but it'll lessen the clearance to the build plate
- Base x1 file has 6.5mm of clearance
5/22/2023
- Added filter cover that works with the hygrometer and the x1/x1c.
- New model now clears the filter in the x1/x1c.
- Big thanks to @mars3142_732125 for the recommendation , testing, and validation.
Files
Main Files
- Filter_Cover_Flush
- Filter_Cover_Hygrometer
- Filter_Cover_Hygrometer_x1
Alternative Files
- Filter Cover with Hygrometer X1 5.5 mm
- Filter Cover with Hygrometer X1 7 mm
Print File
- Filter Cover Print File
Additional Parts
(If using a Hygrometer)
- Hygrometer - https://www.amazon.com/dp/B07GNMKYCZ?psc=1&ref=ppx_yo2ov_dt_b_product_details
- Most of the Amazon ones are the same, as long as the dimensions are 1.89" x 1.13" / 48mm x 28.6mm
Print Orientation

Print Settings
DO NOT USE PLA, IT WILL BREAK. Please use PETG, ASA, PLA+ , etc.
I used Polylite Pro PLA+
Set your K calibration and adjust setting based on your filament
Quality
- Please see build plate file.
Support
- Please see build plate file.
Assembly
- Insert left side first.
- Give the right side a little bend so it'll snap in easier.
- Snap in the center top and bottom.
- To remove, use a small flathead in the area circled below.

If you like my designs and want to say thanks, you can buy me a coffee and help fund the filaments I need for prototyping. A donation of any amount to Buy Me a Coffee or PayPal would be greatly appreciated!
As always, given different printing environments, filaments, etc., prints may not work perfectly for everyone. If you are having issues please message or comment and I will try my best to resolve the issue.
License
This user content is licensed under a
Creative Commons Attribution-Noncommercial-NoDerivatives
Comment & Rating (41)