
Parametric Multiboard Tile Stacks
Print Profile(1)
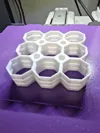
Description
Boost Me (for free)
Boosts cost you nothing, but they really help us model designers, so, if you like this model, please give it a boost.
⚖️ LICENSE INFORMATION: This remix utilizes components released under the Multiboard License. The full license is provided in the Documentation section below. The Multiboard License requires that Multiboard components within a remix remain under the same terms; it encourages, but does not require, applying those terms to the entire remix. Since MakerWorld does not support the Multiboard License directly, this remix is released under the Creative Commons Attribution–Noncommercial–ShareAlike license, which is the closest available option on this platform.
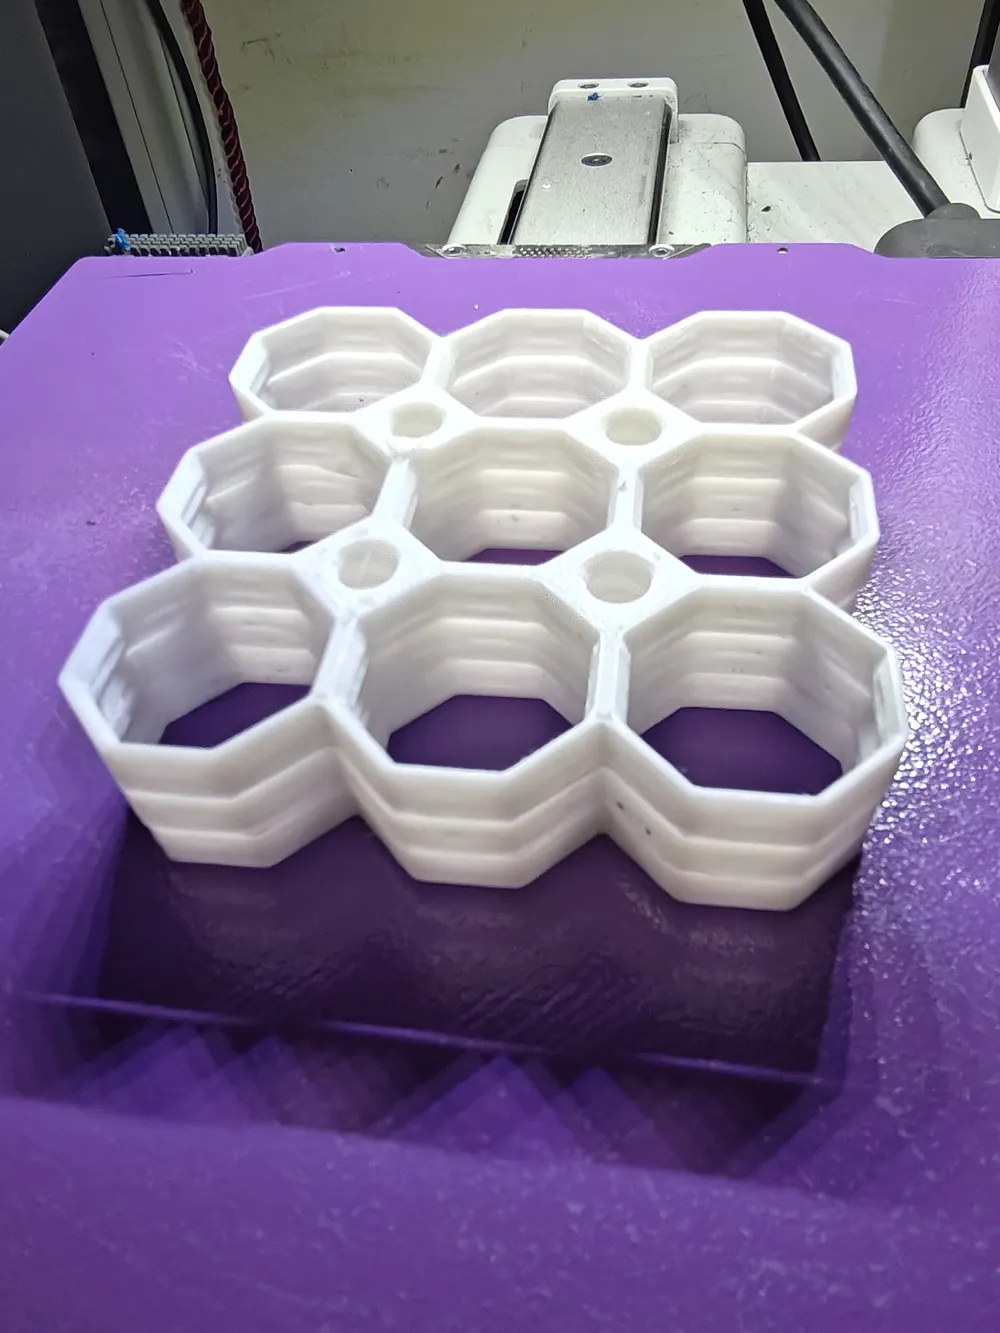
This is a fully parametric Multiboard Tile stack generator…. Doing a big wall and want to generate an 8x8 tile stack 20 tiles high? This can do it. There are both ironed versions (turn on top surface ironing, and the plates should easily separate when finished. There is also a multi-material version that puts a sacrificial layer of PETG between the tiles. You will have to manually set the material type of the thin layers to PETG, as the parametric engine can't do that part. Personally, I find the ironed version works best, as you just pull them apart and you're done, no peeling off the PETG.
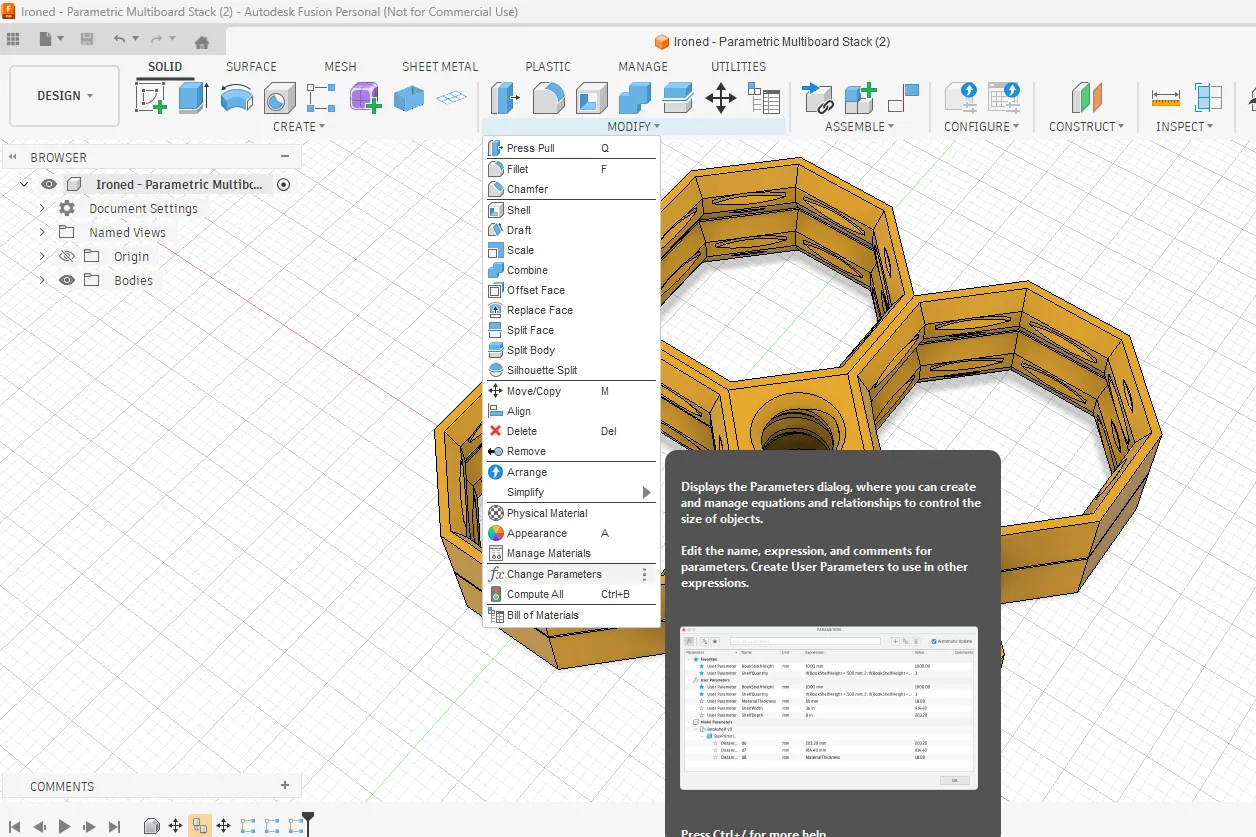
Please be aware… the MakerWorld parametric customizer does tend to choke on large tiles and stacks, but you can download the Fusion 360 file by clicking Download STL/CAD files above. Fusion 360 is free for personal use. Then once opened in Fusion 360, select Modify-→Change Parameters as shown in the photo below, and you can change the parameters and make a stack any size your computer can handle.
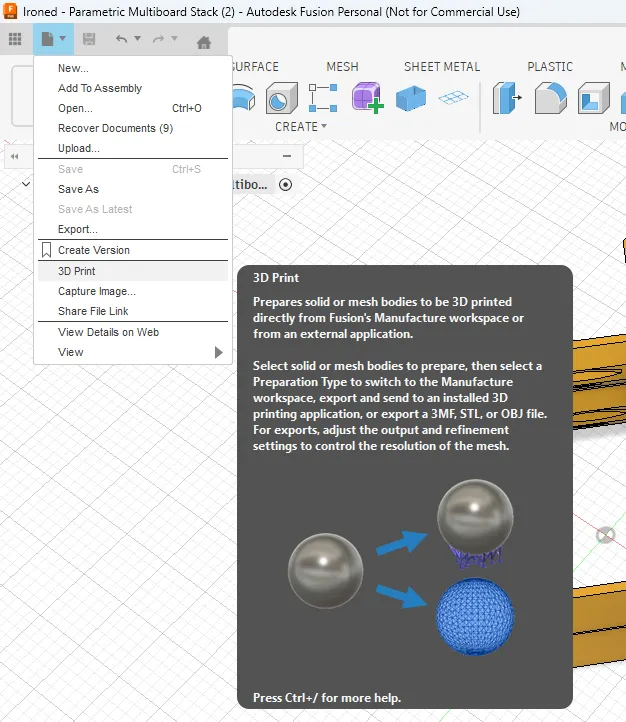
Once your stack is rendered, just click on the File→3D Print option as shown in the picture below to export to a 3mf or stl for your slicer.
If printing with the multi-material option, remember to change all the thin parts between the tiles to print out of PETG, and your main tiles out of PLA in your slicer, otherwise you'll just fuse them all into one very thick tile. This is a more complicated process, and is why I strongly recommend using the ironing option instead. With the ironing option, you don't need to use multi materials, just the material of your choice for the main tiles. You can adjust the z gap (set to 0.24mm by default) in the changeable parameters in Fusion as shown above to ensure easy separation of the tiles.
My inspiration for making this model was the fact that Multiboard makes you buy a membership in order to download multiboard stacks, and then when you do, their stacks are only 4 high, so if you're doing a big Multiboard wall, you can't print more than 4 tiles at a time. With this I was able to create a 9x9 36 tile stack, and print it all in one go on my A1
Boost Me (for free)
If you like this model, please consider giving me a boost.
Want to Sell Your Prints?
Download and print for personal use, free. Want to sell printed versions? Join my Patreon here:
👉patreon.com/3DCreationsofRI
Active members of my Patreon are licensed to offer prints of MY ORIGINAL MODELS commercially (i.e. does not apply to remixes).
All of my original designs, photographs, and—where applicable—my original modifications to remixed designs are Copyright © 2026 John H. Tetreault d/b/a 3D Creations of Rhode Island - All rights reserved, except for rights expressly granted by the applicable model license. These designs are provided without any warranty, including without limitation, any warranty of fitness for a particular purpose.
Documentation (1)
This remix is based on

License



Comment & Rating (19)