Ultimative Nozzle Wiper P1/P1S/X1/X1S
Ultimative Nozzle Wiper P1/P1S/X1/X1S


Print Profile(1)

Description
English:
I think I've already tested all the nozzle wipers available on Makerworld
and wasn't really satisfied with any of them.
Until I came across the Nozzle Wiper by Sven Krause at Printables!
The Nozzle Wiper has done its job better than all other wipers so far,
but it's still not 100% perfect. Until now!
Since the original wiper of the P1/X1 from Bambu Lab has its place,
I simply attached it to Sven Krause's wiper as a test.
I was surprised that the wiping performance improved a lot.
The wiper I use from Sven Krause is a “medium” size and therefore ideal for the P1/P1S.
You can find more information about creating the silicone mold
or where you can buy the finished silicone part here!
Installation is incredibly easy.
The original scraper is unscrewed with the appropriate hexagon socket.
The screw is no longer needed!
If it is difficult to assemble the carrier and silicone part,
simply add a drop of oil or dishwashing liquid under the holding lip.
Do not pull excessively on the silicone part!!!
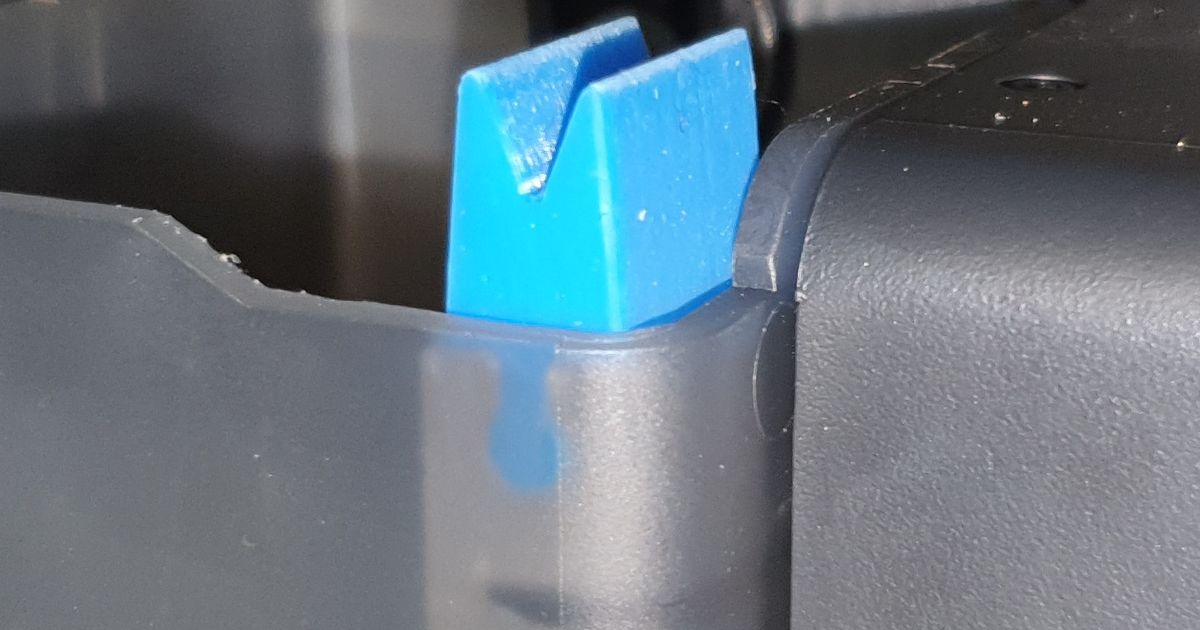
Both parts are now simply pushed onto the protruding piece of plastic in the waste chute.
The semicircle in the support part snaps into the original screw hole, done!
The silicone part is 1mm shorter than the carrier part.
That's right, the radius of the carrier part adapts perfectly to the waste chute.
The silicone part, when viewed from the front, must completely line up with the rear edge of the carrier part.
If ABS or ASA is used excessively, the carrier part should definitely be printed from ABS or ASA,
PETG cannot withstand the temperature and the silicone part comes off.
Deutsch:
Ich glaube ich habe bereits alle auf Makerworld verfügbaren Nozzle Wiper getestet
und war mit keinem so richtig zufrieden.
Bis ich bei Printables auf den Nozzle Wiper von Sven Krause gestossen bin!
Der Nozzle Wiper verrichtet bislang seine Arbeit besser als alle anderen Wiper,
aber halt noch nicht zu 100% pefekt. Bis jetzt!
Da der original Wiper des P1/P1S/X1/X1S von Bambu Lab durchaus seine Berechtigung hat,
habe ich diesen einfach mal testweise an den Wiper von Sven Krause angesetzt.
Ich war überrascht das die Wischleistung noch einmal um einiges besser wurde.
Der von mir genutzte Wiper von Sven Krause ist der in der Größe "mittel" und daher ideal für den P1/P1S.
Weitere Infos zum Erstellen der Silikonform, oder wo Sie das fertige Silikonteil kaufen können finden Sie hier!
Die Installation gestaltet sich äußerst unkompliziert.
Zuerst wird der originale Abstreifer mithilfe eines passenden Innensechskants herausgeschraubt.
Die Schraube wird anschließend nicht mehr benötigt.
Falls es beim Anbringen des Trägers und des Silikonteils Schwierigkeiten gibt,
kann ein Tropfen Öl oder Spülmittel unter der Haltelippe hinzugefügt werden,
um das Gleiten zu erleichtern. Es ist wichtig, das Silikonteil nicht übermäßig zu ziehen!
Beide Teile werden nun einfach auf das herausragende Kunststoffstück im Abfallschacht geschoben.
Der Halbrund im Trägerteil rastet dabei in dem originalen Schraubenloch ein – und schon ist die Installation abgeschlossen!
Das Silikonteil ist bewusst 1mm kürzer als das Trägerteil. Dies ermöglicht es dem Trägerteil,
sich perfekt dem Radius des Abfallschachts anzupassen,
während das Silikonteil bündig mit der hinteren Kante des Trägerteils abschließen sollte.
Bei intensiver Nutzung von ABS oder ASA ist es unerlässlich,
dass der Trägerteil ebenfalls aus ABS oder ASA gefertigt wird.
PETG hält den Temperaturen nicht dauerhaft stand, was dazu führen kann, dass sich das Silikonteil löst.
Weitere Infos finden Sie hier: https://www.printables.com/de/model/613245-best-nozzle-wiper-abstreifer-bambu-p1x1
Comment & Rating (7)