Wowstick case with magnetic bit holders, parametric
Wowstick case with magnetic bit holders, parametric


Print Profile(0)
Description
Features
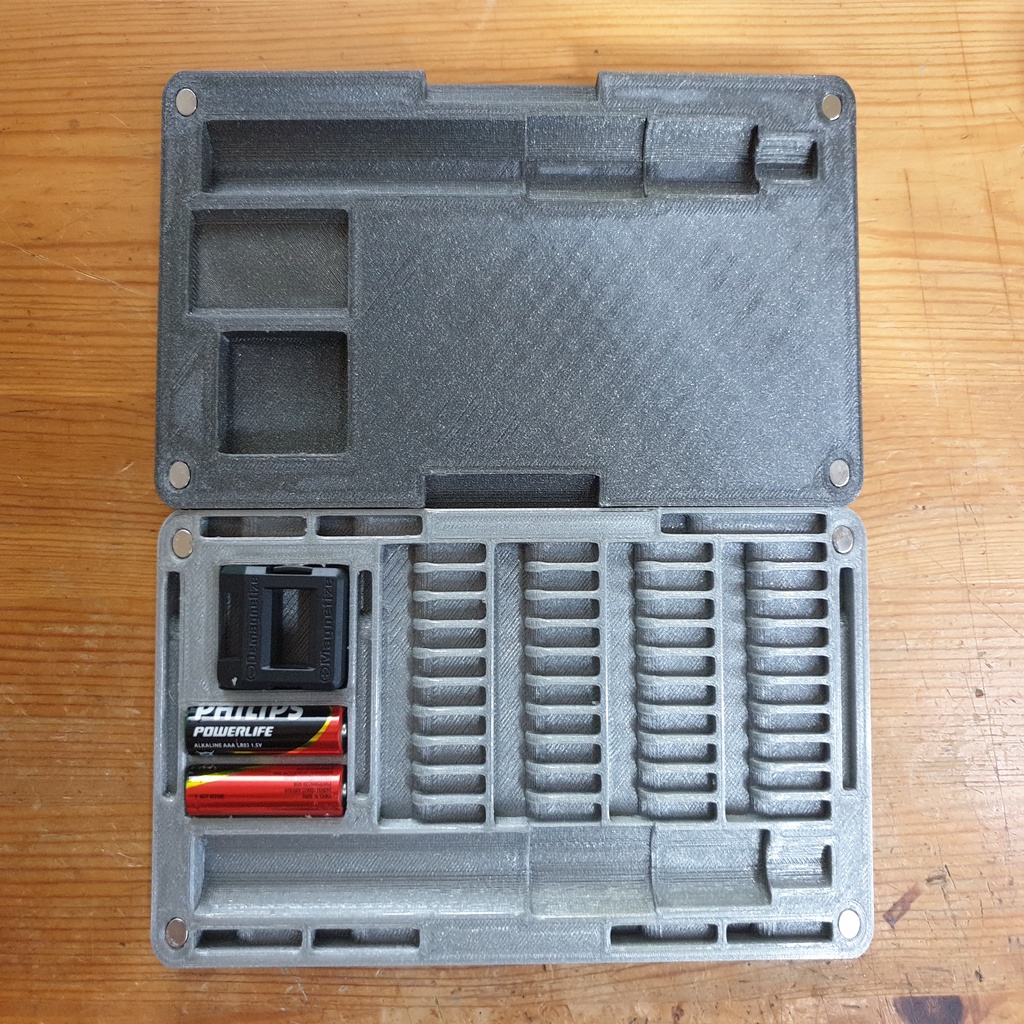
- Holds 56 standard bits + 9 Long ones (my kit has 52+4, so there are slots to spare)
- Holds the magnetizer/demagnetizer thingy
- Has a small pocket for carrying miscellaneous items, plus 7 more slots in the lid, where you can put screws when working
- For gen 1, magnets can be added mid-print to hold the bits in place more securely.
- With gen 2 they are mandatory because they are the only thing that holds the bits. The advantage it that the bits are much easier to take out and put in.
- Easily editable parametric design for Fusion 360
Differences Between Gen 1 and Gen 2
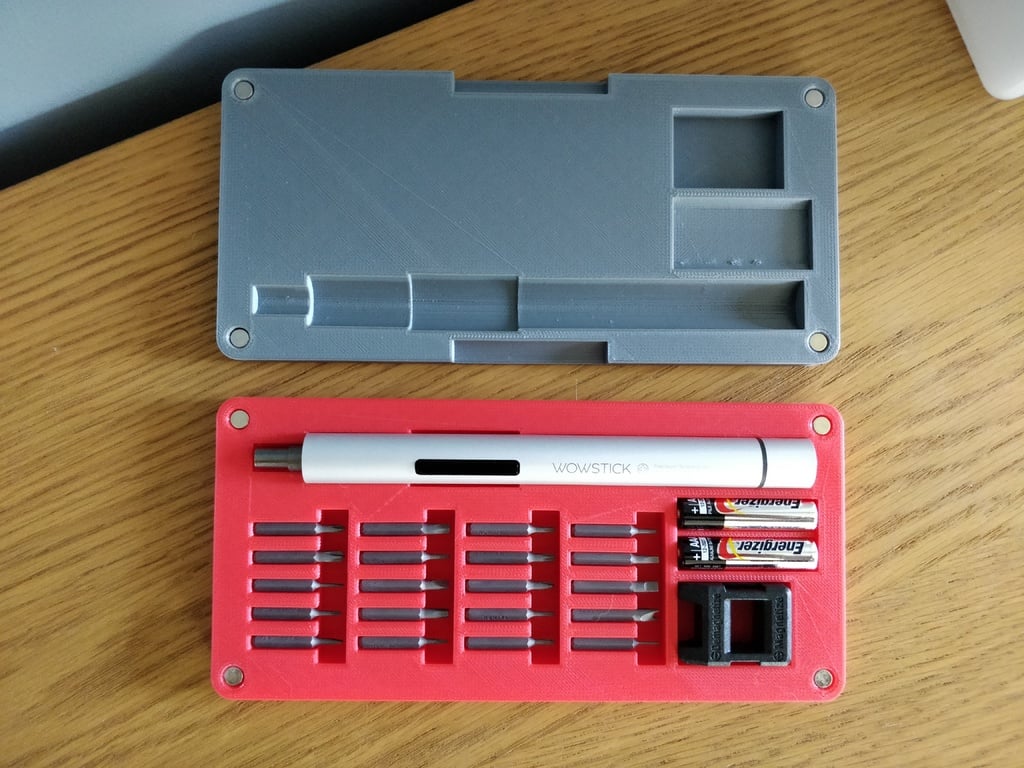
- Gen 2 uses different bit holders where only the mangetic forse holds the bits in place. They are much easier to take in or out, but still won't fall out on their own.
- Gen 2 has a hole for charging the wowstick inside the case (this was not possible in gen 1 because the corner magnet was in the way).
- Gen 2 has a hole so that you can put the wowstick in the case with a bit inserted.
- Gen 1 is slightly more compact because the bit holders are a bit smaller.
- The gen 2 bit holders only hold the base of the bit, so you can now store things like nut drivers.
Origin story
Ever since I got my Wowstick I thought that the little storage tubes it came with, while pretty to look at, were a huge pain to use. What's more, the case that came with the kit could only fit the screwdriver itself and one of the three tubes. Needless to say, I soon set out to find the perfect 3D printed solution to this annoying problem. I was looking for something similar to the case that comes with the manual Xiaomi precision screwdriver, as I really liked how convenient it was to put in and take out the bits from it, because they were just laid out flat, rather than standing upwards in little holes. I also really wanted to mimic the magnetic functionality of the case, where you could easily flip it without the bits falling out. Unfortunately, having scowered PrusaPrinters and Thingiverse, I couldn't find anything that fit my criteria. I did find a design that was pretty good, but it had some things I didn't like (read my review there if you are interested). It didn't have any source files, but the model it was based on did. I was going to modify that design, but it was not parametric at all, so I finally gave up and decided to remodel the whole thing myself and fix all the things that annoyed me.
Print instructions for gen 1
- You will need 64 7x1 mm disc magnets (for gen 1) or 70 6x3mm ones (for gen 2) for the whole thing, or just 24 if you don't care about magnetic bit holding. You can change the magnet diameter in the .f3d file if you have different ones.
- You will need superglue to fix the magnets in place. Use a hex key when placing the magnets to avoid getting glue on your fingers.
- The model is designed to print at 0.2 mm layer height and takes about 11 hours.
- Print the small test model first to make sure your magnets and bits fit.
- If you don't care about magnetic bit holding, go to step 8.
- You will need to add a pause at the height of 5.6 to insert the bit holder magnets (see the pictures). The .gcode and .3mf files have the pause set up, you should see it in PrusaSlicer.
- About 7 hours in, the printer will pause to let you insert the bit holder magnets. They will want to jump out of their holes and stick together, so you will need to superglue each of them into place. You could also make the holes tighter by editing the parametric file, but superglue will be easier and more effective if you have it. The holes are made to be 0.2 mm bigger than the magnets to make insertion easy, 0.1 mm would be quite a bit tighter.
- After the print is done, insert 3 7x1 mm magnets (or 1 7x3 mm magnet) into each corner. MAKE SURE THE MAGNETS IN THE CORRESPONDING CORNERS ARE ATTRACTED TO EACH OTHER. You won't be able to remove them after they are glued, be extra careful here.
- Clean up the top surface of both parts, if you want a better seal.
- That's it, enjoy your new case!
Print instructions for gen 2
- You will need 70 6x3 mm disc magnets. You can change the magnet diameter in the .f3d file if you have different ones.
- You will need superglue to fix the magnets in place. Use a hex key when placing the magnets to avoid getting glue on your fingers.
- The model is designed to print at 0.2 mm layer height and takes about 14 hours (or 9.5 with a 0.6mm nozzle).
- Print the small test model first to make sure your magnets fit and the bits hold well.
- You will need to add a pause at the height of 5.4mm to insert the bit holder magnets (see the pictures). The .gcode and .3mf files have the pause set up, you should see it in PrusaSlicer.
- About 7 hours in, the printer will pause to let you insert the bit holder magnets. They will want to jump out of their holes and stick together, so you will need to superglue each of them into place. You could also make the holes tighter by editing the parametric file, but i don't recommend this (i tried and in took me a literal hour to push all 70 magnets into the holes).
- After the print is done, insert a 6x3 mm magnet into each corner. MAKE SURE THE MAGNETS IN THE CORRESPONDING CORNERS ARE ATTRACTED TO EACH OTHER. You won't be able to remove them after they are glued, be extra careful here.
- Clean up the top surface of both parts, if you want a better fit between the halves.
- That's it, enjoy your new case!
Note: the links to Aliexpress are affiliate, I get a small commission if you buy anything from them.