Robot Vacuum Cleaner X Cyberbrick


Print Profile(1)

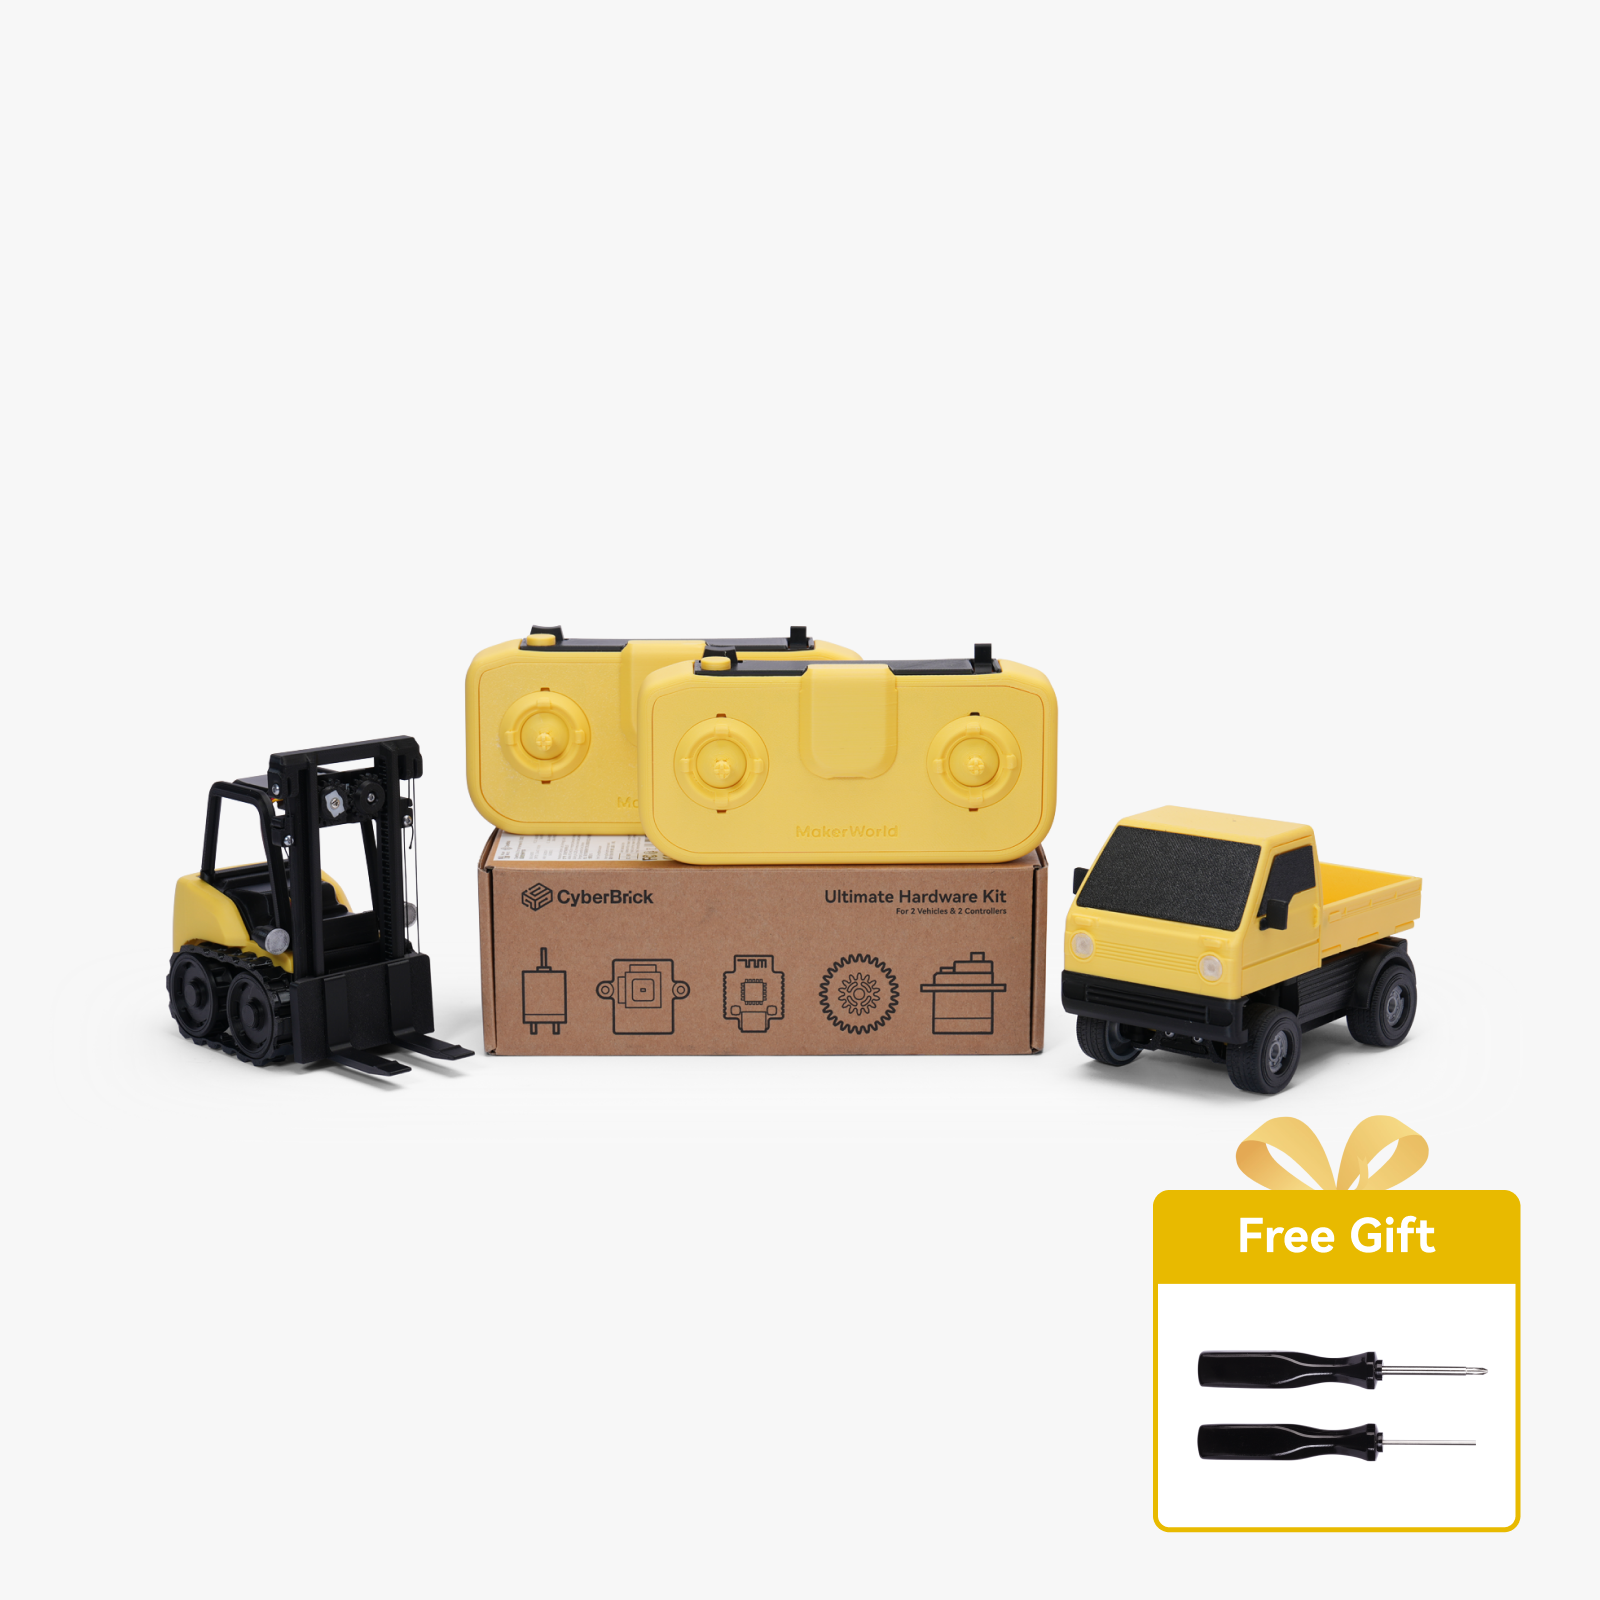
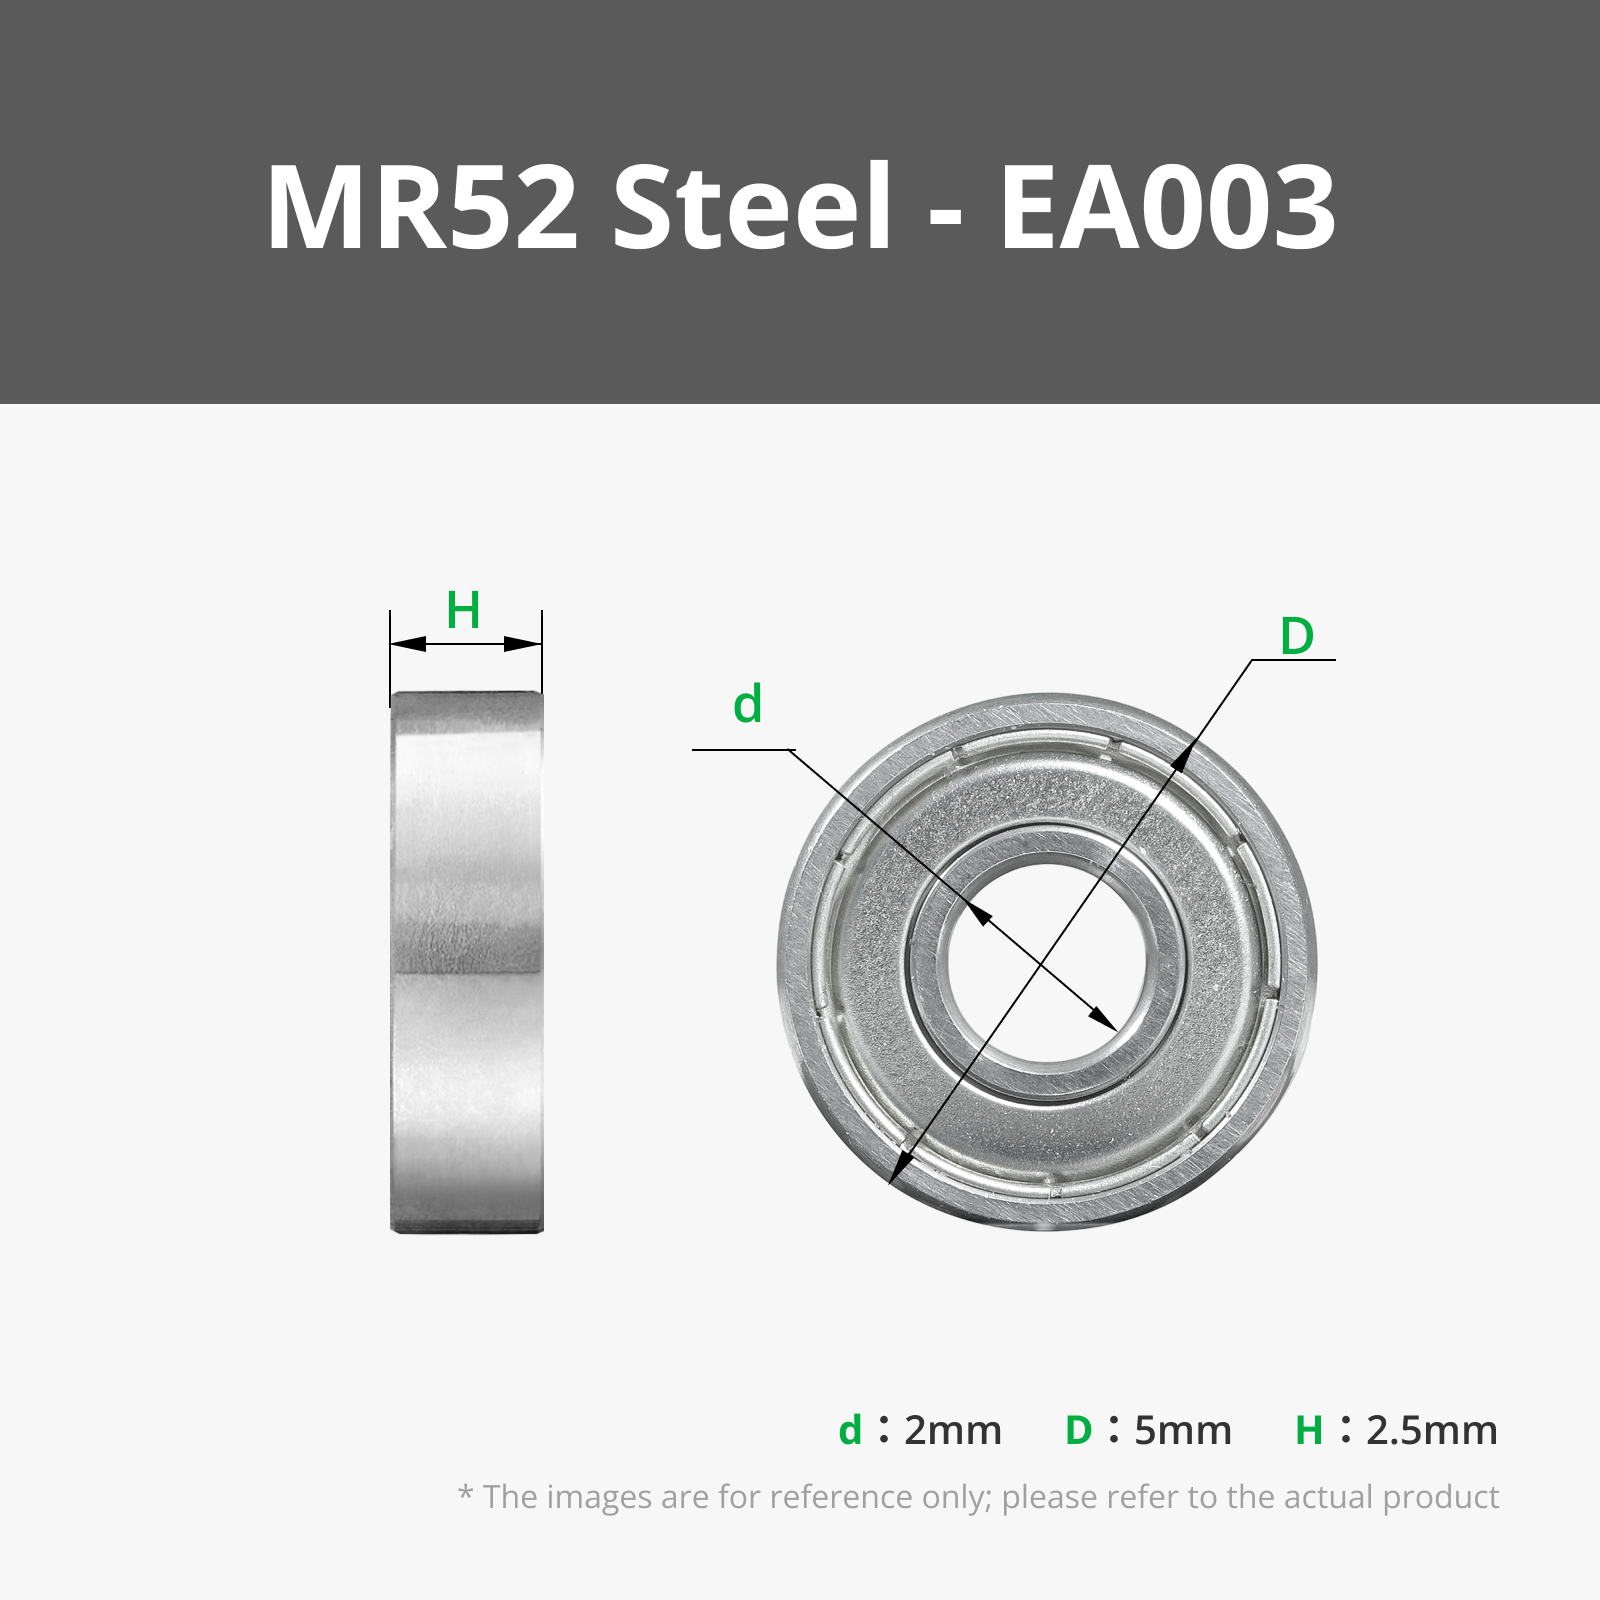
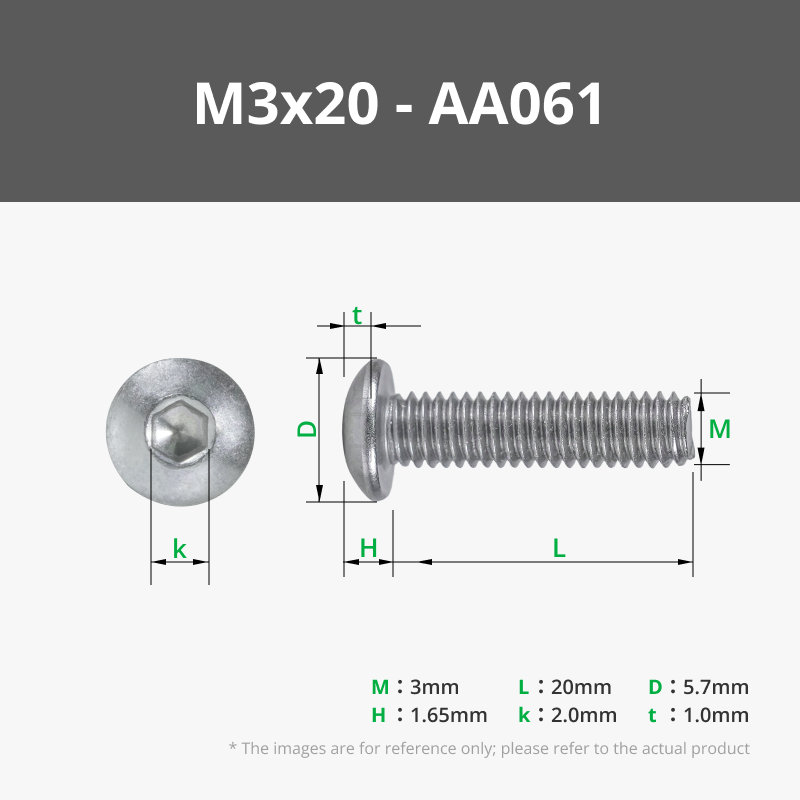
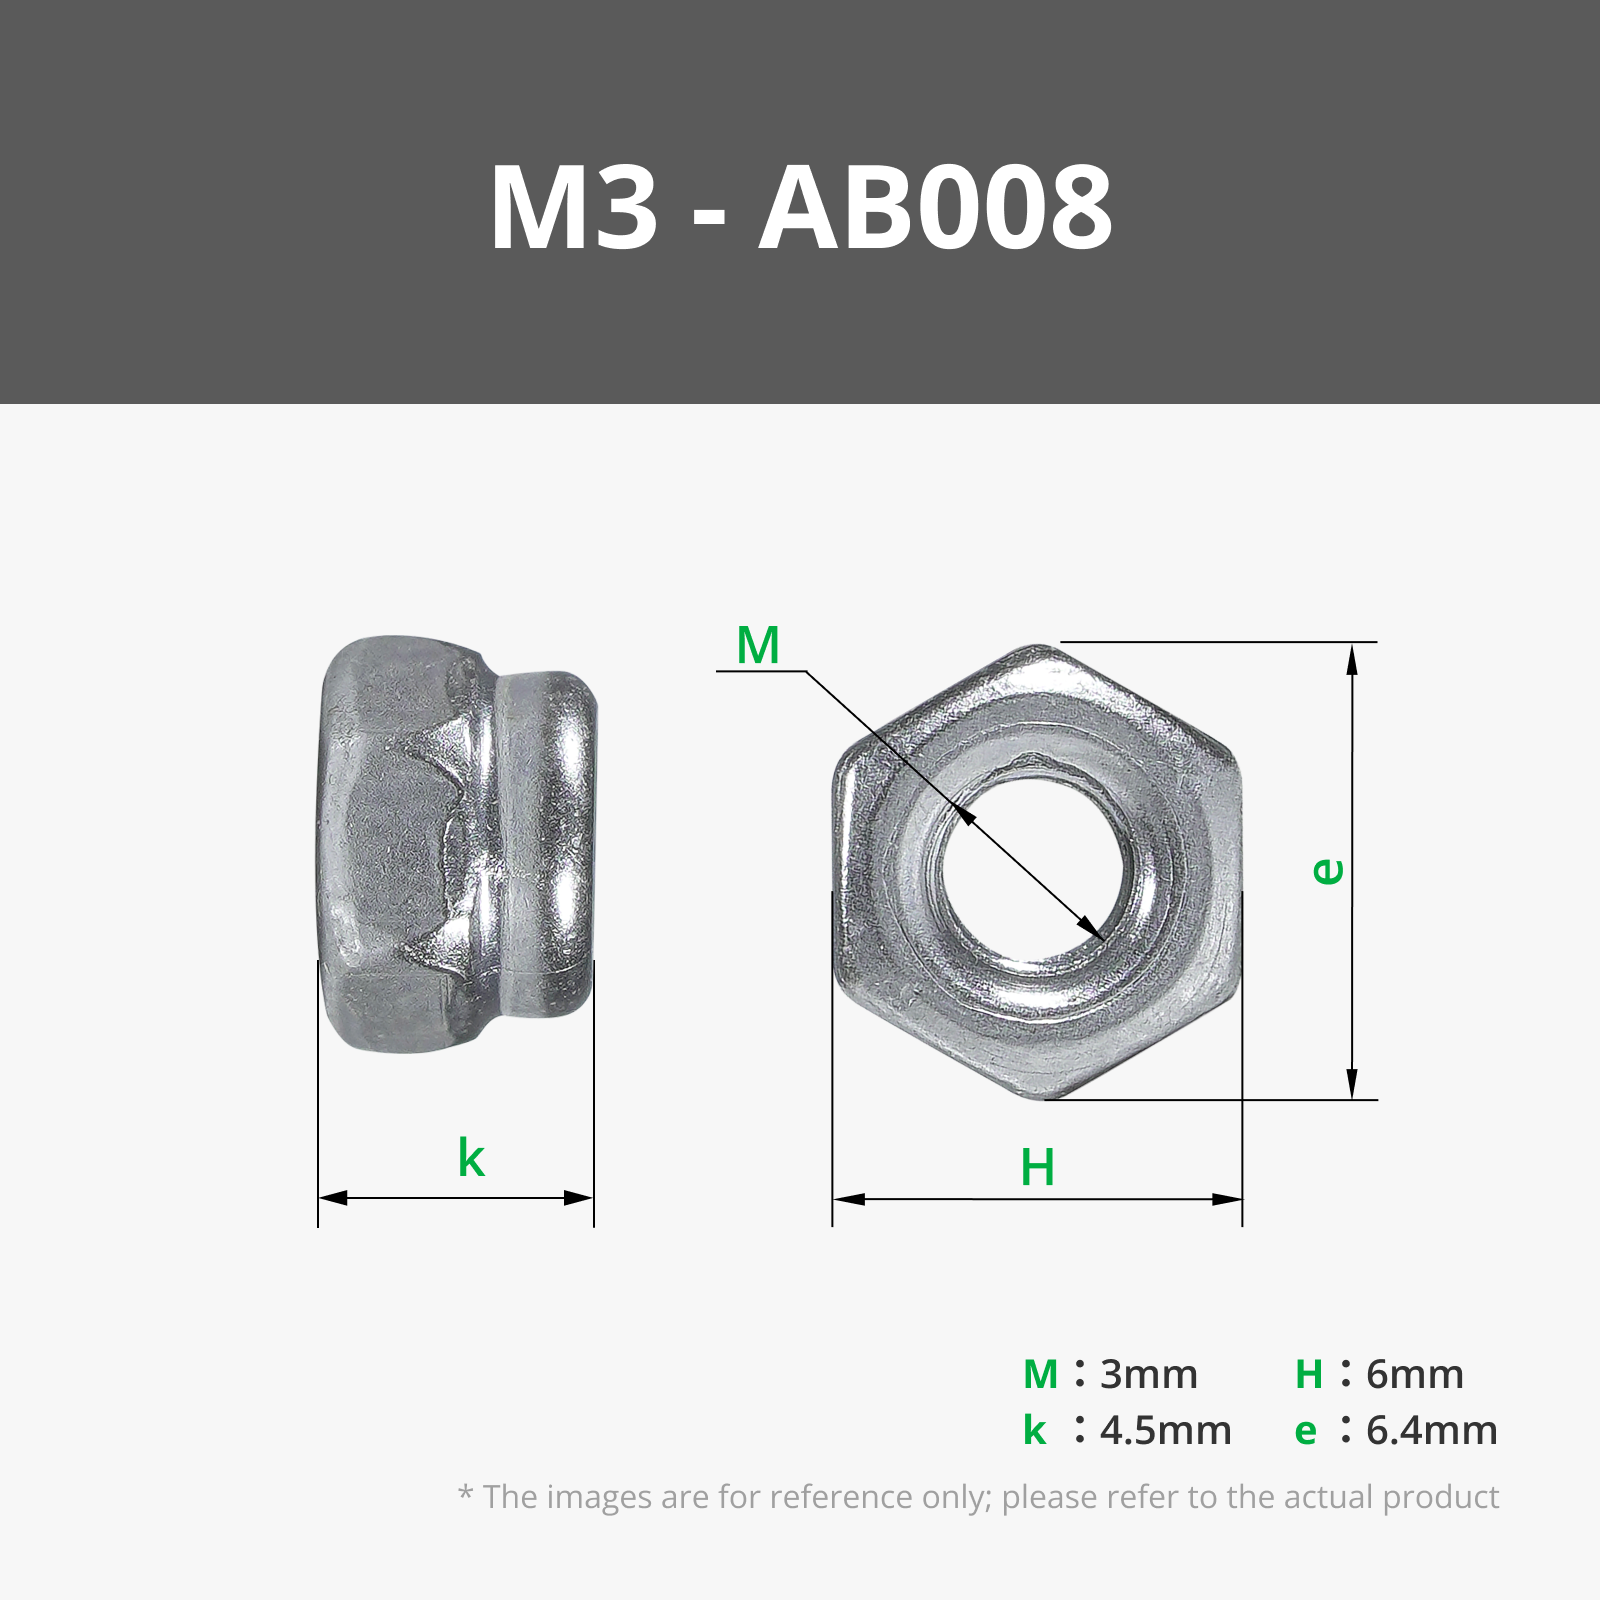
Bill of Materials


Description
VACUUM CLEANER KIT meets CYBERBRICK
✅PRINTABLE ON the A1 ✅
Boost Me (for free)
TO SUPPORT ME IN MAKING A FULLY AUTOMATED ROBOT VACUUM CLEANER
Print Plug and Play! ( NO SOLDERING required)
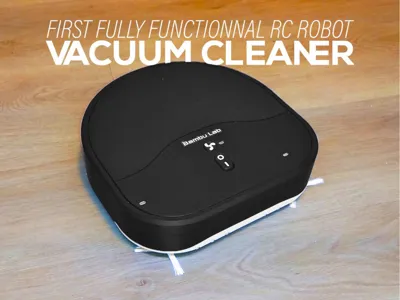
I am happy to announce the first fully operational 3D printed remote controlled portable Robot Vacuum Cleaner available exclusively on Makerworld. This is the first version made as a proof of concept that a 3D printed robot vacuum cleaner can outperform commercial ones.
The models fits the usual 256mm build plates from the A1, X1 and P1 series!
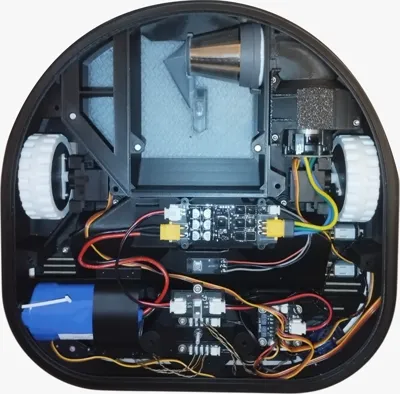
With a rough size of 250mm, a 16kPa suction pressure and High end mechanical components and electronics, you'll be able to clean your space with ease and efficiency!
The unmatched capability of the Cyberbrick electronics kit, coupled with the High end Vacuum Cleaner Kit Power circuit makes the present Vacuum Cleaner Robot an unbeatable contender in the realm of household appliances.
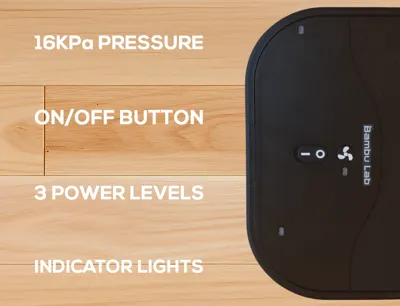
MAIN FEATURES:
- Up to 16 kPa suction Pressure
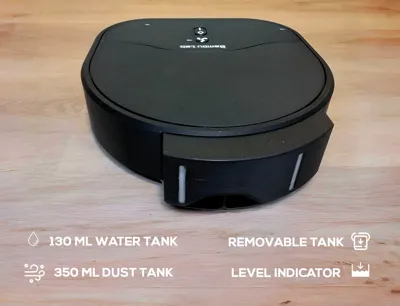
- 2 IN 1 Dust (350mL)/Water(130mL) tank + Level indicators (removable filter & washable tank)
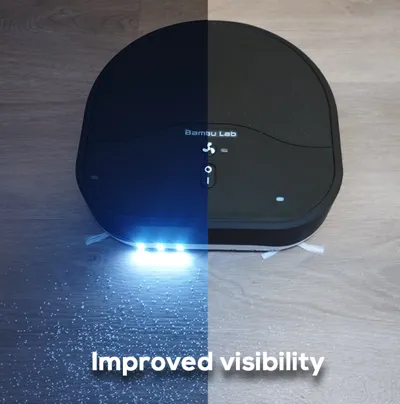
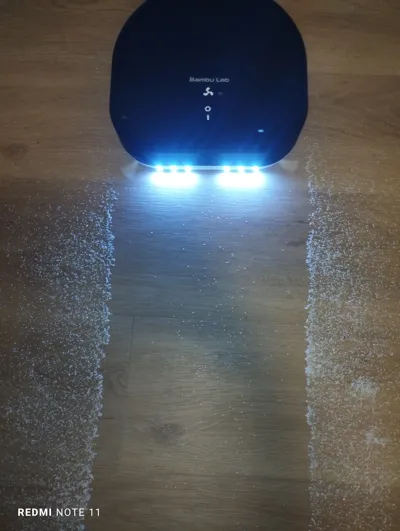
- LED visibility light (for dust localisation)
- 2 Control buttons + 4 Indicator lights
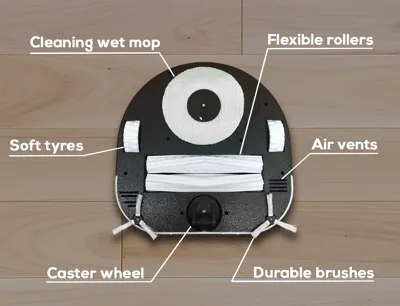
- Wet cleaning mop (removable & compliant to vacuum cleaner mops in the market)
- Flexible long lasting brushes, rollers and wheels
- Air vents (cooling & redirecting dust into the inlet)
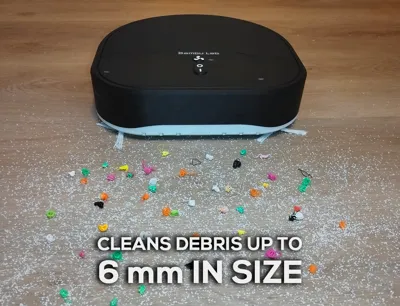
- Vacuums particles up to 6mm in diameter (small filament purges and broken support shards)
NEXT UP ON THE LIST:
- FULLY AUTOMATED ROBOT VACUUM CLEANER WITH BUILT IN SENSORS & SMART OBSTACLE AVOIDANCE SYSTEM
- AUTOMATIC CHARGING STATION
- AUTOMATIC TANK CLEANING STATION
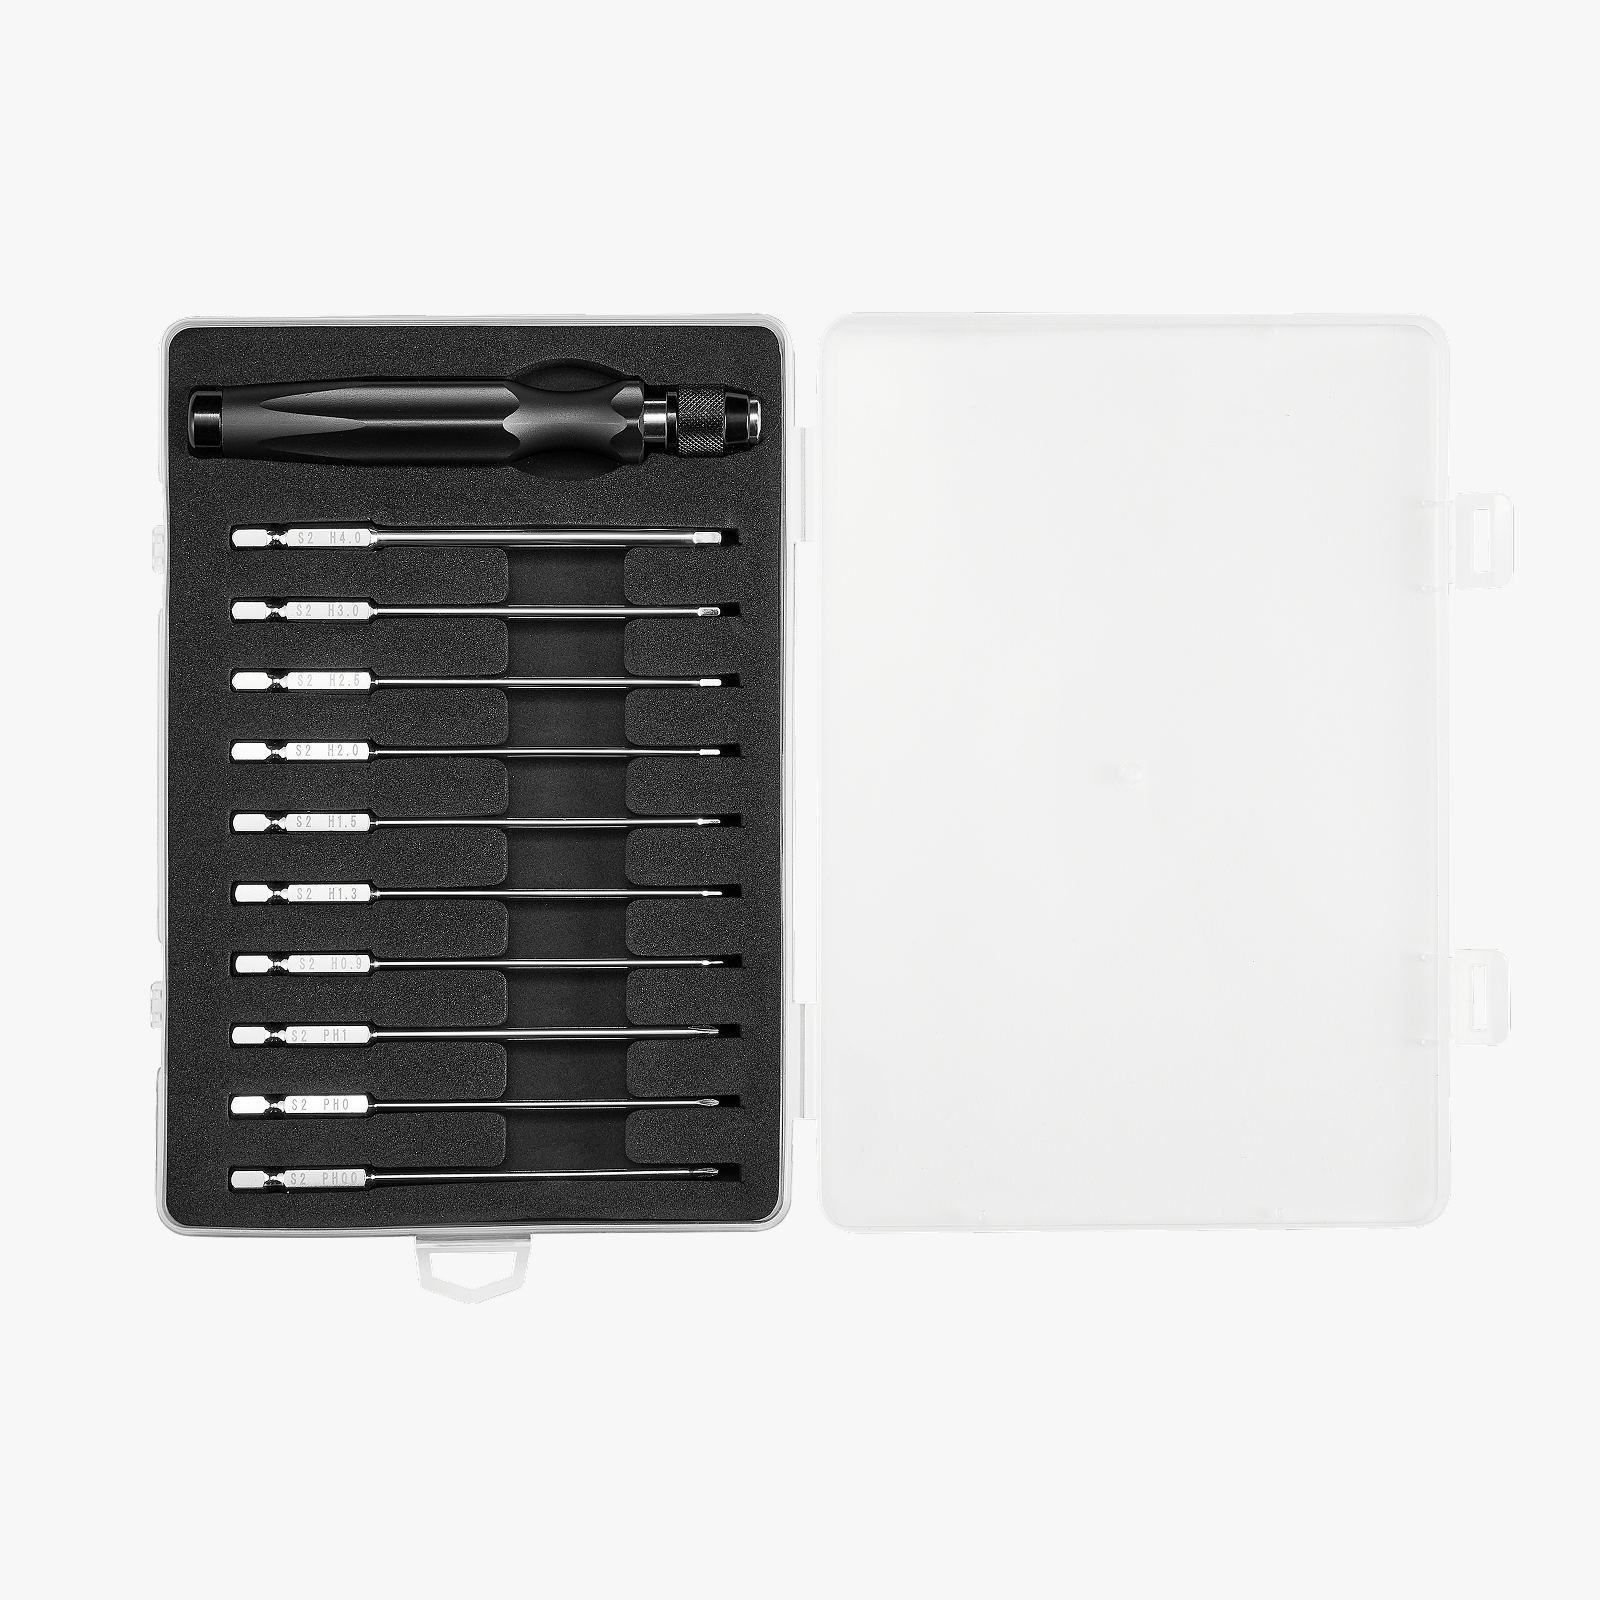
Feel free to get all the necessary tools from the Bill Of Materials below!
NOTE:
You can buy an aftermarket vacuum cleaner mop with a thickness of 5mm, an outer diameter of 13 to 14 cm and an inner diameter of 4 to 5 cm or cut a squishy mop yourself with those dimensions.
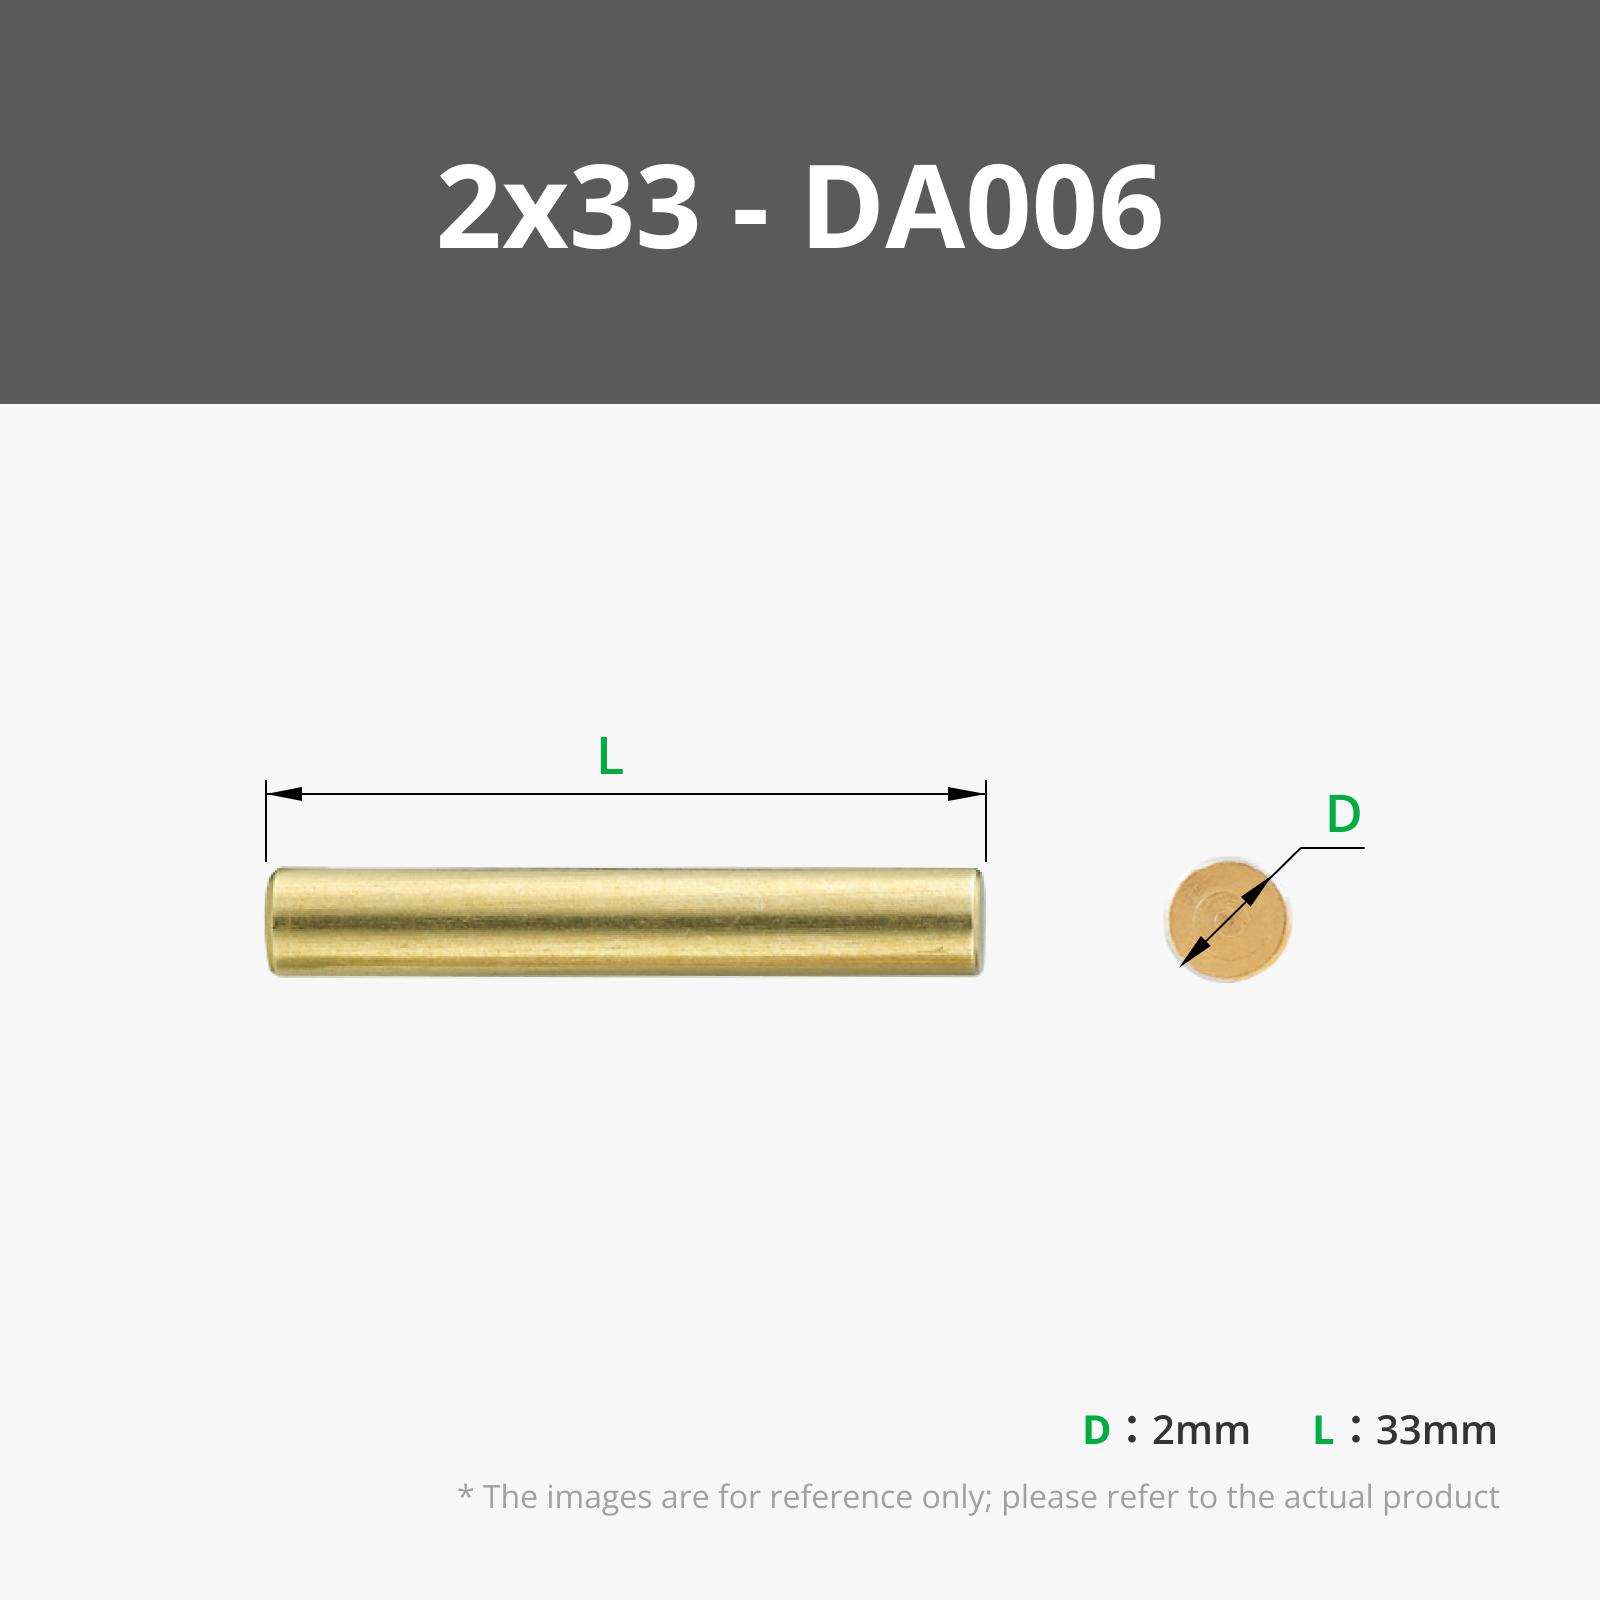
(if you baught the 22mm long brass pins you can print the smaller caster wheel!)


BUILD GUIDE:


HOW TO USE:
STEP 1: Turn on the ON/OFF switch (Receiver Light should turn on)
STEP 2: Bind the Vacuum cleaner to the controller (The light under the robot should turn green)
STEP 3: Hold the Fan Power Button then click to switch power settings (Motor Light should turn on)
STEP 4: Drive the Robot with the controller (Don't leave it still for an extended period of time to avoid creating a water puddle under it)
STEP 6: Turn off the Robot (with both switches) then open the Tank, clean it and dry it (TAKE OUT THE FILTER BEFORE WASHING THE TANK!)
STEP 5: Make sure to charge the battery after a long use (Battery Light should turn on when charging)


Reasons to build yourself a robot vacuum cleaner:
This robot vacuum cleaner doesn't only outperform equally priced consumer vacuum cleaners powerwise but also gives you full freedom of fixing any part that could brake for a minimal cost (no shipping, no charging extra) let alone the availability of the parts !
Outro:
No AI has been used during the making of this project. This work is the result of labor and love.
I hope you enjoy the build!
Membership
subscribe and get FULL ACCESS to the CAD files of my projects
Documentation (1)

License
You shall not share, sub-license, sell, rent, host, transfer, or distribute in any way the digital or 3D printed versions of this object, nor any other derivative work of this object in its digital or physical format (including - but not limited to - remixes of this object, and hosting on other digital platforms). The objects may not be used without permission in any way whatsoever in which you charge money, or collect fees.
Comment & Rating (257)