Filament poop waste disposer - Wastewarp V3


Print Profile(1)
Description
Wastewarp V3 - ESP32 Filament Poop Detector - MakerWorld Release
✅ Project Status: Ready for Publication
This project is fully tested and operational!
Inspired by: Filament Eject Conveyor (WasteWarp) - This electronic automation adds IR sensor detection, OLED display, and ESP32 control to the mechanical concept.
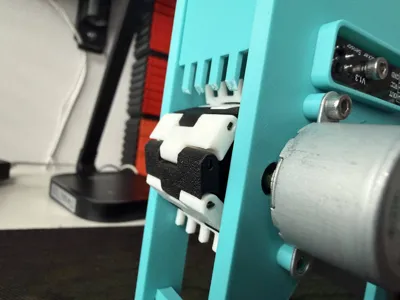
Based on the original idea, I added some automation and detection logic to the solution, and redesigned the belt slightly. The included new belt parts are printable with a normal 0.4 nozzle. (Connect them to eachother using pieces of filament)
🎯 What It Does
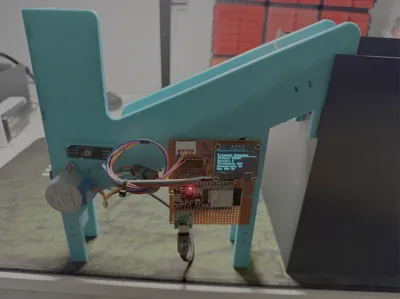
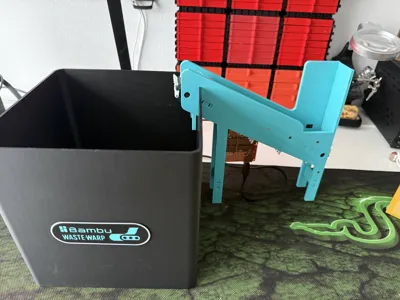
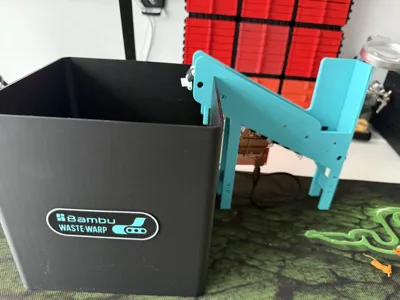
Automatically detects and removes filament waste from your Bambulab 3D printer using:
- IR sensor to detect falling filament
- Stepper motor-driven conveyor belt to clear waste
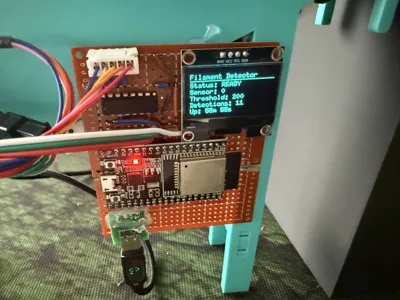
- OLED display showing real-time status
✨ Current Working Configuration
Hardware Verified Working
- ✅ ESP32-WROOM-32
- ✅ 28BYJ-48 Stepper Motor with ULN2003 Driver
- ✅ TCRT5000 IR Reflective Sensor
- ✅ SSH1106 OLED Display (128x64, I2C, 0x3C address)
- ✅ All wiring and connections tested
Software Configuration (Optimized)
- Motor Runtime: 30 seconds per detection
- Motor Speed: 5ms step delay (full-step mode for maximum torque)
- Sensor Threshold: 200 (tuned for reliable detection)
- Detection Mode: Trigger on high reading (DETECT_ON_LOW = false)
- I2C Address: 0x3D (configurable in config.h)
Key Features
- ✅ Change-based sensor logging (clean debug output)
- ✅ Real-time OLED display with progress bar
- ✅ Configurable motor speed and runtime
- ✅ Cooldown period prevents false triggers
- ✅ Debug mode for troubleshooting
🔧 Important Hardware Notes
Critical Wiring Fix
28BYJ-48 Motor Connection:
- The motor's RED wire MUST connect to +5V (not GND!)
- All 5 wires connect through the white connector to ULN2003
- Red wire is internally routed to VCC on most ULN2003 boards
Power Requirements
- ESP32: USB power (5V/500mA minimum)
- Motor: External 5V power supply recommended (1A minimum)
- OLED Display: 3.3V from ESP32 (not 5V!)
- Important: Common ground between ESP32 and motor power supply
Display Compatibility
- Tested with SSH1106 controller at I2C address 0x3C
- If display doesn't work, try address 0x3D in config.h
- Some displays labeled SSH1106 are actually SSD1306 (code supports both)
📦 What's Included
Find this on GitHub
Documentation
- README.md - Complete project overview
- QUICKSTART.md - Fast setup guide
- WIRING.md - Detailed wiring instructions with diagrams
- CONFIG_EXAMPLES.md - Configuration examples for different setups
- TCRT5000_GUIDE.md - Sensor calibration guide
- OLED_GUIDE.md - Display troubleshooting
- PCB_DESIGN.md - Bill of Materials for custom PCB - (This is still WIP - Work In Progress!)
- SCHEMATIC.md - Circuit schematic reference
KiCad PCB Design (Optional - This is still WIP - Work In Progress!)
- Complete schematic and PCB layout in kicad/ directory
- Ready for manufacturing with JLCPCB, PCBWay, etc.
- Includes USB-C programming circuit
- Recommended for permanent installations
Test Utilities
- test/motor_test.cpp - Motor driver diagnostic tool
- test/i2c_scanner.cpp - I2C device scanner
- test/hardware_test.cpp - Comprehensive hardware test
🚀 Quick Start
- Clone the repository
- Wire components following WIRING.md
- Adjust sensor threshold if needed (see config.h)
- Upload firmware using PlatformIO
- Test detection by placing object over sensor
- Fine-tune motor speed and runtime as needed
🛠️ Tested Configuration
// Working settings from config.h #define SENSOR_THRESHOLD 200 #define MOTOR_RUN_TIME 30000 // 30 seconds #define MOTOR_STEP_DELAY 5 // 5ms = fast speed #define DETECT_ON_LOW false // Trigger on high reading #define OLED_I2C_ADDRESS 0x3D // Try 0x3C if display doesn't work
💡 Tips
- Sensor Sensitivity: Adjust potentiometer on TCRT5000 for optimal detection
- Motor Direction: If the motor turns in the wrong direction, change currentStep increment in code
- Display Issues: Check I2C address (0x3C or 0x3D) and wiring
- Motor Torque: Loosen chain/belt if motor struggles. The included new belt shekels are printable with a normal 0.4 nozzle!
- Power Supply: Use adequate 5V supply for motor (1A minimum)
📝 License
MIT License - Free to use, modify, and share
🤝 Contributing
Issues and pull requests welcome at GitHub repository
Enjoy automated filament waste removal! 🎉
License
You may create derivative works based on this object, provided that all such derivative works are published exclusively on the MakerWorld platform and include proper attribution to the original creator. You may not share, upload, host, distribute, or publish this object—or any derivative work of this object—on any other digital platform, marketplace, or distribution channel. Commercial use of this object and any derivative works is strictly prohibited. This includes, but is not limited to, selling, renting, sublicensing, or using the object in any context in which you receive monetary compensation or other financial benefits.
Comment & Rating (3)