Printacaster

Remixed by
Copyright Claim

Printacaster

Remixed by
Boost
136
200
32

Print Profile(3)

All
P1P
P1S
X1
X1 Carbon
X1E
A1

Body Print Profile
Body Print Profile
Designer
15.5 h
1 plate
5.0(3)

0.2mm layer, 3 walls, 10% infill
Designer
3.9 h
1 plate
5.0(1)

Full PLA 0.2mm layer Strength 7 walls 30% infill for Main 2mm 3 walls 15% infill for non-structural
37.2 h
4 plates
4.9(10)

Boost
136
200
32
6
354
195
Released

Description

Hey Everyone!


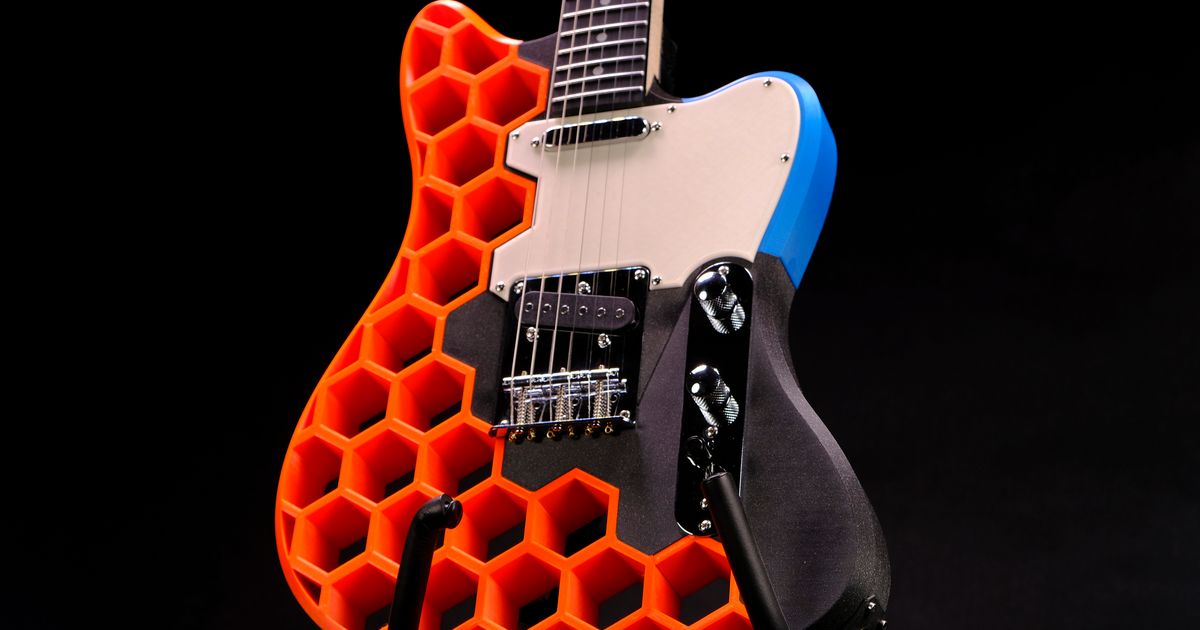
I really loved the design of the Prusacaster done by Mikolas Zuza of the Prusa team, but the kit they linked was very expensive to ship to the US. I remodeled my own version based off this amazon DIY Stratocaster Kit. All the parts are included in the kit and you only need to print the 5 parts.


Printer: Bambu Lab P1P w/ .4mm hardened steel nozzle


Filament: Bambu PLA-CF and Elegoo PLA+

** I only used the PLA-CF because I had it from the 1 year anniversary gift, I've seen people do similar designs out of normal PLA and have no issues


Print Settings:

Body (very structural and needs to be much stronger)

-.2mm layer height

-8 Wall Loops

-5 Top and Bottom Shell Layers

-25% Gyroid infill

-Normal(auto) Support

-.2 mm Top and Bottom Z distance for support (under Advanced)

-Mouse Ear Brim


All other parts

-.2mm layer height

-3 Wall Loops

-3 Top and Bottom Shell Layers

-10% Gyroid infill

-Normal(auto) Support

-.2 mm Top and Bottom Z distance for support (under Advanced)

-Mouse Ear Brim


Some of the parts are close to maxing out the build plate, but just keep rotating the parts. They all fit on a 256x256 mm build plate.


Assembly:

After sanding the faces the would be glued together with a fine grit sandpaper, I glued the parts together using standard Superglue. I recommend aligning all the parts with the front flush to a flat surface before gluing (learn from my mistakes). For the screws that hold the pick guard and cable connector on, I drilled pilot holes that aligned with the existing holes on the parts and screwed them on. For the vast majority of the assembly I just followed the guide that was provided in the kit.


Results:

Overall, I am happy with the results I got! It plays as you would expect any non-3D printed guitar to play. It is by no means an amazing guitar, but was a very fun build and really rewarding to play it afterwards! I have included the STL's and STEP files if you are looking to do any modifications to the design.

Comment & Rating (32)

Please fill in your opinion
(0/5000)

Boosted
Printed great! since I did “send all plates” and printed it from the menu I can’t rate it 5 star, but I would!
3
Reply
Very fun build. The holes didn't line up for one part but easy to drill new holes. Now just need to remember how to play it....
0
Reply
Print Profile
Full PLA 0.2mm layer Strength 7 walls 30% infill for Main 2mm 3 walls 15% infill for non-structural
printed alright. only problem is that the proportions of the holes and horns are off.
(Edited)
0
Reply
so far it seems decent. The only problem is that some of the holes don't line up and for some reason the right side horn doesn't line up with the pick guard
0
Reply
Absolutely thrilled with how easy it was to put together. then took to local music store and they adjusted everything and have it all set up. easy peasy!! 5*
0
Reply
Print Profile
Full PLA 0.2mm layer Strength 7 walls 30% infill for Main 2mm 3 walls 15% infill for non-structural
awesome build pieces fit great
0
Reply
Where is the rest of the body? i.e. the honeycomb part
0
Reply
the Profile doesn't have it. you have to download the files. I have a 3MF for PLA. I will upload it.
0
Reply
Replying to @UniqueMLLLC :
it is uploaded as the profile. i did make it one project. since you have the others download you will have to select which ones you want to print from the app. but it should work great. my son was going to print it but he fell in love with the wood. cant wait to see your print.
1
Reply
Replying to @3dprinting4silv :
where is the honeycomb body file?
0
Reply
Awaiting my amazon shipment what size drill bit did you use?
The designer has replied
0
Reply
Any small bit should do the trick. Just make sure it's smaller than the holes on the pickguard. You just need a small hole for the screws to start grabbing onto. Would love to see how it looks once your finished!
0
Reply
Print Profile
Full PLA 0.2mm layer Strength 7 walls 30% infill for Main 2mm 3 walls 15% infill for non-structural
The designer has replied
0
Reply
nice. I hope you post some pictures once you are done. can't wait to see it.
0
Reply
turned out well
(Edited)
1
Reply
Replying to @jocko1960 :
love the color choice. it looks awesome
(Edited)
1
Reply
Does anyone know of a better neck/pickups I could use for this project? like buying used parts maybe
0
Reply

Related Models

There are no related models yet