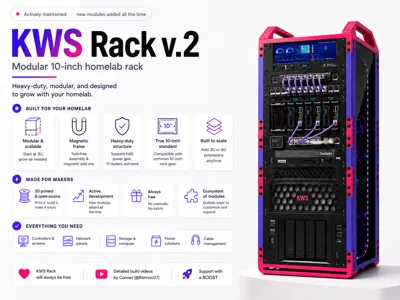
KWS Rack v.2 - Heavy‑Duty 10‑Inch Homelab Rack


Print Profile(12)


Description

What is KWS Rack?
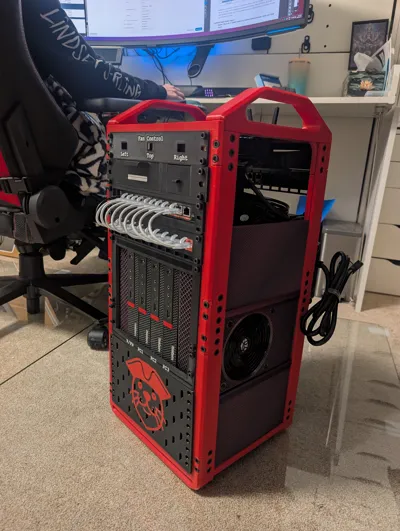
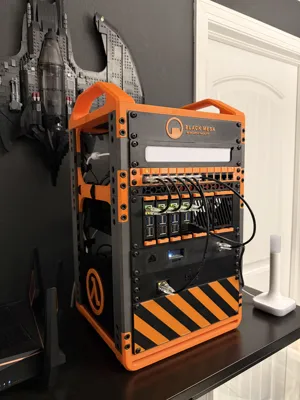
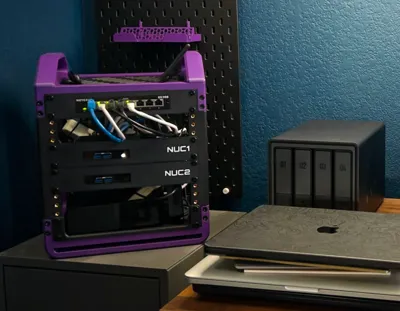
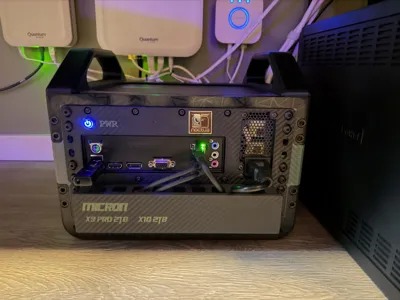
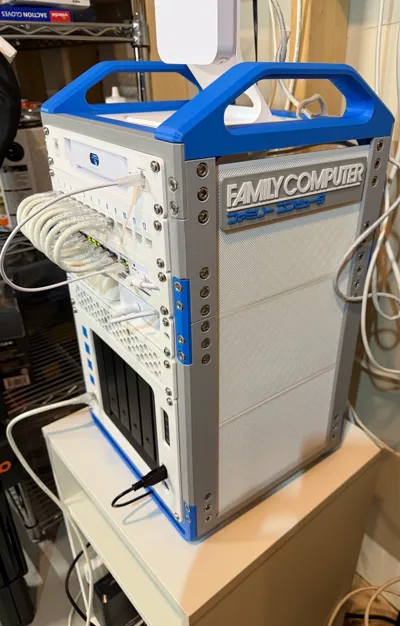
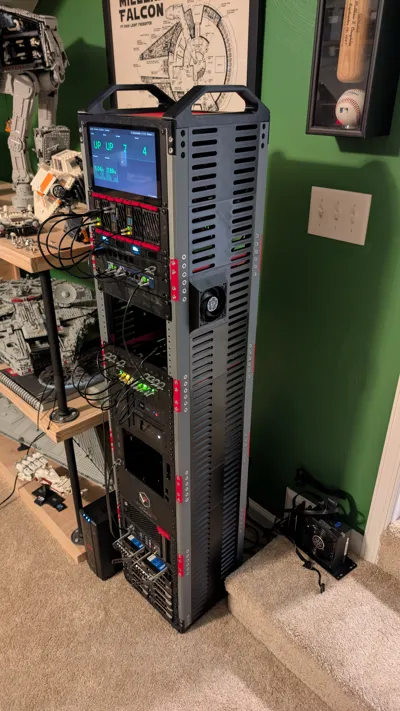
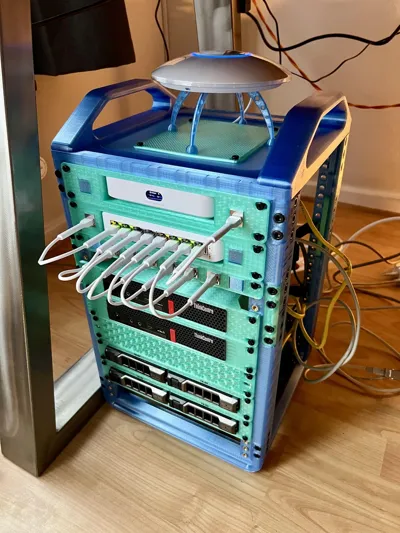
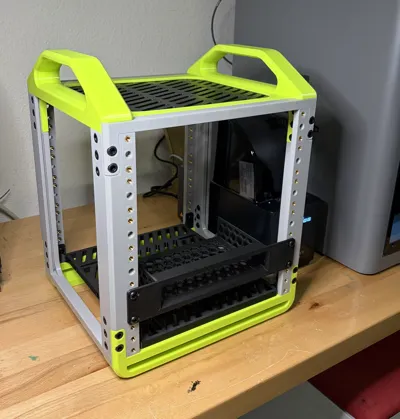
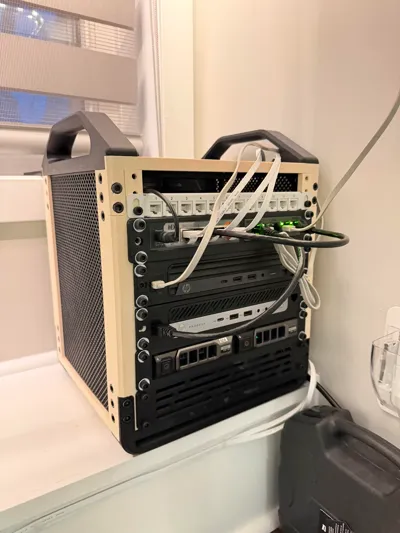
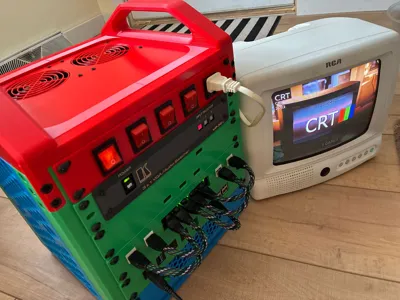
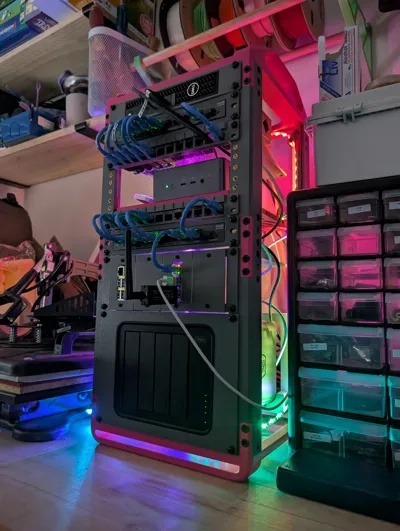
KWS Rack is a modular, heavy‑duty homelab rack system for makers who want something that feels engineered, not flimsy.
It’s designed to hold real equipment - NAS devices, power supplies, Raspberry Pi clusters, screens - while staying clean, expandable, and enjoyable to build.
You don’t need to print everything at once. Build what you need today, expand when your homelab grows.
You can contribute & find next planned additions here

Updates!
- 21st of April, 2026 - Please visit this Reddit post to see the full updates list
Boost Me (for free)
💜 KWS Rack will always be free!
If you like the model and want to support my work,
feel free to give it a BOOST 🚀
To see a detailed build process you must watch this amazing video by Conner! (@Rennoc07) 🚀
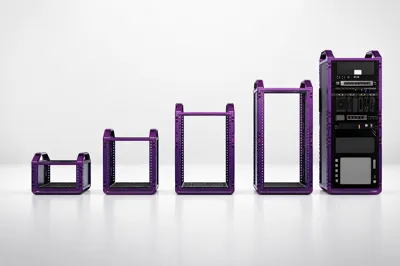
Modular & Scalable

- Minimum size: 3U
- Maximum size: tested up to 30U!
- Recommended starting point: 6U cube base rack
- Add 3U or 6U extensions anytime
No redesigns. No wasted prints. Just stack and grow.
Key Features

- 🧲 Magnetic frame
Keep screws and tools stuck to the rack while working.
More magnetic add‑ons coming soon! - 🏋️ Heavy‑duty structure
Stable enough for NAS units, power gear, and dense builds. - 📏 True 10‑inch rack standard
Compatible with common 10‑inch rack gear and accessories. - 🧊 Optional full enclosure
Supports side and top panels (printed or laser‑cut 3mm acrylic). - 📈 Built to scale
Designed from day one to grow vertically without compromises. - 💡 LED & cable management system (separate project will publish soon)
Upcoming Modules
The rack is part of a growing ecosystem:
- Screen + Raspberry Pi system monitor / controller module
- Keystone patch panel with magnetic labels
- Rack cable management mounts
- Synology 4Bay Base module (a remix of this model)
- 2U snap‑in Raspberry Pi cluster (up to 8 Pis)
- Power‑supply shelf with cable management
- Magnetic removable back plate
- UPS + PDU back‑panel holder
You can contribute & find next planned additions here
Parts Checklist (Order Before Printing)

Brass heat‑set inserts (M5) - (for NO-INSERTS VERSION)
8mm length, 7mm OD or 7.5mm OD
12 inserts per 1U (order extras)
Example link
M6 × 8mm socket head screws (outer frame)
16 per frame section (base or extension)
Example linkM6 × 10mm socket head screws (inner frame)
24 per frame section (base or extension)
Example link
M6 nylon self‑lock nuts (nyloc)
Quantity = M6×8 + M6×10 total
Example link
Round magnets - 10mm × 5mm (Optional)
Example linkMagnet usage:
- Each 6U frame leg: 14 magnets
- Each 3U frame leg: 2 magnets

M5 x 10mm screws
rack panels mounting screws - each panel usually has 4 to 6 screws
Example link
Hardware Reference Table
| Rack Size | Inserts | M6×8 | M6×10 | M5x10 | Nuts | Magnets |
|---|---|---|---|---|---|---|
| 3U | 36 | 16 | 24 | ~24 | 40 | 23 |
| 6U | 72 | 16 | 24 | ~48 | 40 | 63 |
| 9U | 108 | 32 | 48 | ~72 | 80 | 79 |
| 12U | 144 | 32 | 48 | ~96 | 80 | 119 |
| 15U | 180 | 48 | 72 | ~120 | 120 | 135 |
| 18U | 216 | 48 | 72 | ~144 | 120 | 175 |
Printing Notes
- Recommended material: PETG
PLA is not heat‑resistant and may deform in real homelab environments. - Print structural parts with strength in mind (walls > infill). I used Bambu's “Strength” profile

Assembly (Short & Simple)
- Choose your rack size and order hardware.
- Print all required parts.
- Press M6 nuts into the inner side of frame parts
→ Nylon side facing away from the screw. - Push the inserts with soldering iron into the frame legs (from the rack's inner side!)
- Add the magnets with the snap in mangets inserts
- Assemble the frame with the connectors.
Tips and useful links:
- Gluing the nuts inside the top handles with epoxy is recommended.
It makes future maintenance much easier, especially with side plates installed. - For high racks - print this connector by Dohsie
- To cover your open spaces - print some blank panels using this awesome generator model by Kiwiworks
Side Panels (Optional)
- 🖨️ Printed side panels
A separate printable file is included. - ✂️ Laser‑cut acrylic panels
Use the included DXF files with 3mm acrylic.
Credits
- Synology module - I remixed this one
- TP Link switch mount - here
- Lenovo mini pc rack mount with keystones - here
Why You’ll Enjoy This Build
- Feels solid and professional
- Grows with your homelab
- Clean, modular, and practical
- Designed for real use, not just looks
If you like building things that are useful, well‑designed, and future‑proof - you’ll enjoy this rack.
Happy printing 🖨️
📐 Measurements

🛠️ Troubleshooting

Most of the solutions can be found in “Download STL/CAD files” section P1s exclusion zone (heavy-duty-base) - not enough print area
I've added a .3mf file FOR-P1S-bottom-heavy-duty-base.3mf for P1S users (download STL/CAD files).
Its ok to have only 3 mounting ears, since the base is leaning on the bottom legs.- No inserts
There is a Nut-Based version (no heat-set brass inserts) available here - Pushing nuts into the angled slots on the inner side of the frame - make sure that the nylon part of the nut (if there any) is pointing out of the slot + use a hex key to push them in place.


Share your MAKES ❤️
Boost Me (for free)
💜 KWS Rack will always be free!
If you like the model and want to support my work,
feel free to give it a BOOST 🚀
License
You may create derivative works based on this object, provided that all such derivative works are published exclusively on the MakerWorld platform and include proper attribution to the original creator. You may not share, upload, host, distribute, or publish this object—or any derivative work of this object—on any other digital platform, marketplace, or distribution channel. Commercial use of this object and any derivative works is strictly prohibited. This includes, but is not limited to, selling, renting, sublicensing, or using the object in any context in which you receive monetary compensation or other financial benefits.
Comment & Rating (1055)