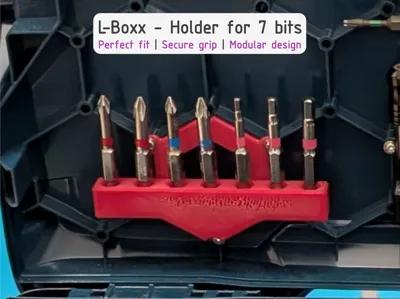
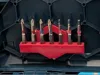
L-Boxx - Holder for 7 bits


Print Profile(2)

Bill of Materials


- superglue x 1: Amazon Link: https://h7.cl/1kukG
Description
L-Boxx - Holder for 7 Bits
Do your bits also constantly fly around loose in your L-Boxx? That was my main problem, which is why I designed this holder. It is one of my first 3D printing projects and has revolutionized the organization in my toolbox
The holder provides space for 7 standard bits (25mm) and is mounted directly in the lid of the L-Boxx. This saves space in the main compartment and provides a perfect overview. A crucial advantage: when packing up at the end of a workday, you immediately see if a bit is missing. The design is deliberately modular so that the individual parts can be printed easily and without support
✨ Features
- Space for 7 bits: Optimized for standard hex bits.
- Support-free: The design allows for clean printing without support structures.
- Shadow board effect: Missing tools are noticed immediately.
- Stable: Secure screwing through threaded inserts in the L-Boxx honeycomb.
🖨️ Print Settings (Recommendation)
- Material: PLA or PETG
- Walls: 2
- Infill: 15% (Gyroid)
- Support: No
🔧 Assembly
- Mount the holder: Apply a small amount of superglue to one side of the connector pins and insert them into the recesses of the bit holder. Then glue the other side of the pins and connect them to the mounting plate. Important: Allow glue to dry completely!
- Prepare the L-Boxx lid: Thermally insert three M3 threaded inserts (heat-set inserts) (e.g., with a soldering iron) into the existing honeycomb receptacles. They should be flush.
- Install the holder: Position the holder in the desired compartment and secure it with three M3x8 hex head screws.
- Secure: Tighten screws evenly until everything is securely seated.
- Load: Insert bits and enjoy the new order!
ℹ️ Information
I have designed more bit holders for the L-Boxx.
You can find them at the following link: Bosch tools and accessories.
____________________________________
📸 Show us your results! 😀
I look forward to your 💬feedback, a ⭐star rating, a ❤️like and 📷pictures of your 🖨️prints!
🔍 Discover more
Interested in my other models?
Feel free to look around my profile!
There you will find more useful accessories, decoration ideas and practical everyday helpers.
Link: https://makerworld.com/de/@exo2dus
_____________________________________
Boost Me (for free)
It costs you nothing and you support my work with it. 😀
Thank you and happy printing!
License
You shall not share, sub-license, sell, rent, host, transfer, or distribute in any way the digital or 3D printed versions of this object, nor any other derivative work of this object in its digital or physical format (including - but not limited to - remixes of this object, and hosting on other digital platforms). The objects may not be used without permission in any way whatsoever in which you charge money, or collect fees.
Comment & Rating (15)