Song Thrush call


Print Profile(2)


Description
Song Thrush call
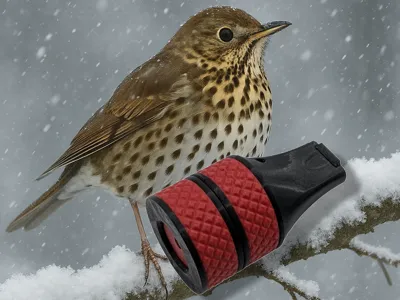
This is an ordinary “button whistle” inside of a body looking as a normal whistle, tuned to be used for mimic song thrush calls. It does requires som training to master since the song thrush is a very talented song bird with many different sounds. The size is quite big but this also allows for a little more power/volume.
The body of this call can also be used to mimic a lot of other different animals. By changing the hole sizes and spacers many different frequencies can be created. (Smaller hole sizes normally needs a thinner spacer #1 between the reeds, picture in assembly section for parts). I plan to expand the collection here but feel free to experiment yourself.
Printing
I normally suggest PLA or another stiff material for my calls but in this case I actually think most materials will be ok for the main body. Although softer materials might damping the sound a little bit. For the reed parts (print profile #2) I suggest PLA.
Avoid all CF/GF materials since you are going to breath in around it, you do not want small CF particles in your lungs.
All parts are designed for 3d-printing and no supports needed.
I suggest using 0.4 mm or finer nozzle.
Its divided into two print profiles because the reed parts will be better with lower layer heights and ironing. The body can be printed with 0.2mm layer heights without problems. The reeds should have a 4mm hole in the middle and this is quite important for the tuning. This is hard to get exact on many printers since they squish the first layer a little bit. I therefore suggest that you use a 4mm drill afterwards. Make sure the holes are sharp and fine without any debris.
Assembling
Place the reed and spacers in the correct order shown in the picture below into the front and lock them by screwing the back into the front. The reeds are both identical, the spacers are numbered on the side. ALL parts and their order is very important for the function, if you don't get sound, it is most likely you have either placed them wrong or that you have quality problem with the reeds. Its really important that the thin reeds are “air tight” except for the hole that needs to be round, sharp and 4mm.

Use
As with all button style whistles, this can be used both by blowing and on in-breath. Use your tung to modulate the sound. You can watch the video below for instructions on a similar call:
License
You shall not share, sub-license, sell, rent, host, transfer, or distribute in any way the digital or 3D printed versions of this object, nor any other derivative work of this object in its digital or physical format (including - but not limited to - remixes of this object, and hosting on other digital platforms). The objects may not be used without permission in any way whatsoever in which you charge money, or collect fees.
Comment & Rating (339)