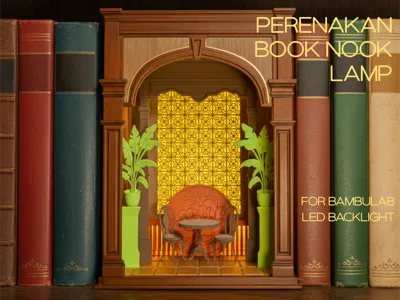
Peranakan Book Nook - Bambu Lab Backlight LED


Print Profile(1)

Bill of Materials


Description
Peranakan Book Nook – Introduction & Build Instructions
Introduction
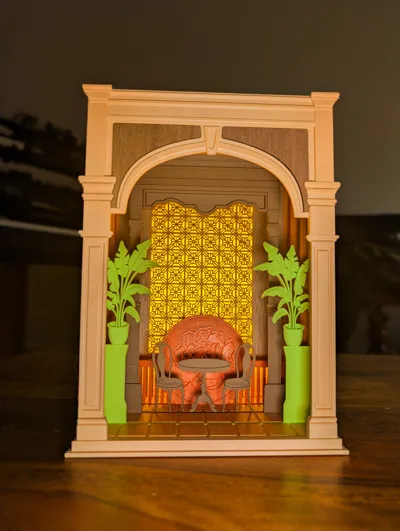
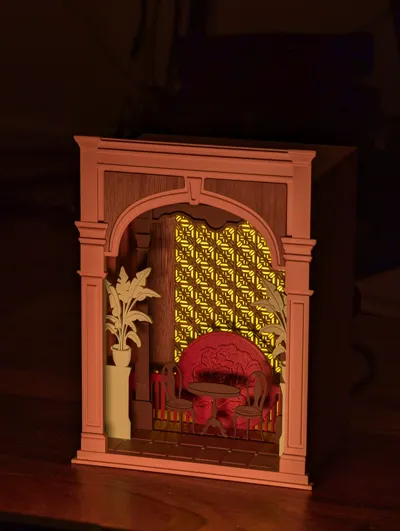
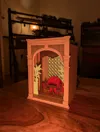
This Peranakan Book Nook is a charming miniature inspired by the distinctive architectural style of traditional Peranakan house entrances. It is designed to be easily 3D-printed and simple to assemble! With layered inserts, a glowing LED backlight, and detailed laser-cut windows, this book nook recreates a traditional Peranakan home - right between your books.
What You Need
- 4× M3×10 screws
- 1× Bambu Lab LED Backlight Panel
- 3D-printed parts (from the included .3mf file):
- Outer Frame
- Floor
- Plant Insert
- Chair Insert
- Flower Insert
- Diffuser Insert (print this in an opaque filament—translucent colors will not diffuse or tint the light properly!)
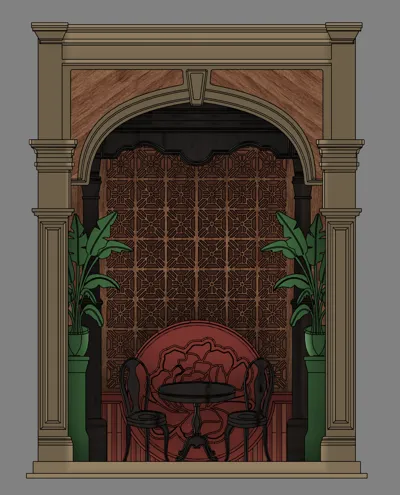
- Laser-cut parts:
- Front Wall Insert – Left
- Front Wall Insert – Right
- Peranakan Window
How to Print
- Open the provided .3mf file and print all included 3D parts.
- Diffuser Insert:
- Use an opaque material.
- Avoid translucent filaments—they let too much light through and won’t color or soften the lighting correctly.
- All other parts can be printed in your preferred filament and color.
Assembly Instructions
1. Install the LED Backlight
Insert the Bambu Lab LED Backlight Panel into the outer frame.
(You can find the LED panel in the “Maker Parts” section of the listing.)
2. Attach the Front Wall Panels
Press the laser-cut Front Wall Inserts (Left and Right) into the printed Front Wall.
Press the Clips through the Outer Frame into the holes at the Front Wall.
The clips will snap securely into place—no glue needed.
3. Insert Components (in order)
Slide the following parts into the frame one by one:
- Diffuser
- Laser-cut Peranakan Window
- Flower Insert
- Chair Insert
- Plant Insert
4. Install the Floor
Align the floor piece with the bottom of the frame.
You may need to wiggle gently to get the inserts seated correctly into the floor slots.
Secure the floor using 4× M3×10 screws.
You’re Done!
Your Peranakan Book Nook is now complete.
Place it on your shelf, turn on the LED backlight, and enjoy the warm glow of your newly built miniature Peranakan home entrance!
License
You shall not share, sub-license, sell, rent, host, transfer, or distribute in any way the digital or 3D printed versions of this object, nor any other derivative work of this object in its digital or physical format (including - but not limited to - remixes of this object, and hosting on other digital platforms). The objects may not be used without permission in any way whatsoever in which you charge money, or collect fees.
Comment & Rating (2)