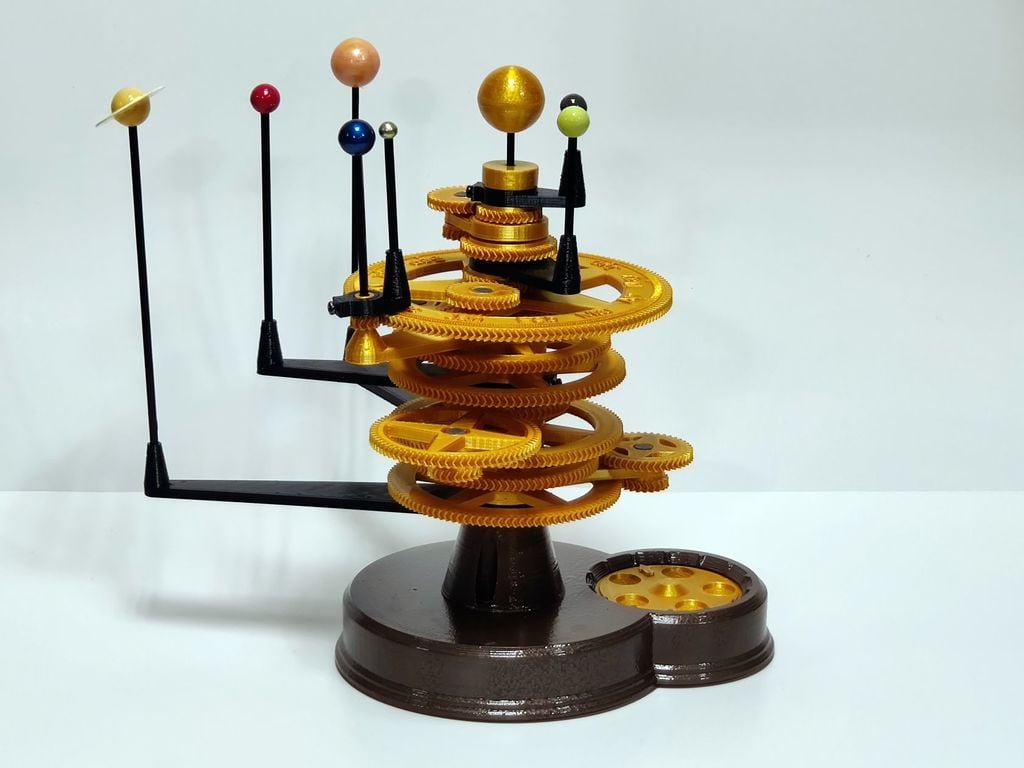
Mechanical Planetarium (Orrery)


Print Profile(1)

Description
This is adaptation of the tuned mechanical planetarium by HackerJack42: https://www.thingiverse.com/thing:4632441
The original design is by Zippitybamba: https://www.thingiverse.com/thing:4613061
I've taken this design and laid it out on the plates to help with organization while building. I've also utilized Bambu Lab's “color paint” feature for the planets. Saturn has been adapted to also take advantage of the paint feature on the rings.
Bill of materials:
6 - M3x10 self tapping screws: to attach the base floor and support bracket.
3 - M3x10 hex head screws and nuts: to attach the Main axle to the base housing.
7 - M3x10 Hex button head cap screws: to use as set screws for each planetary arm.
4 - Rubber cabinet bumpers as feet for the bottom.
The 17 plates are mostly laid out in order of construction. You will need to keep track of components like planetary arms and planetary pegs, but they are generally largest for the furthest planets. Zippitybamba has posted some videos for construction, and Hackerjack42 has a great chart showing the layout of all gears, idler arms, and pegs.
Base construction:
- Print the first 3 plates (base components 1, 2, and 3) and plate 5 (finger wheel & Saturn gears) will allow the construction of the base.
- To assemble the base, first attach the main axle to the base housing using the hex head screws and nuts.
- Flip over the base housing and place the base drive gear in the larger cavity. Insert and hold the Mercury axle into the main axle to align the base drive gear properly.
- Place the fingerwheel in the smaller cavity opening. Insert the fingerwheel axle into the fingerwheel gear. Flip the finger wheel support bracket upside down and align the hole with the finger wheel axle cutout. Insert the finger wheel axle through the support bracket and into the finger wheel axle cutout. Ensure the finger wheel gear and the base drive gear mesh properly.
- While holding this entire thing upside down, carefully install the base floor, ensuring the finger wheel axle goes into it's guide hole as does the Mercury axle. First insert the screws through the base floor into the support bracket. Then install the other 4 screws.
- Flip it over and ensure that the finger wheel can rotate and note that the Mercury axle rotates. If the finger wheel is too tight, loosen the single screw by the finger wheel that is not attaching the support bracket.
- Attach the rubber feet to the bottom.
Planetary Gears Installation:
I utilized the chart that HackerJack42 created for installation. Note in the corner it shows the positioning of the idler arms in each tof the 3 possible locations.
I found that for me , to get the next gear (or set of gears) to mesh properly, was to slide the whole already installed gear collection up the main axle, slip the new on into position at an angle to get the herringbone teeth to mesh, then slide the collection back down onto the main axle. The plates are laid out for each planetary set of gears.
Install a set screw into each planetary arm before placing the planetary arm and subsequent gears in place. The screws are a very tight fit. Get the set screw fully threaded, then back it out so you can adjust the planetary arm upon completion of construction.
I also found that there was a little bit of give in the hex interface that had planetary arms on the ring. I placed a very thin piece of sticky tack in each interface, only because I didn't want to risk glue coming in contact with something that is supposed to move.
Each planetary peg needed to be shaved and sanded down to allow for the planet to be installed. I did glue my planet hemispheres together while on their respective peg.
When installing the Moon gear, the Earth peg is all that is needed to hold into against the calendar gear. Ensure that the moon planetary arm sits above the calendar hash marks so that it can spin freely.
After placing the Mercury Cap on top, the Sun peg (longest peg) slides all the way through the main axle down to the base floor.
The last plate contains all the planets as a single color if you don't want to use the AMS for multi-color printing.

Comment & Rating (231)