
camera stabilizer
Print Profile(1)
![[Screw Hole Update] The bottom Picatinny rail screw hole has been changed from 4.8mm to a 4.5mm-4mm countersunk hole](https://makerworld.bblmw.com/makerworld/model/US8728efa3d3eab4/535851798/instance/2025-11-05_52cff302b0f548.jpg?x-oss-process=image%2Fresize%2Cw_100%2Fformat%2Cwebp)
Description
Boost Me (for free)
This model has been modified and print-verified over 20 times, for aspects like hardware adaptation, weight reduction, adding storage space, no supports, and feel adjustment A large amount of filament was consumed, and various combinations of hardware were purchased For a Fusion 360 beginner who just started, it truly took a lot of effort If it works well for you, please come back and give a boost, if not, please be lenient Thank you everyone 🫶
If printing on behalf of someone, please indicate the source and copy the following information into the product description:
MakerWorld model: Camera Stabilizer
Model ID: 1743493
Author: 0o布娃娃o0 (@0obuwawao0)
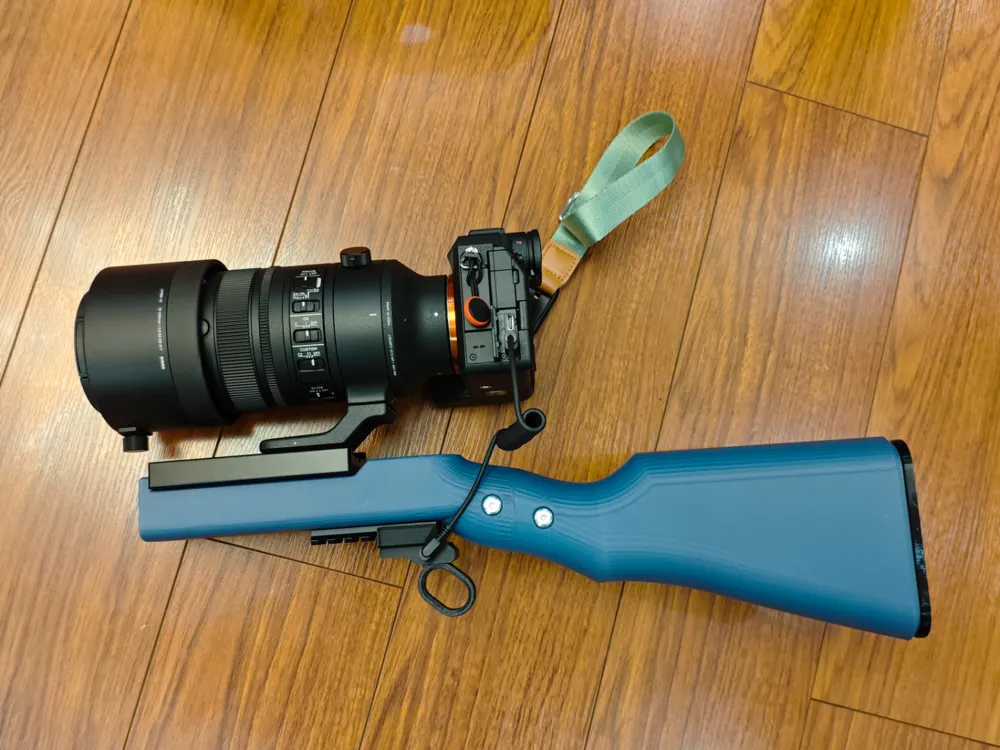
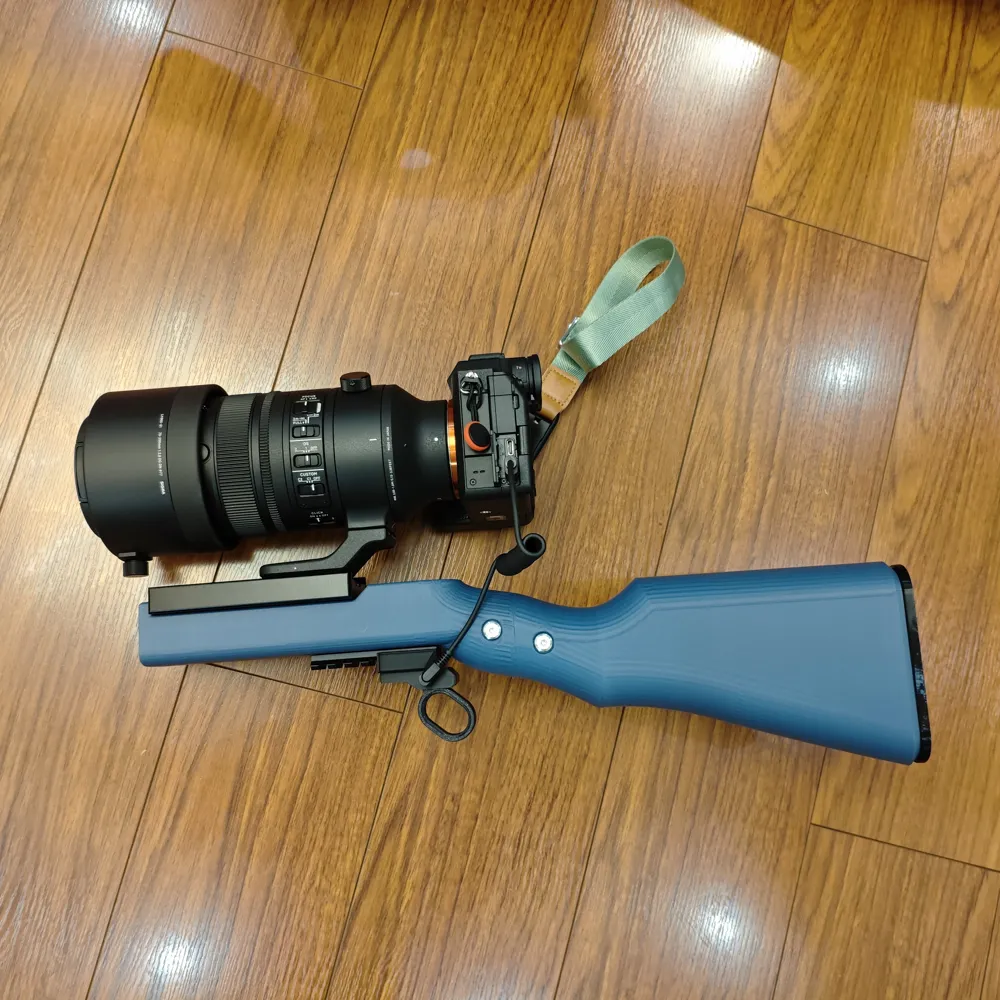
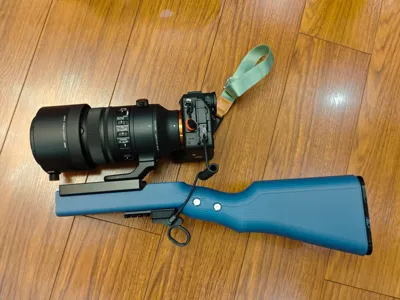
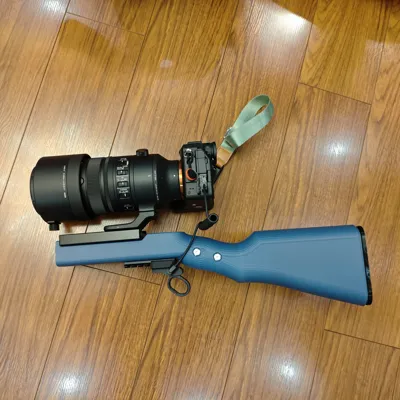
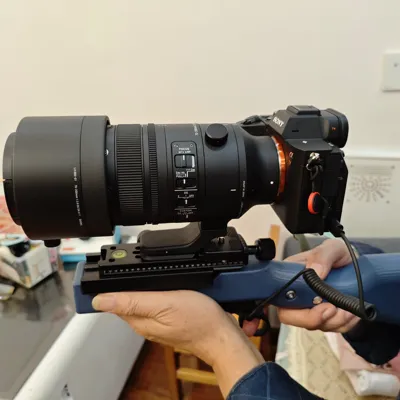
For picnics, camping, travel, and recording the beauty of life, a camera is indispensable To travel everywhere with a camera, a medium-to-long telephoto lens is unavoidable But with the weight of the lens plus the camera body, holding it bare with only two hands will quickly become tiring Especially for low-angle shots, it's awkward to press the shutter in a low posture I hope this camera stabilizer can help you
Model Introduction:
I bought a new camera and a telephoto lens in October, and the weight is very unfriendly and hard to hold So when I was looking for camera brackets on Taobao, I found a “Cangye Camera Stabilizer” and was attracted by its appearance This model drew inspiration from its appearance and was manually drawn During this period, to find suitable hardware, I also purchased many different camera bases and screws Adding these trial-and-error costs, it actually exceeded the price of the finished product itself 😅 Plus my unfamiliarity with Fusion 360, complex internal space drawing, various unsatisfactory prints, I almost gave up, but after more than 20 revisions, I got a relatively ideal result (don't want to change it for now) It's open-source for everyone to use, please be lenient if it doesn't work well
Friendly reminder: Be sure to protect your camera, use a camera shoulder strap or wrist strap as insurance You are responsible for any drops or damage that occur If you use it well, it's also recommended to purchase the Cangye Camera Stabilizer, the wooden finished product looks great The purchase link has been attached to the document
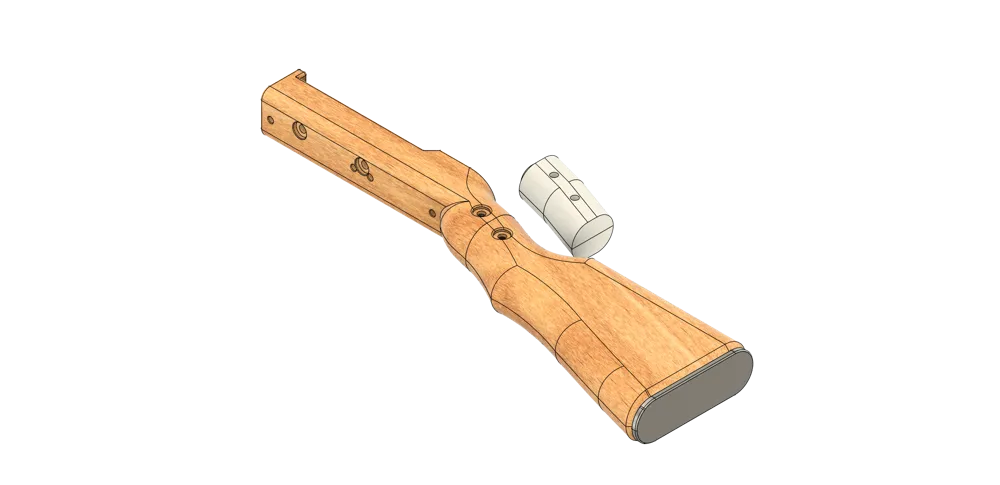
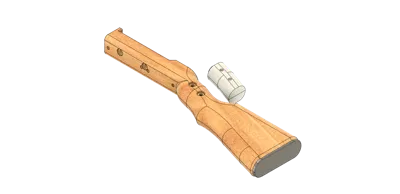
No supports are needed during printing, designed to be internally hollow, [Only the bottom surface of the current pre-arranged plate is designed for support-free printing (if changing the bottom surface, supports need to be enabled, and do not select "generate only on build plate")] Solid printing with a wall thickness of 3mm will increase weight, so when printing, please adjust the number of walls or infill rate as appropriate, according to your own situation, to enhance durability I'm quite concerned about the fit of the screw holes; the few demos I printed were either too small or too loose, and it took a long time to get them right I don't know what everyone's situation is, so friends who have successfully printed it are welcome to provide feedback, and I will make adjustments
Hardware (purchase links attached in the document):
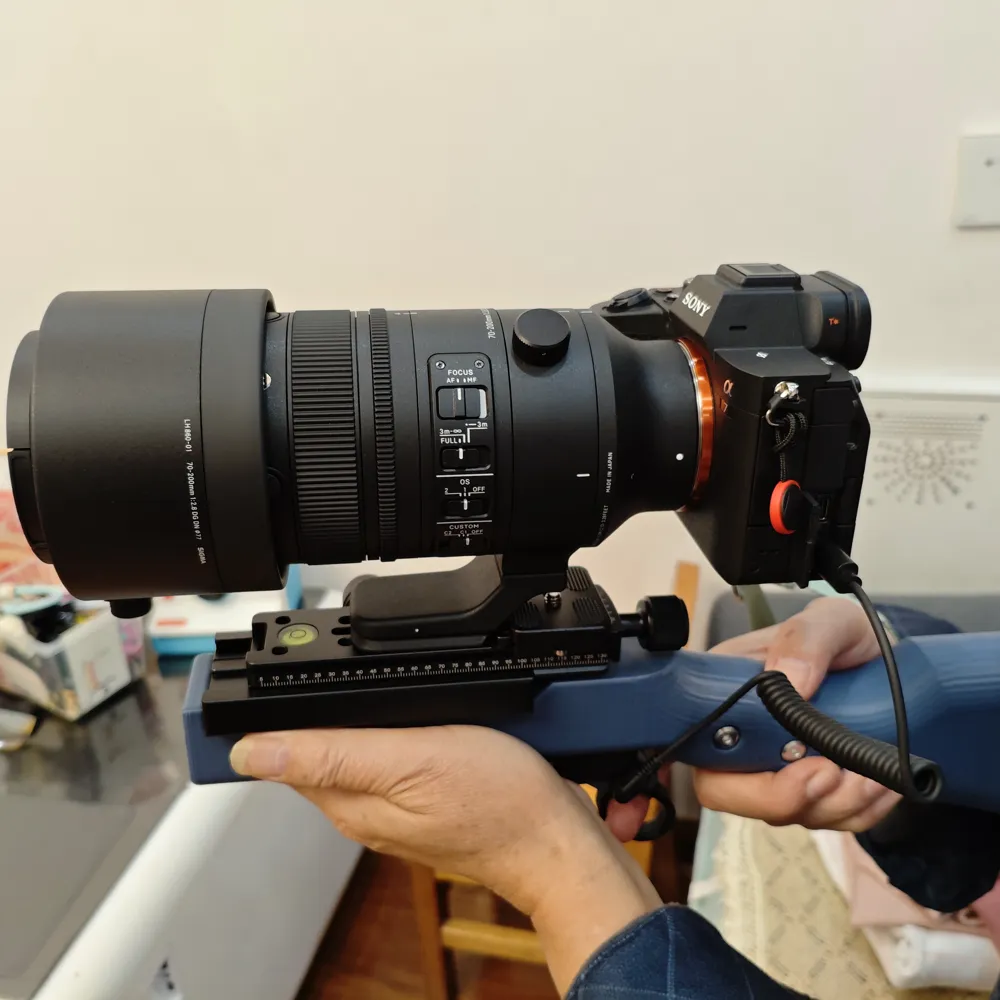
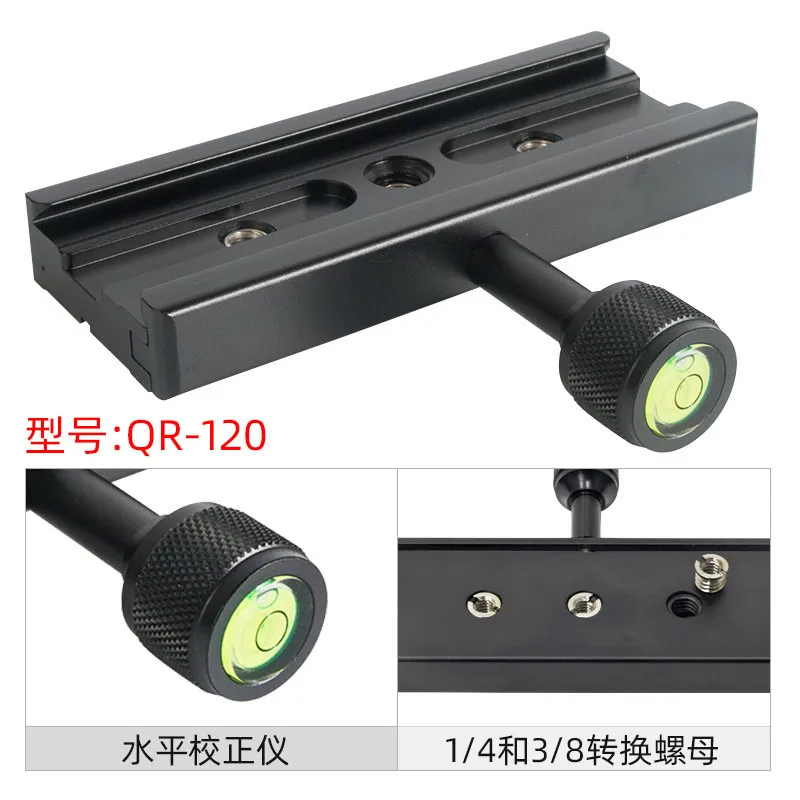
1. Arca-Swiss Clamp 120*38*16mm with at least 2 quarter-inch screw holes, 60mm apart Using long clamps and quick release plates is mainly for conveniently adjusting the camera's center of gravity on the stabilizer
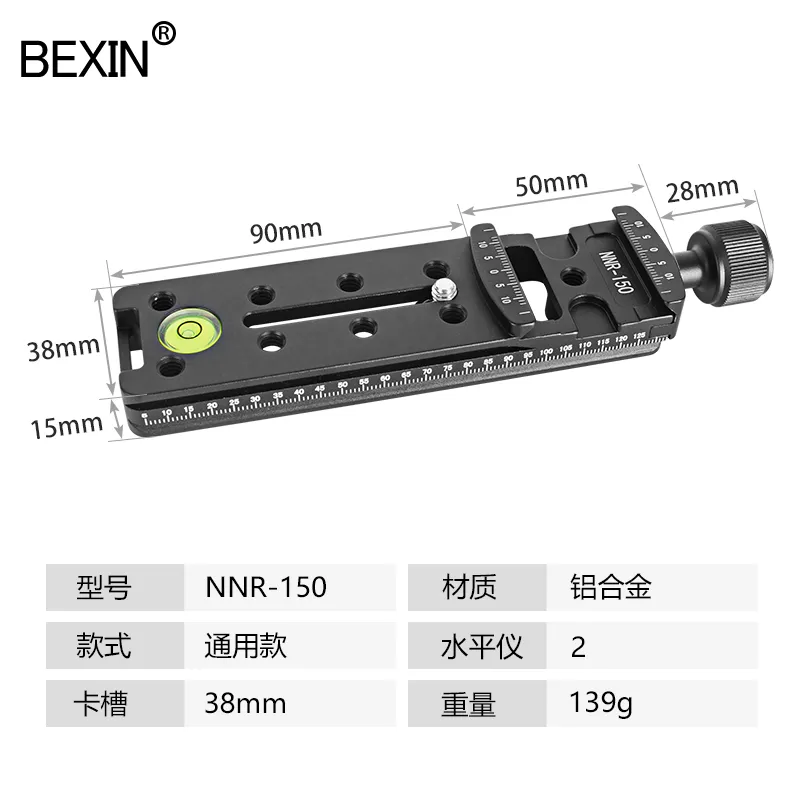
2. Quick release plate to be used with the Arca-Swiss clamp above 150*38*15mm (You can choose different sizes according to your needs, but if it's too long, it will extend beyond the front of the stabilizer)
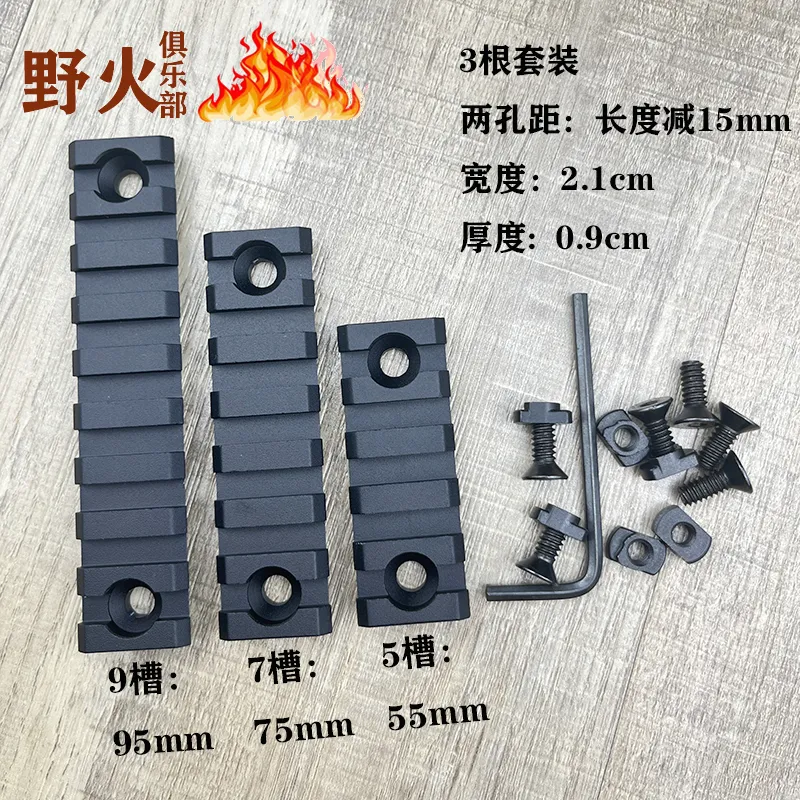
3. Mlok Universal Rail 9-slot 95*21*9mm + 7-slot 75*21*9mm The two sizes of rails perfectly cover the bottom length, Note that the rail's bottom must be completely flat and come with M5 screws (If you care about the feel, you can choose not to install it; the 9-slot Picatinny rail is more flexible)
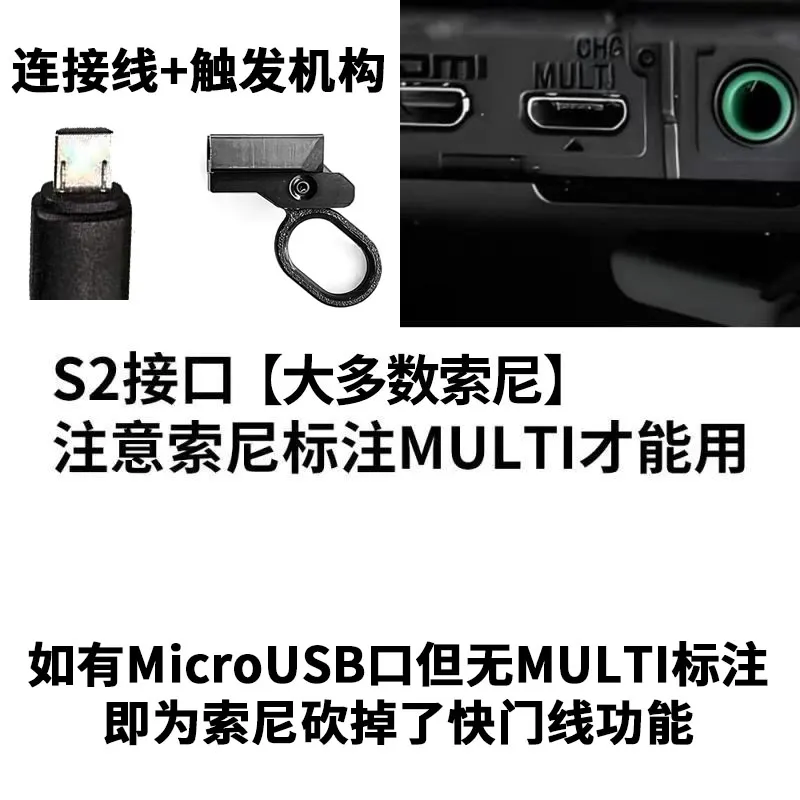
4. Cangye Camera Shutter Release Cable, mine is Sony a7m4 Choose according to your camera model
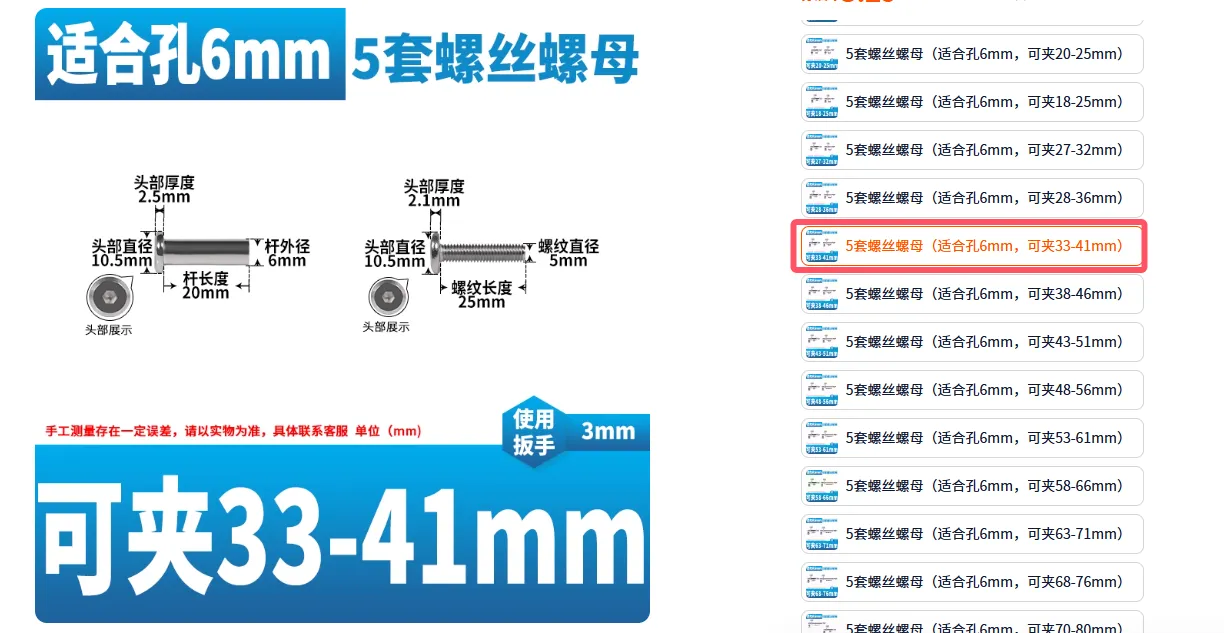
5. Interlocking screws * 2 sets for connecting the foregrip and shoulder stock Note the dimensions as shown in the figure below Pay attention to the options
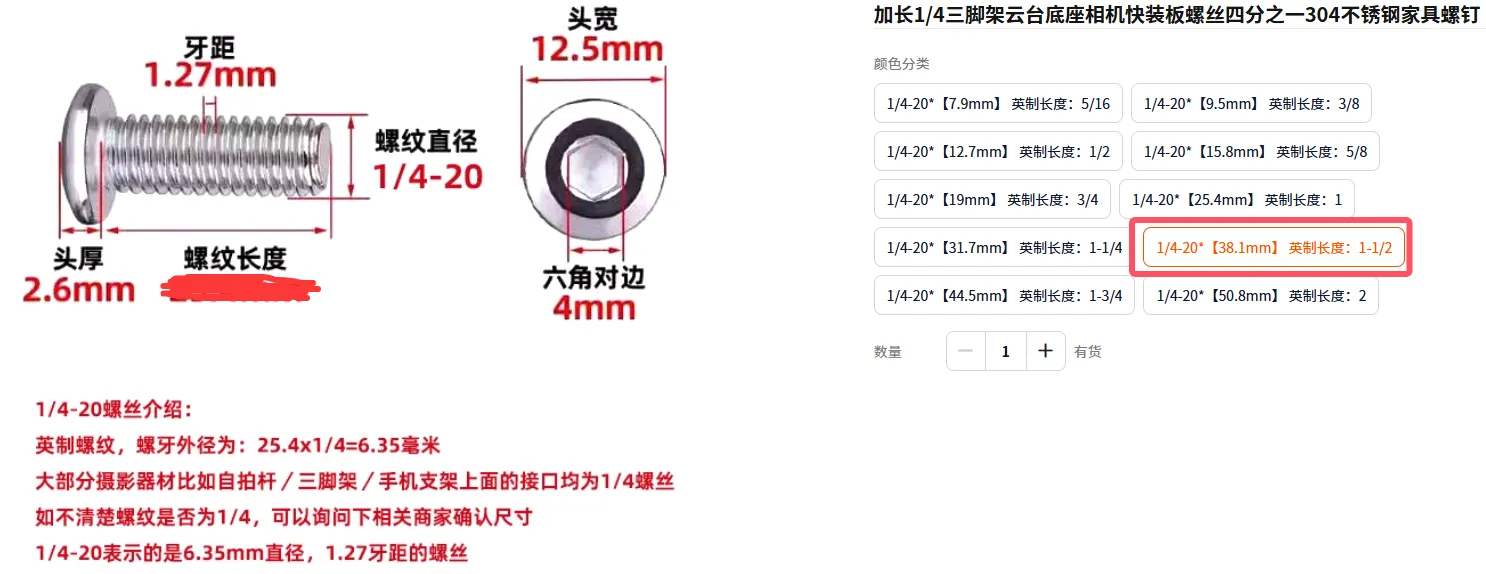
6. Arca-Swiss clamp fixing extended 1/4 screw Head width 12.5mm, head thickness 2.6mm, thread length 31.7mm for longer sliding travel The 38.1mm one I chose can limit the sliding range of the quick release plate, which I feel is very suitable
7. Storage space Magnets 8*3, 8 pieces
The storage space can hold spare batteries, data cables, or chargers (I only have an a7m4, and the original battery fits; other brands are unknown)
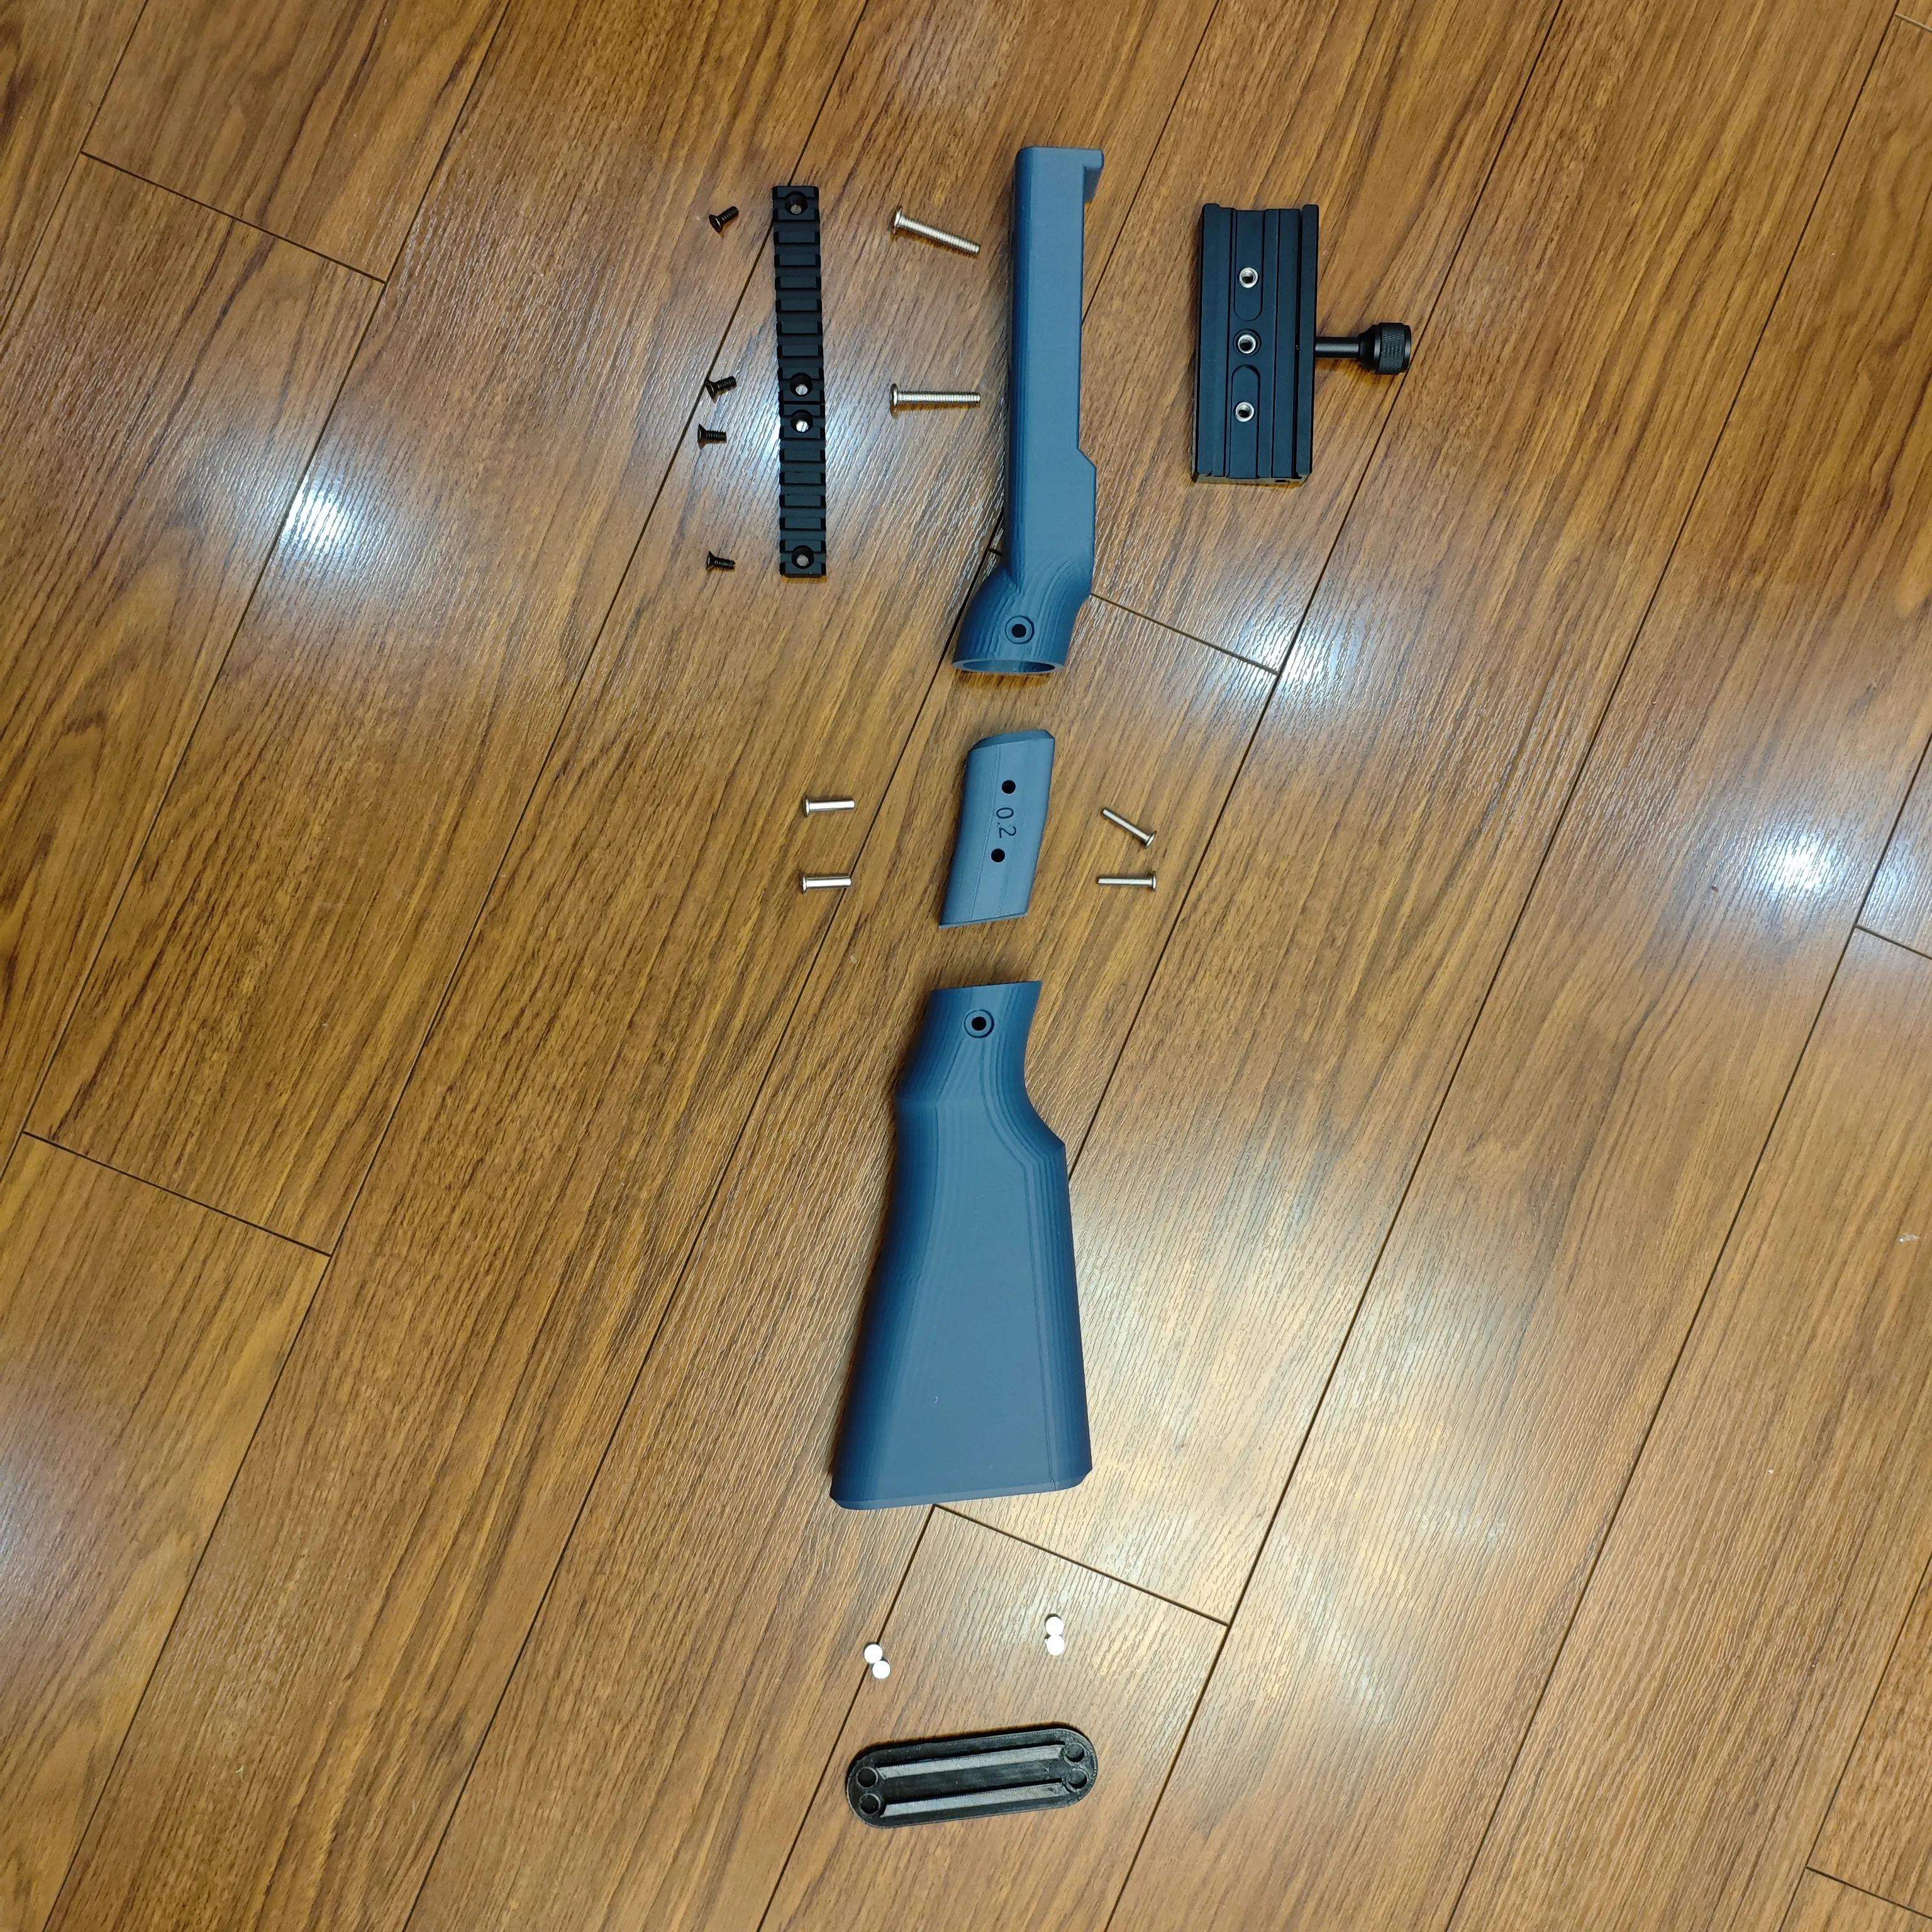
Assembly diagram and effect:
Assembly sequence diagram:
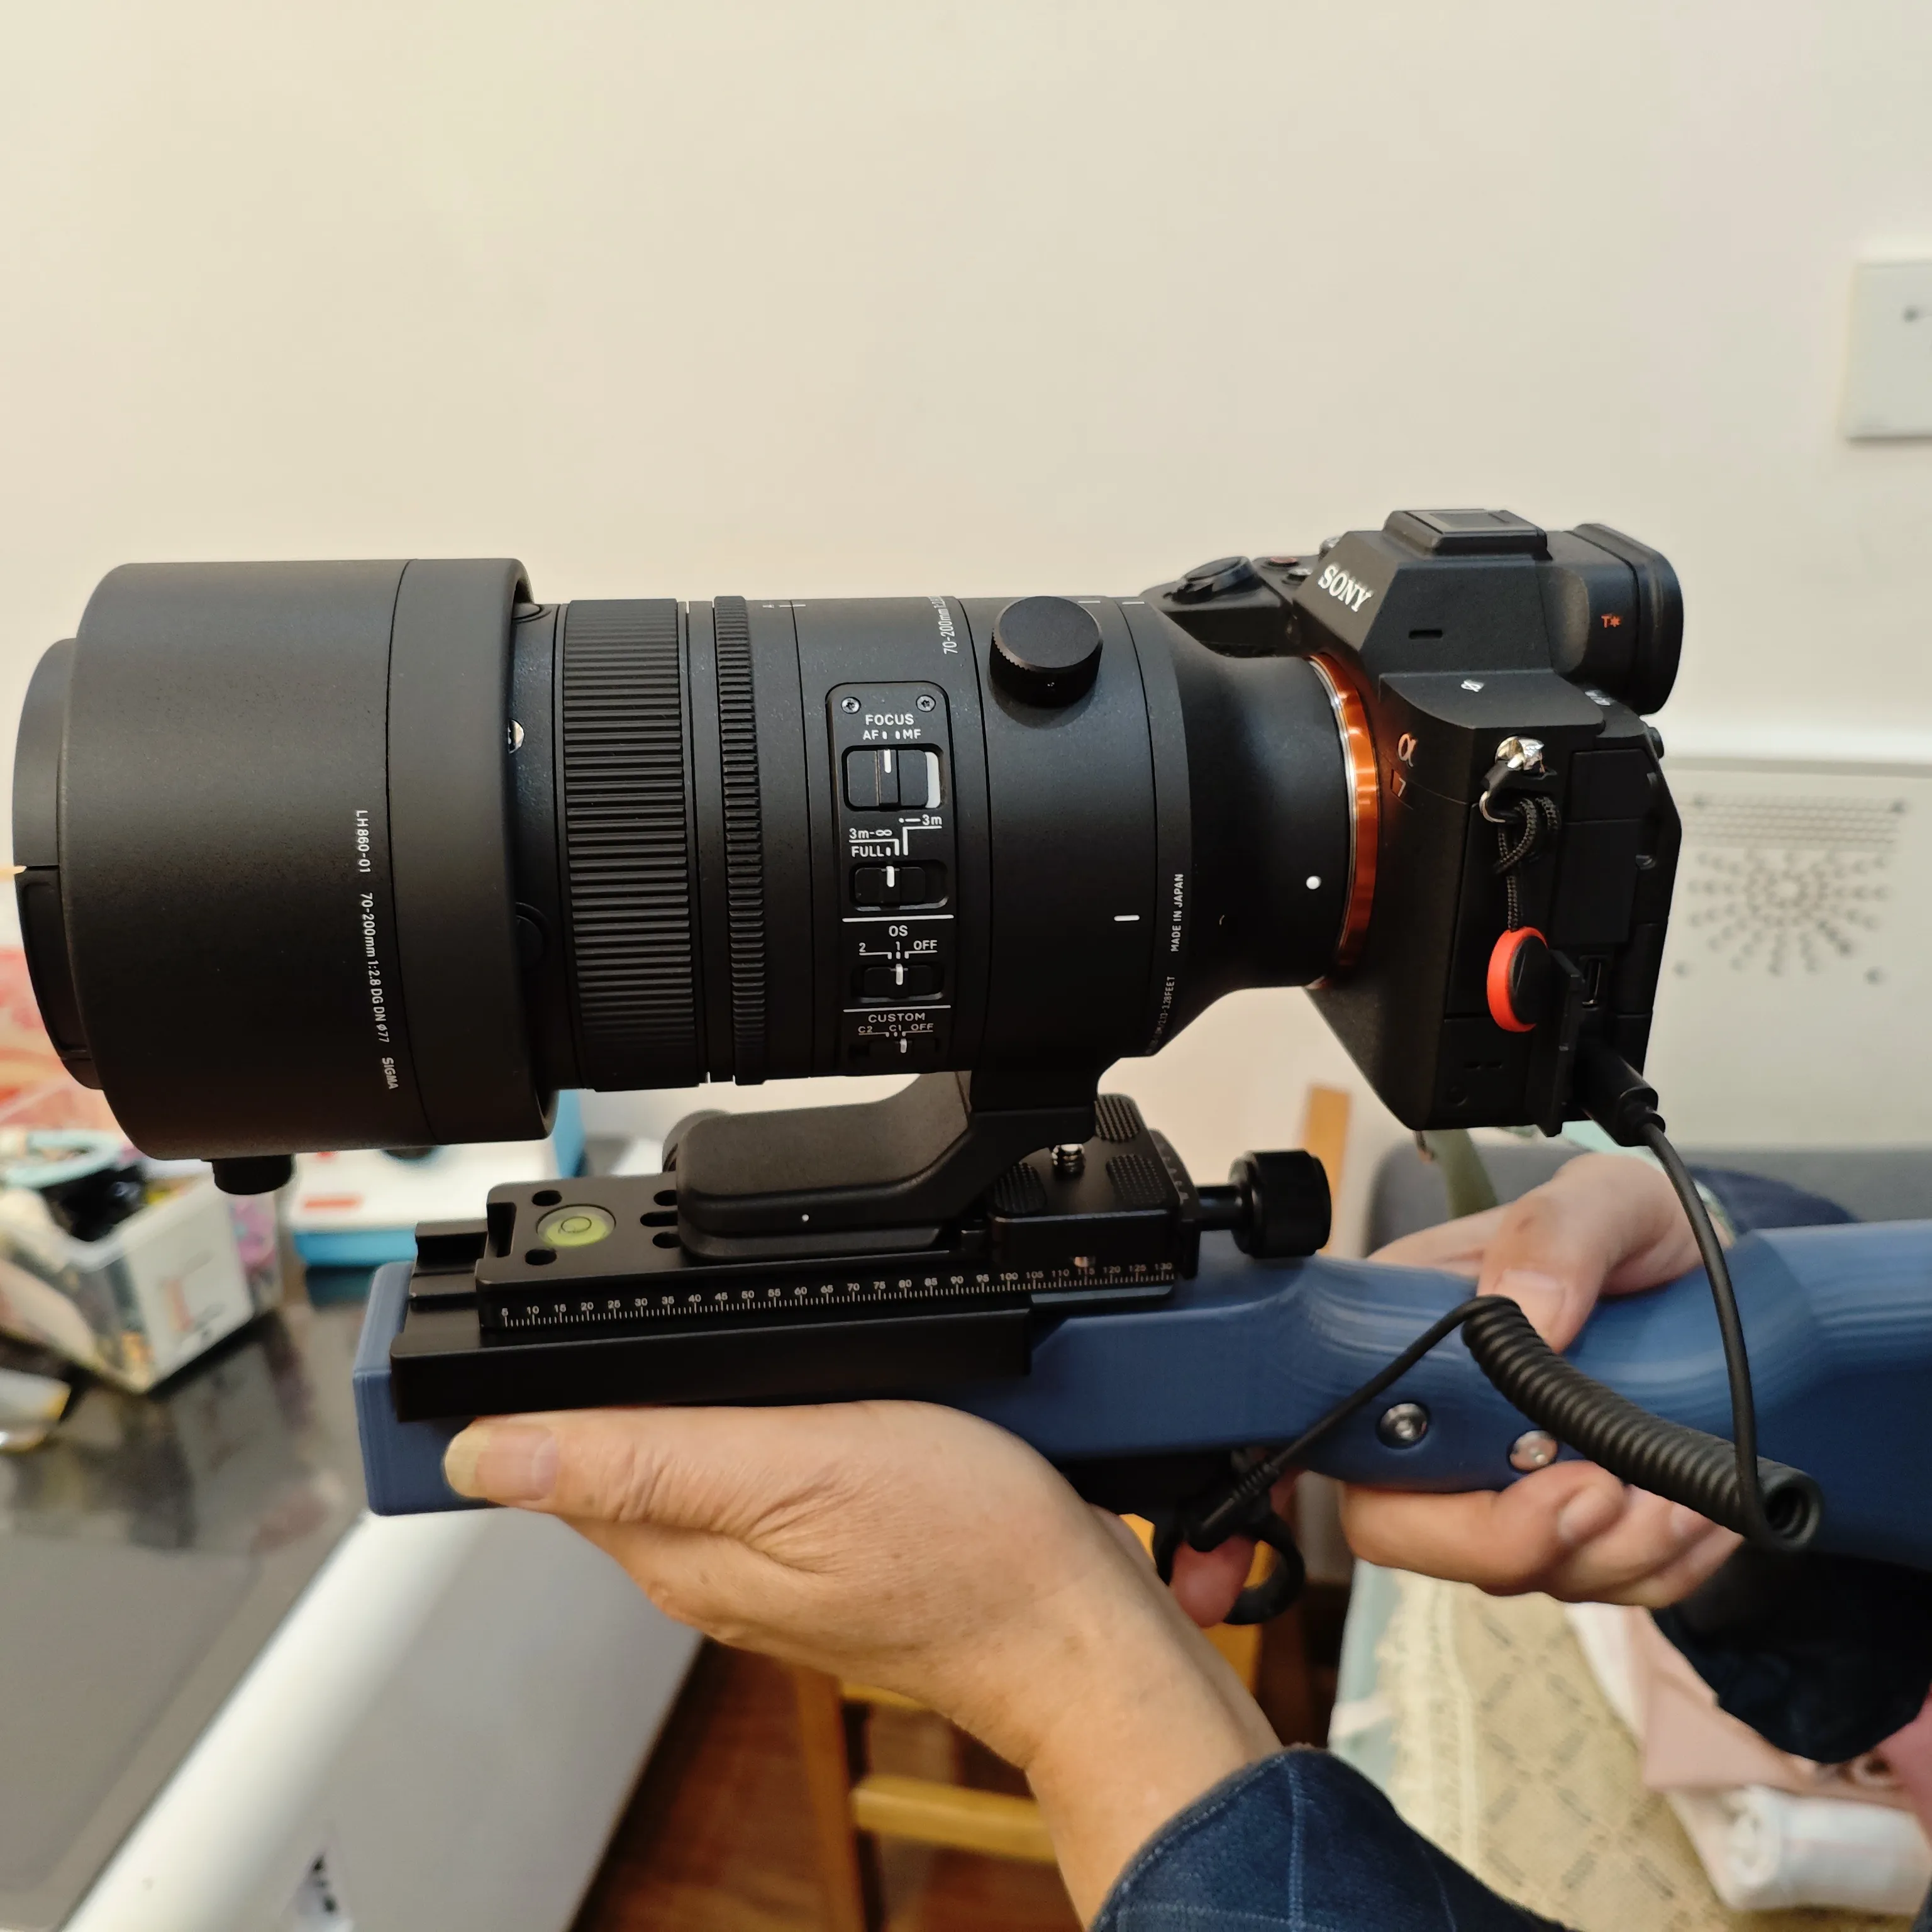
Final effect:
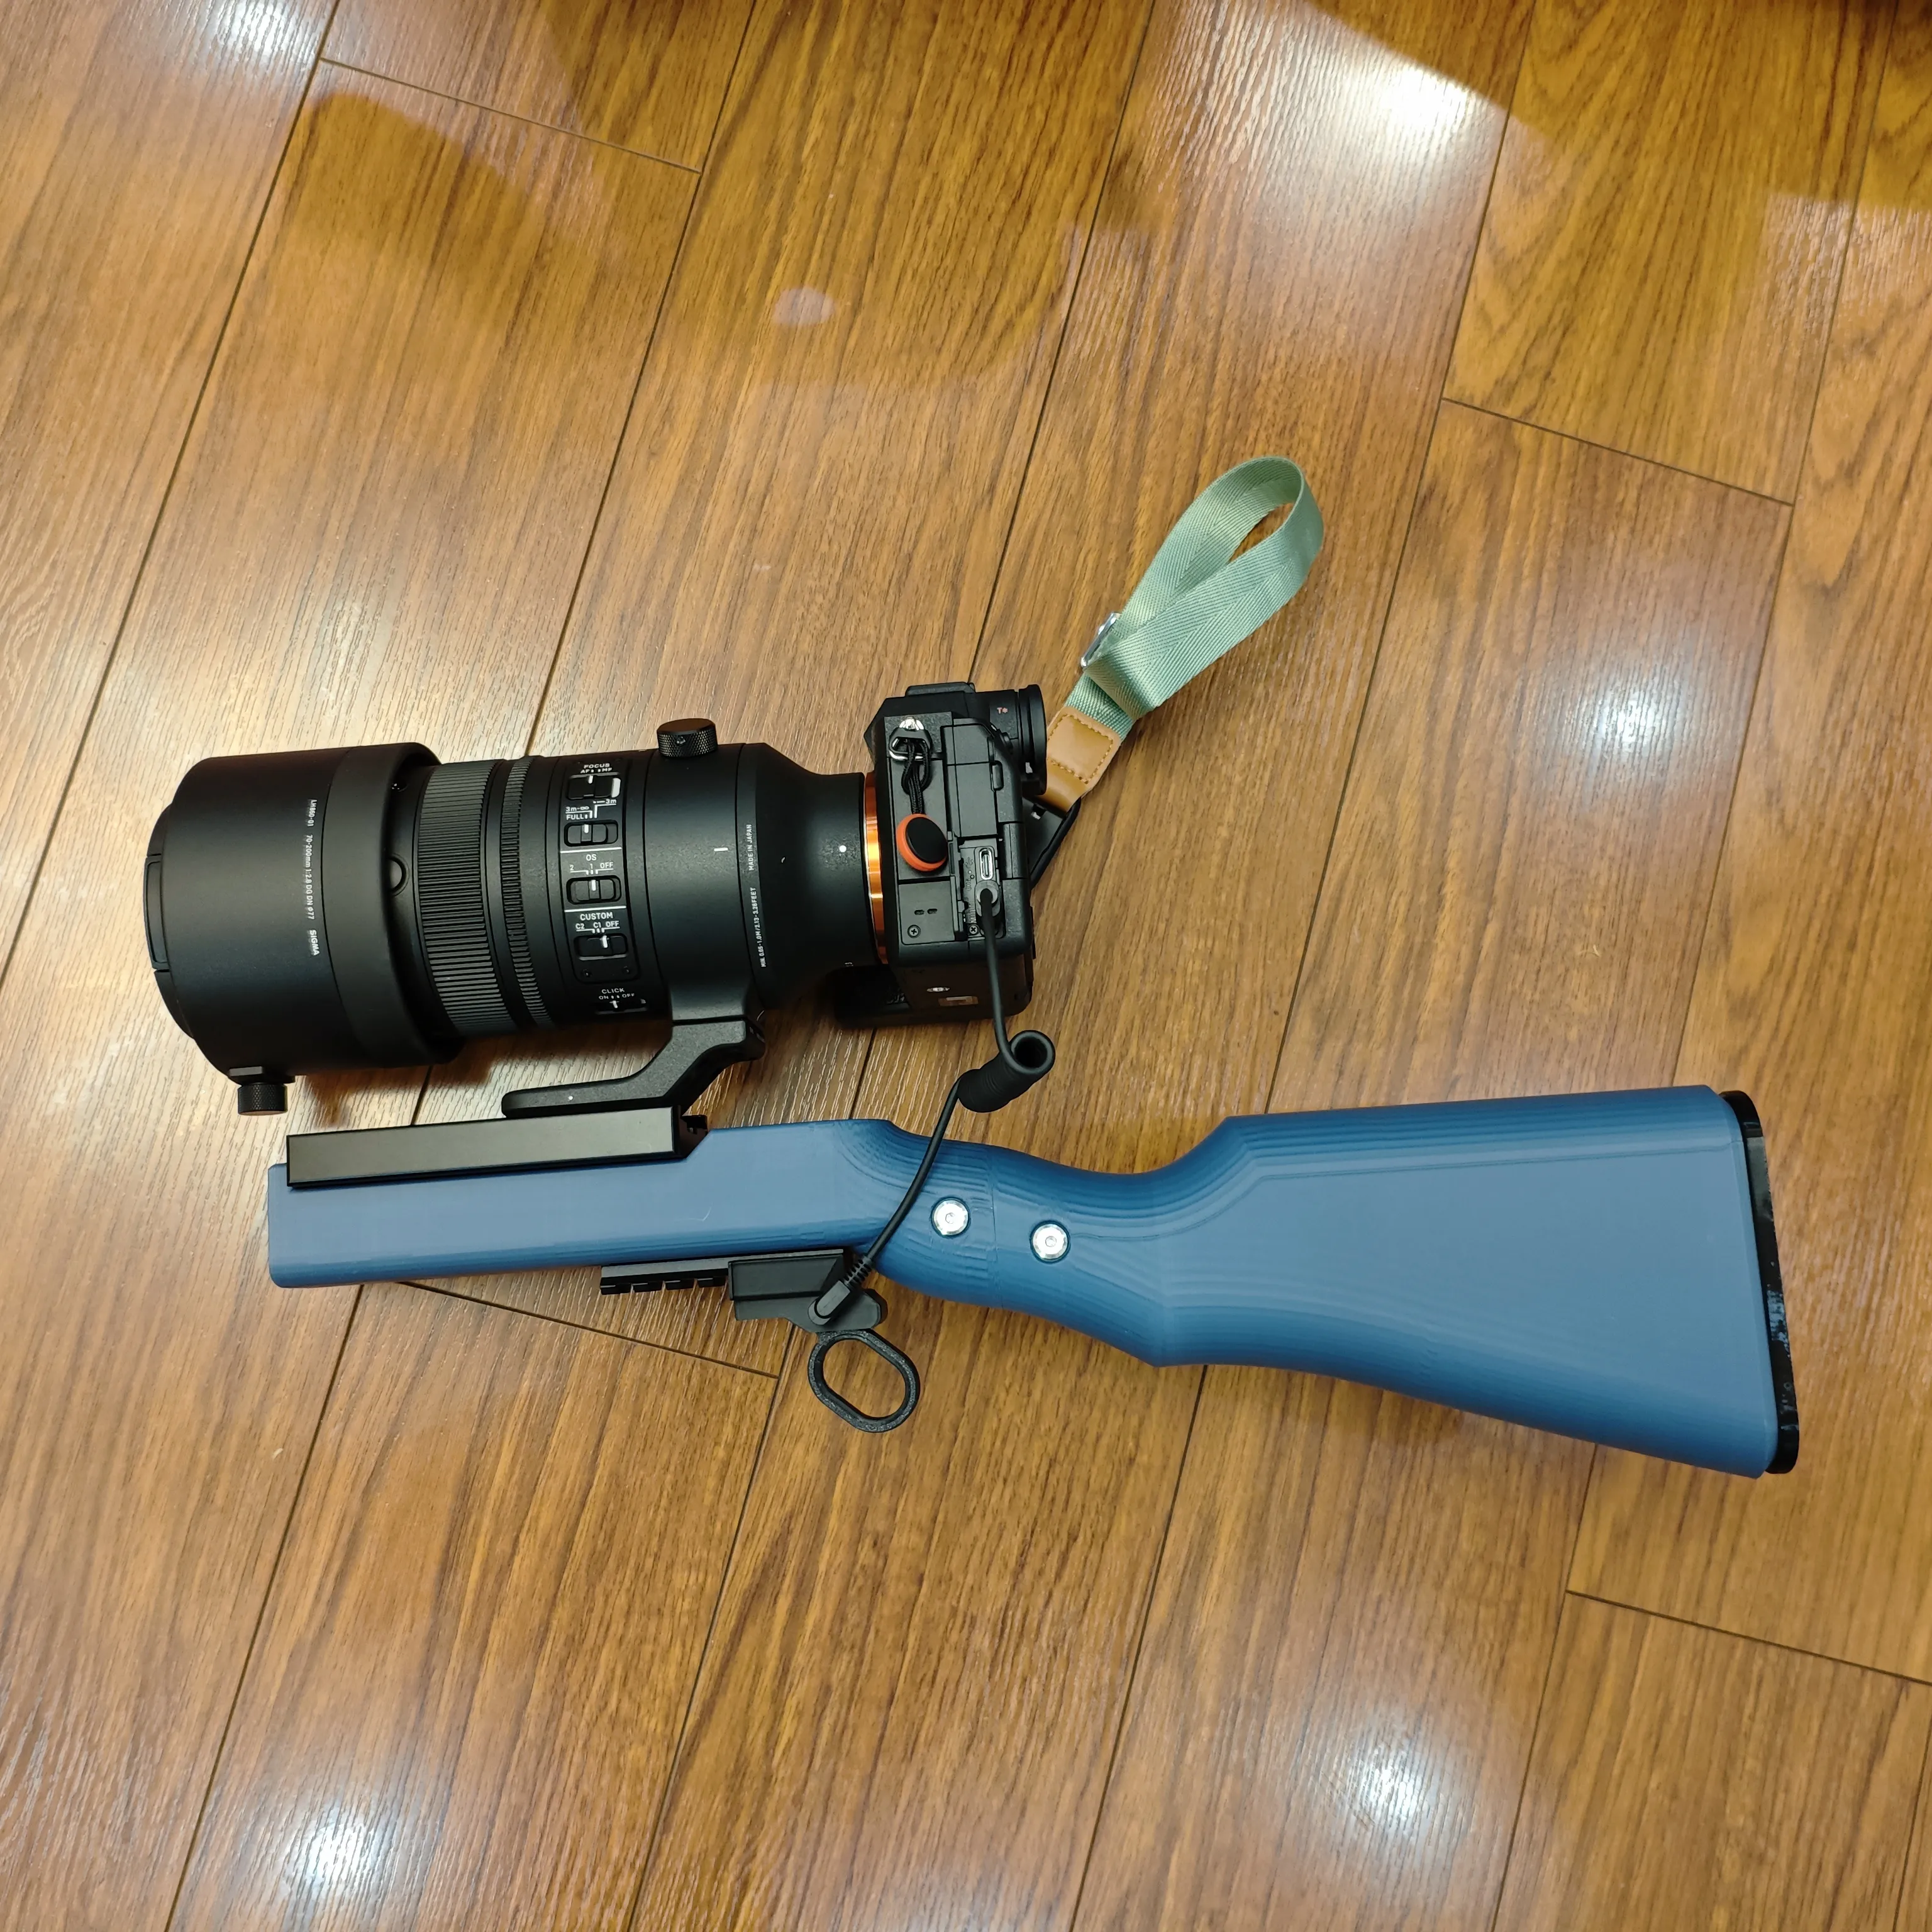
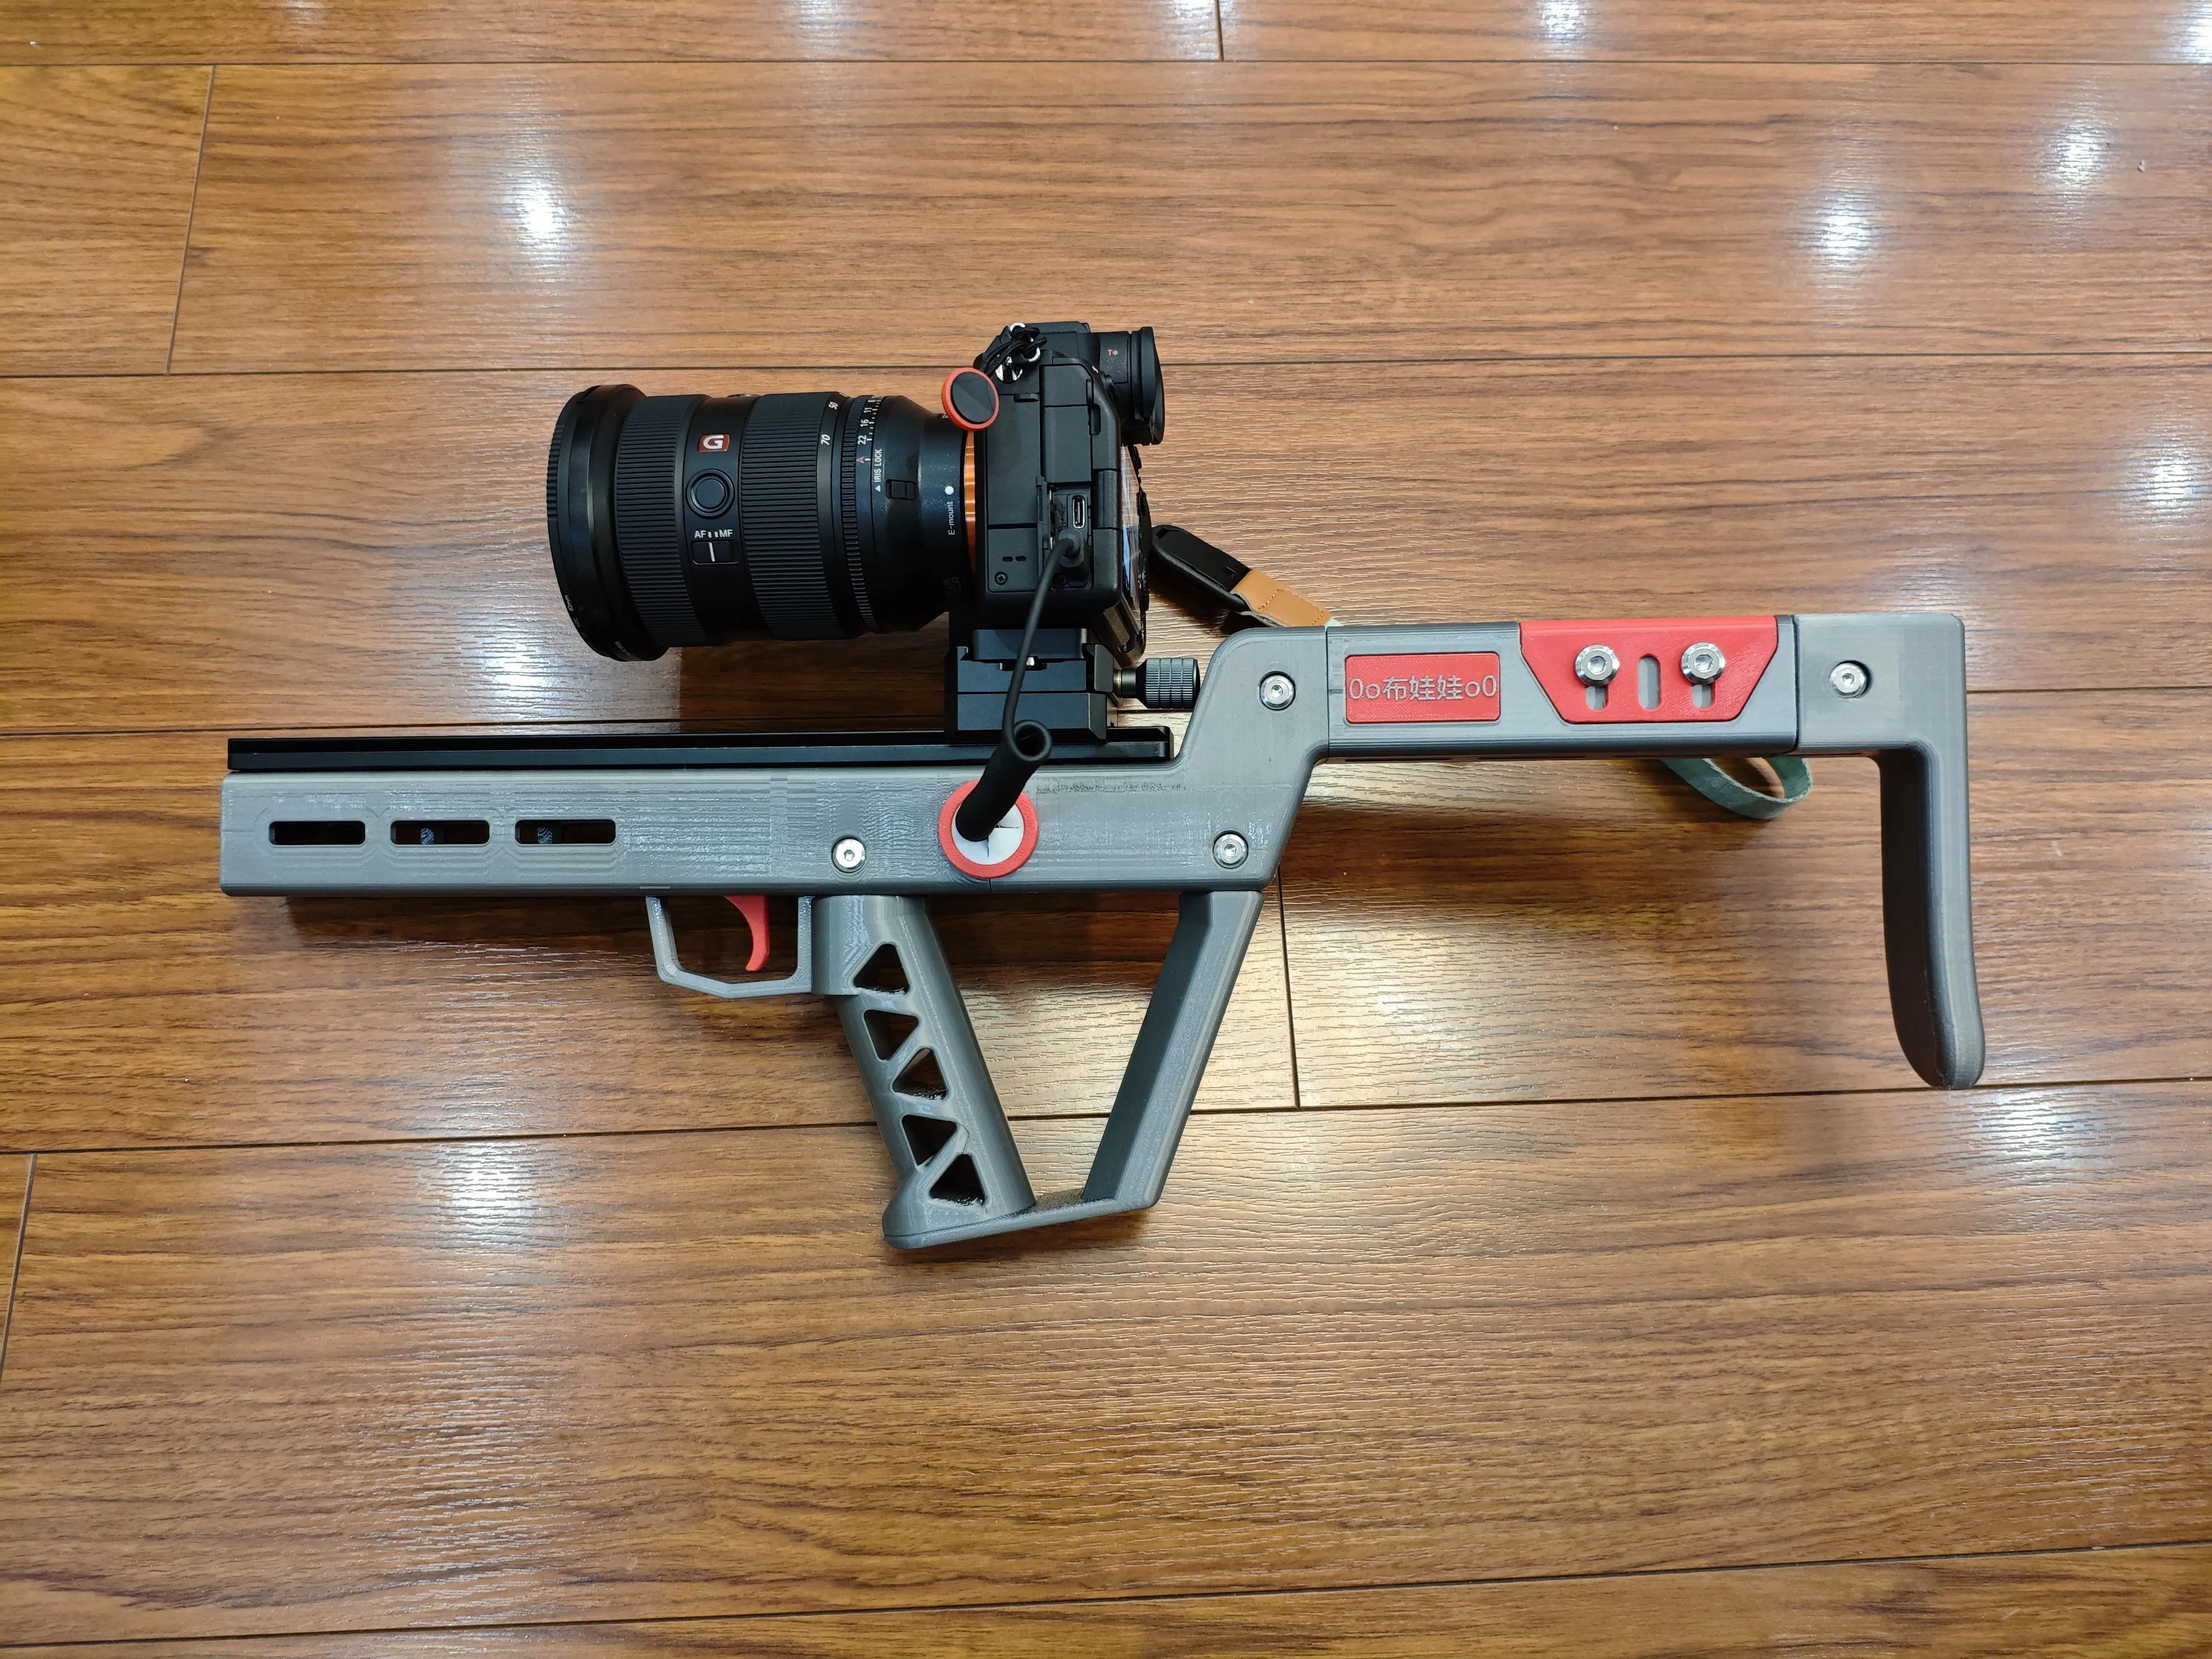
2026-05-13: The second stabilizer is here
https://makerworld.com.cn/zh/models/2497396-xiang-ji-wen-ding-qi-v3#profileId-2858473
International site:
https://makerworld.com/zh/models/2794053-camera-stabilizer-v3#profileId-3107358
Safe Use Guidelines:
1. Use a neck strap or wrist strap for the camera, and make sure the strap is not too long
2. Correctly use the Arca-Swiss clamp and quick release plate, ensuring proper safety stops
3. Most extended quick release plates do not have anti-slip pads between them and the camera; it is recommended to purchase and attach one separately to prevent rotation
4. Whenever using the stabilizer, the lanyard must act as fall protection After all, the equipment's value is greater than the printed part itself!
The STEP file has been uploaded, feel free to modify and optimize; please also upload a configuration here after completion
2026-01-22: Uploaded the STEP file for the trigger mechanism, making it convenient for hands-on friends to create their own shutter release cables
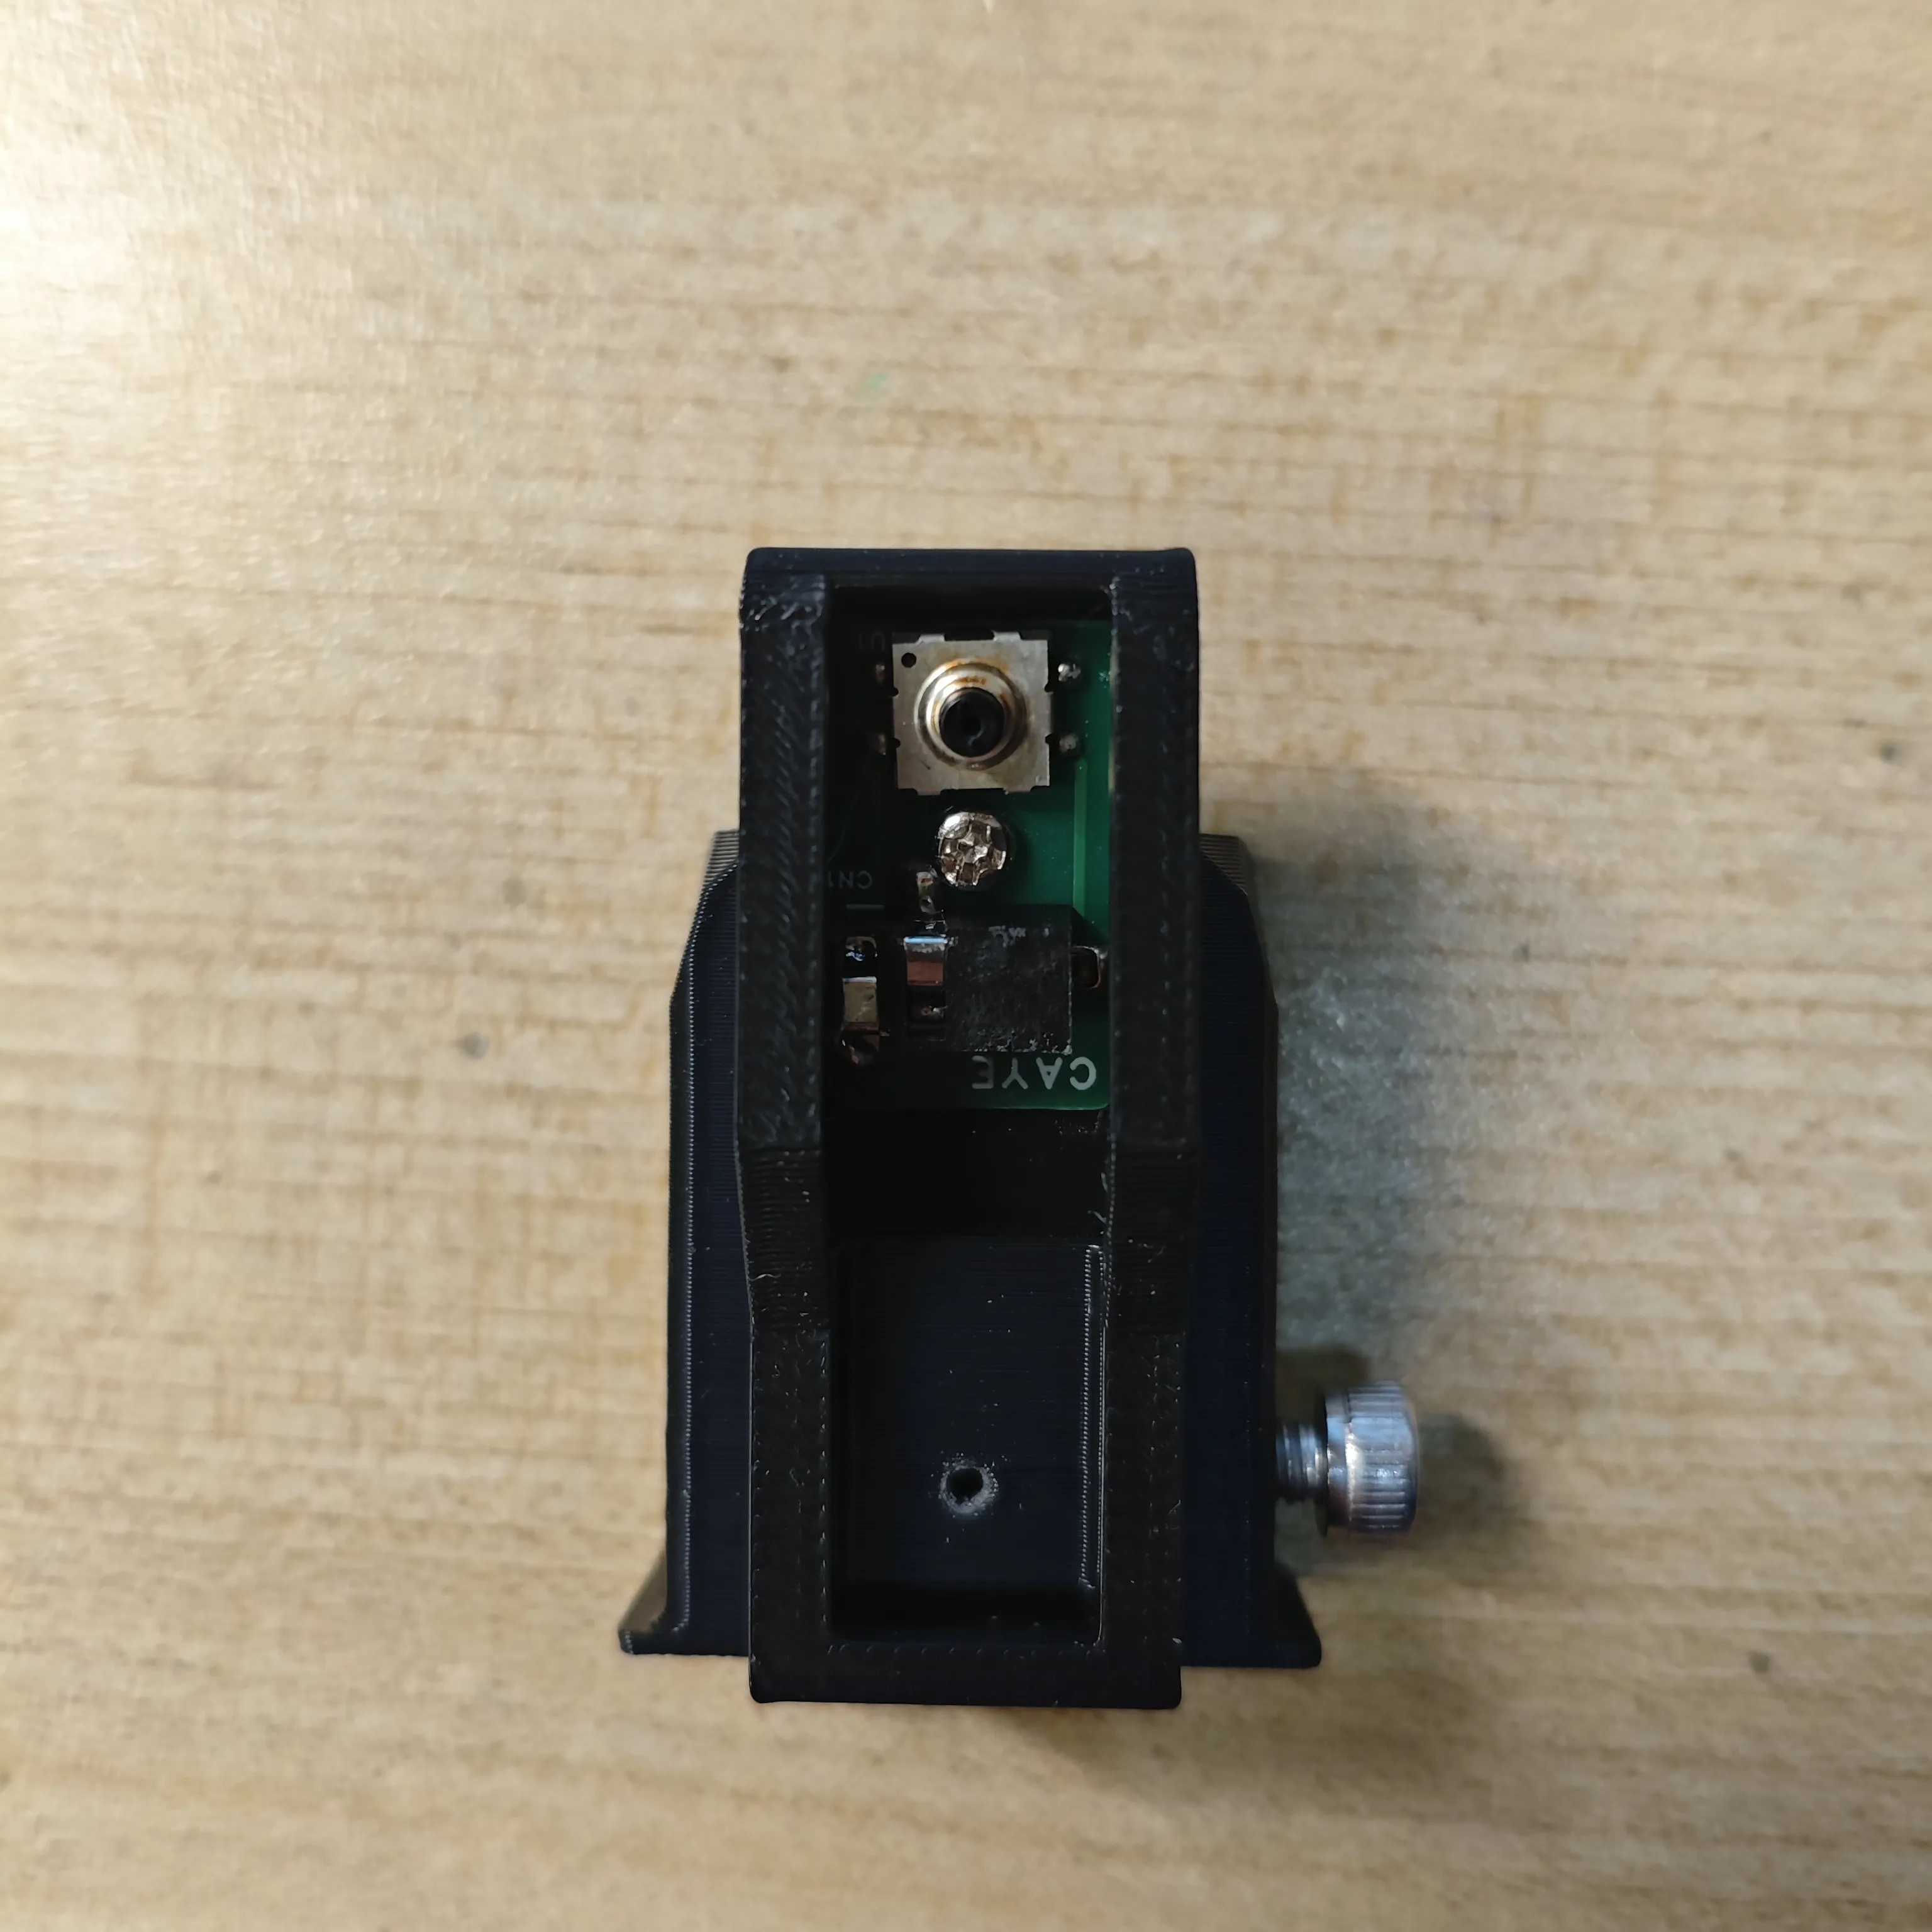
2025-12-25: print profile update, Picatinny rail screw holes changed from 4.8mm to 4.5mm-4mm flared holes
Thanks for the feedback from friends (STEP not modified)
Boost Me (for free)
Having seen it to the end, please support me 🫶
Documentation (1)
License

You may create derivative works based on this object, provided that all such derivative works are published exclusively on the MakerWorld platform and include proper attribution to the original creator. You may not share, upload, host, distribute, or publish this object—or any derivative work of this object—on any other digital platform, marketplace, or distribution channel. Commercial use of this object and any derivative works is strictly prohibited. This includes, but is not limited to, selling, renting, sublicensing, or using the object in any context in which you receive monetary compensation or other financial benefits.


Comment & Rating (3)