Neptune 4 Silent Hotend Mod
Remixed by
Copyright Claim
Neptune 4 Silent Hotend Mod
Remixed by
Boost
4
7
0


Print Profile(0)
Add the first print profile to earn points
Boost
4
7
0
0
1
0
Released
Description
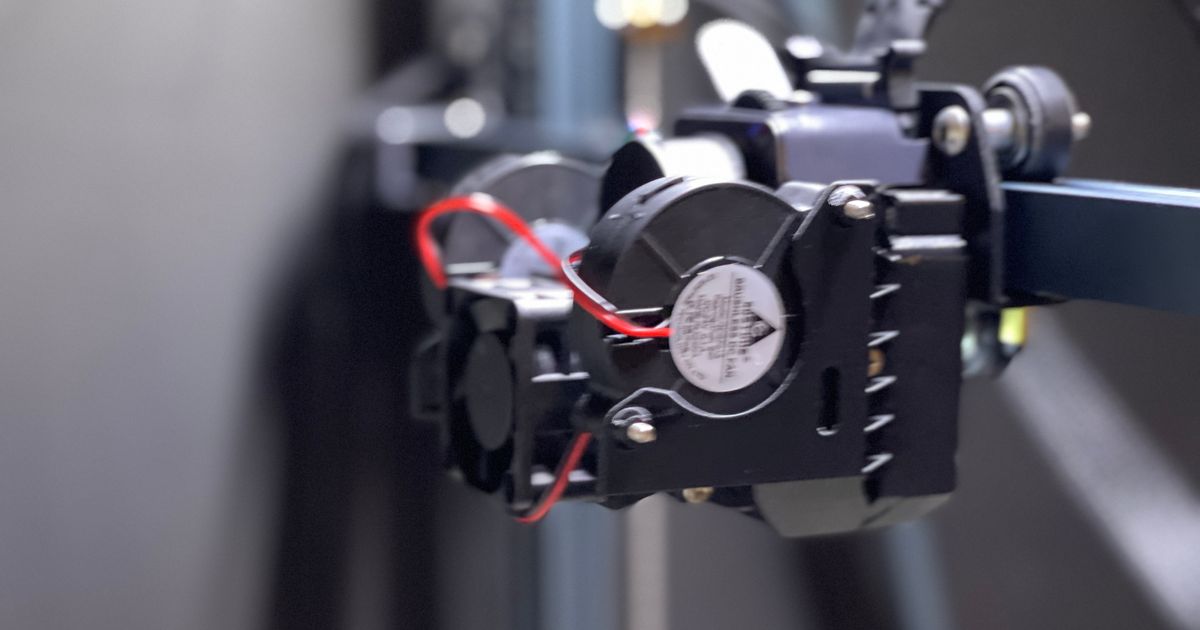
If you were following on the Elegoo discord this is PsychItsMike, several of us have been working on this project for a few weeks now, Jungle posted his wonderful work recently, these are my personal changes.
Changes from JungleG1337's version:
- Thickened several areas, especially the support structure and mounting locations
- Thickened mount for LED light significantly and other screw areas on the 4020 fan mount
- Tightened hole size on heat-set inserts and regular screw holes
- The heat-set inserts were far too loose before, now you actually have to heat up your inserts and melt them in place. I also found the screw holes to be too loose, barely catching on m3 screws, now it's a tight fit, your mileage may vary depending on tolerances.
Compatibility
- This is tested on my Elegoo Neptune 4 Pro. As far as I can tell it will also work on the Neptune 4, 4 Plus, and 4 Max
Everything you need:
- Check out this bill of materials: https://docs.google.com/spreadsheets/d/15IdDd8h8FA0Fvt1MASDWcvsHo8MCbr7nRf7lmk_D0Cs/edit?usp=sharing
- The yellow highlighted options are those that I purchased and installed, there are plenty of alternatives
- Most importantly, you'll need: 2 5015 blower fans, 1 4020 radial fan, some m3 screws, and m3 threaded heat-set inserts. You'll also need some way of wiring the fans to JST ZH1.5 connectors
- I would not recommend splicing and soldering the new fans to your old fan wires, just in case you want to revert to the stock setup
- You can buy connectors and crimp them or, like I did, you can buy connectors with wires attached and splice/solder those to the fan wires
Installation steps:
- First, order the items described above in the bill of materials
- Total for my parts is $56, though keep in mind this includes items like a soldering iron and pack of m3 screws which you might already have (and are very useful for other projects)
- Print each of the 4 files, only the left side piece requires supports, and touching build plate only should be fine
- With your original hotend setup, reset your z-offset to a very safe high number, something between positive 0-1mm. This way if the sensor isn't in the exact same position, you'll avoid smashing your nozzle into your bed
- Disassemble your hotend, there's a video on Elegoo's Youtube channel if you're having difficulties
- Basically it's 4 screws on the back of the hotend, and a bunch on the bottom to release the fans and LED light
- Cut and strip some wire on your new fans, and plug in a ZH1.5 connector, connect to the wires by hand to check the polarity (some fans use the reverse polarity of Elegoo's, and my connectors actually had the colors switched as well)
- You'll have to turn on your printer and set a fan speed, you can set your nozzle to preheat to any number (like 10) to turn on the hotend fan
- When you have the polarity figured out, solder your wires together
- Install your heat-set inserts by heating them up with the soldering iron (or your nozzle if you're desperate), and set them in place with tweezers
- Attach the left, middle, and right printed pieces together with 2 m3 screws per side
- Attach the 4020 fan to the middle piece, and add the clip-on fan guard to make sure the blades aren't hit when turned on
- Attach the auto bed level sensor to the left piece, and the LED light to the middle piece
- Mount the side pieces with the m3 screws near the top. There's some wiggle room up and down on each side to adjust the location, I found it best to lower the z axis until the nozzle was on the bed, then adjust until the fan outputs were barely above the nozzle
- Lastly, install the 5015 blower fans into the left and right pieces and screw them in from the outside in, with a nut on the inside (you can go the other direction if you install these earlier, but then it's difficult to reach the screw to mount the left and right pieces to the x-axis)
- Power on the printer and go into level mode. Adjust your z-offset, then do a test print
- Set fan speed to 50% and never look back, enjoy blissful quiet printing at high speeds
Results:
- This hotend setup is FAR quieter than the stock setup, without even considering the rear blower.
- This setup has considerably more airflow, making the rear blower fans unnecessary
- This setup is heavier than the stock setup, coming in around 135 grams compared to 101
- Here are videos I took with the stock setup and this upgraded setup to compare noise levels (notice how on the upgraded setup you can actually hear the motor noise)
Comment & Rating (0)
All
No more
This remix is based on
License
This user content is licensed under a
Creative Commons Attribution-Noncommercial-Share Alike


© 2024 MakerWorld