Search models, users, collections, and posts

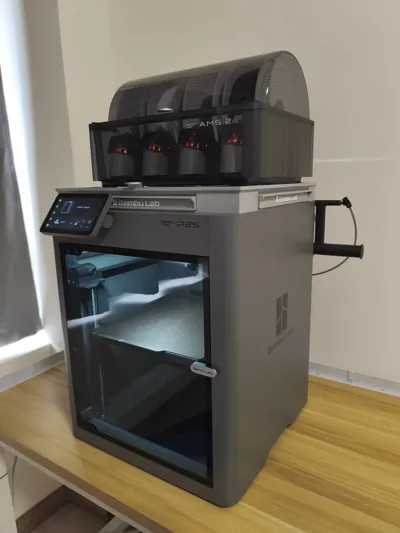
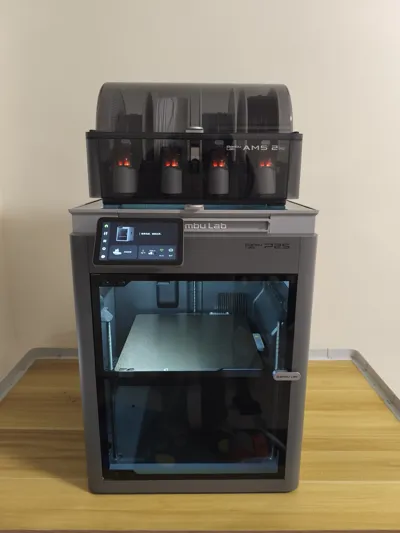
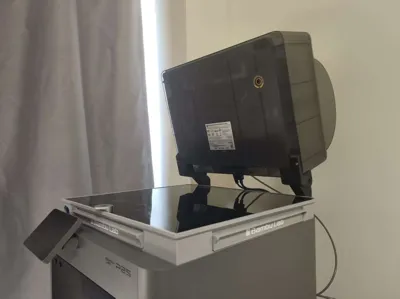
X2D P2S Riser AMS riser

Print Profile(6)

All
P2S
P1P
X2D
A1
X1E
X1
H2D Pro
P1S
H2C
X1 Carbon
H2S
H2D
A2L
A1 mini

X2D P2S HMJ Riser
X2D P2S HMJ Riser
Designer
12.3 h
3 plates
4.9(132)

X2D & P2S HMJ Riser Hole-Free Version - PETG (no magnets needed, no logo)
Designer
7 h
1 plate
5.0(2)

X2D & P2S HMJ Riser No-Hole Version - Petg (no magnets needed, with logo)
Designer
8 h
1 plate

X2D & P2S HMJ Riser Buffer Pad (TPU)
Designer
2.1 h
1 plate
Click to see more

Open in Bambu Studio
Boost
551
1992
224
148
1.6 k
681
Released 

Description

Content has been automatically translated.
Show original

Key advantages of the X2D P2S riser:

  • Maintains a 38mm riser design to prevent rubbing against the filament tube
  • Easy to print, saves filament, main body can be printed in one go
  • Perfect fit, elegant appearance, no additional sanding or adjustment needed
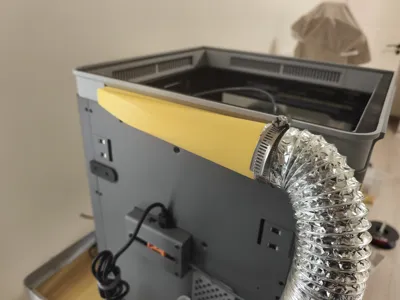
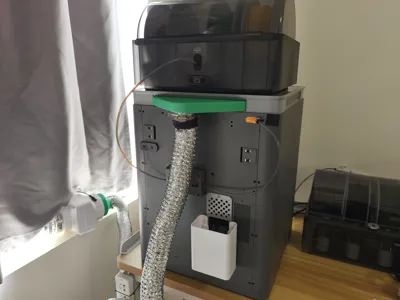
  • Supports external exhaust systems, with multiple exhaust directions to choose from
  • Supports AMS Flipper, allowing the top glass lid to be removed without disassembling the AMS

Boost Me (for free)

Hope everyone likes this work

Accessories to purchase:

  1. 48 circular magnets, 6mm in diameter and 3mm thick [at least 48 are needed, but it's better to buy more, no need for N52 strong magnets, regular magnets will suffice], a print profile without cooling holes is now available, if you don't want to buy magnets, you can try this version
  2. 15mm wide, 1mm thick 3M EVA single-sided foam tape You can also print the TPU buffer pads I released, if you have TPU filament, you won't need to buy EVA foam tape


⚠️Important Warning

Currently, based on user feedback and my own tests, X2D and P2S have inconsistent top dimensions; some are wider, some are narrower. It is currently speculated that this is due to machine assembly issues or actual changes in machine dimensions. This leads to some users finding it a perfect fit, while others find it too wide

A very small number of users have reported that the riser is too wide to be used. Special thanks to MakerWorld user soly for helping me measure the machine dimensions, and he uploaded a print profile with shortened corners. If you cannot use the riser after correct assembly, then simply reprint soly's four corners and replace the default ones

X2D P2S Riser Feature Update


Modified flipper supports X2D and P2S


  • Added support for AMS Flipper, this accessory allows you to remove the top glass lid without disassembling the AMS, making maintenance easier

  • Newly added support for X2D filament changer, and compatible with Bambu Lab's official changer bracket
  • For detailed installation instructions, click the link below to find the original author's page, click the link to download the flipper adapter file, the adapter file is shown in the image above (Note that the profile picture ID should be consistent with mine)https://makerworld.com.cn/zh/collections/2572744-hmj-riser-system-hua-miao-jun-zeng-gao-zhi-jia-xi

X2D P2S Riser Installation Tutorial


The main body can be printed in one go, directly download the 3mf file for direct printing


The installation has been slightly optimized with added anti-error design; simply install the two identical adjacent parts at the top together


After installation, as shown in the figure, some users may experience incorrect installation, leading to it being unusable. This is due to incorrect installation of the four corners, because the middle section has consistent length but the length and width of the four corners are inconsistent. This part is very prone to incorrect installation. If it cannot be used, please carefully refer to this diagram for installation


The placement of the 3M EVA tape is as shown in the figure. The tape acts as a buffer layer for the glass lid, preventing direct contact between the glass lid and the riser cooling bracket, and also makes closing the glass lid quieter


Of course, you can also print the TPU buffer pad print profile I released. If you happen to have TPU filament, you won't need to buy EVA foam tape. When using it, stick the TPU buffer pads with double-sided tape to prevent displacement

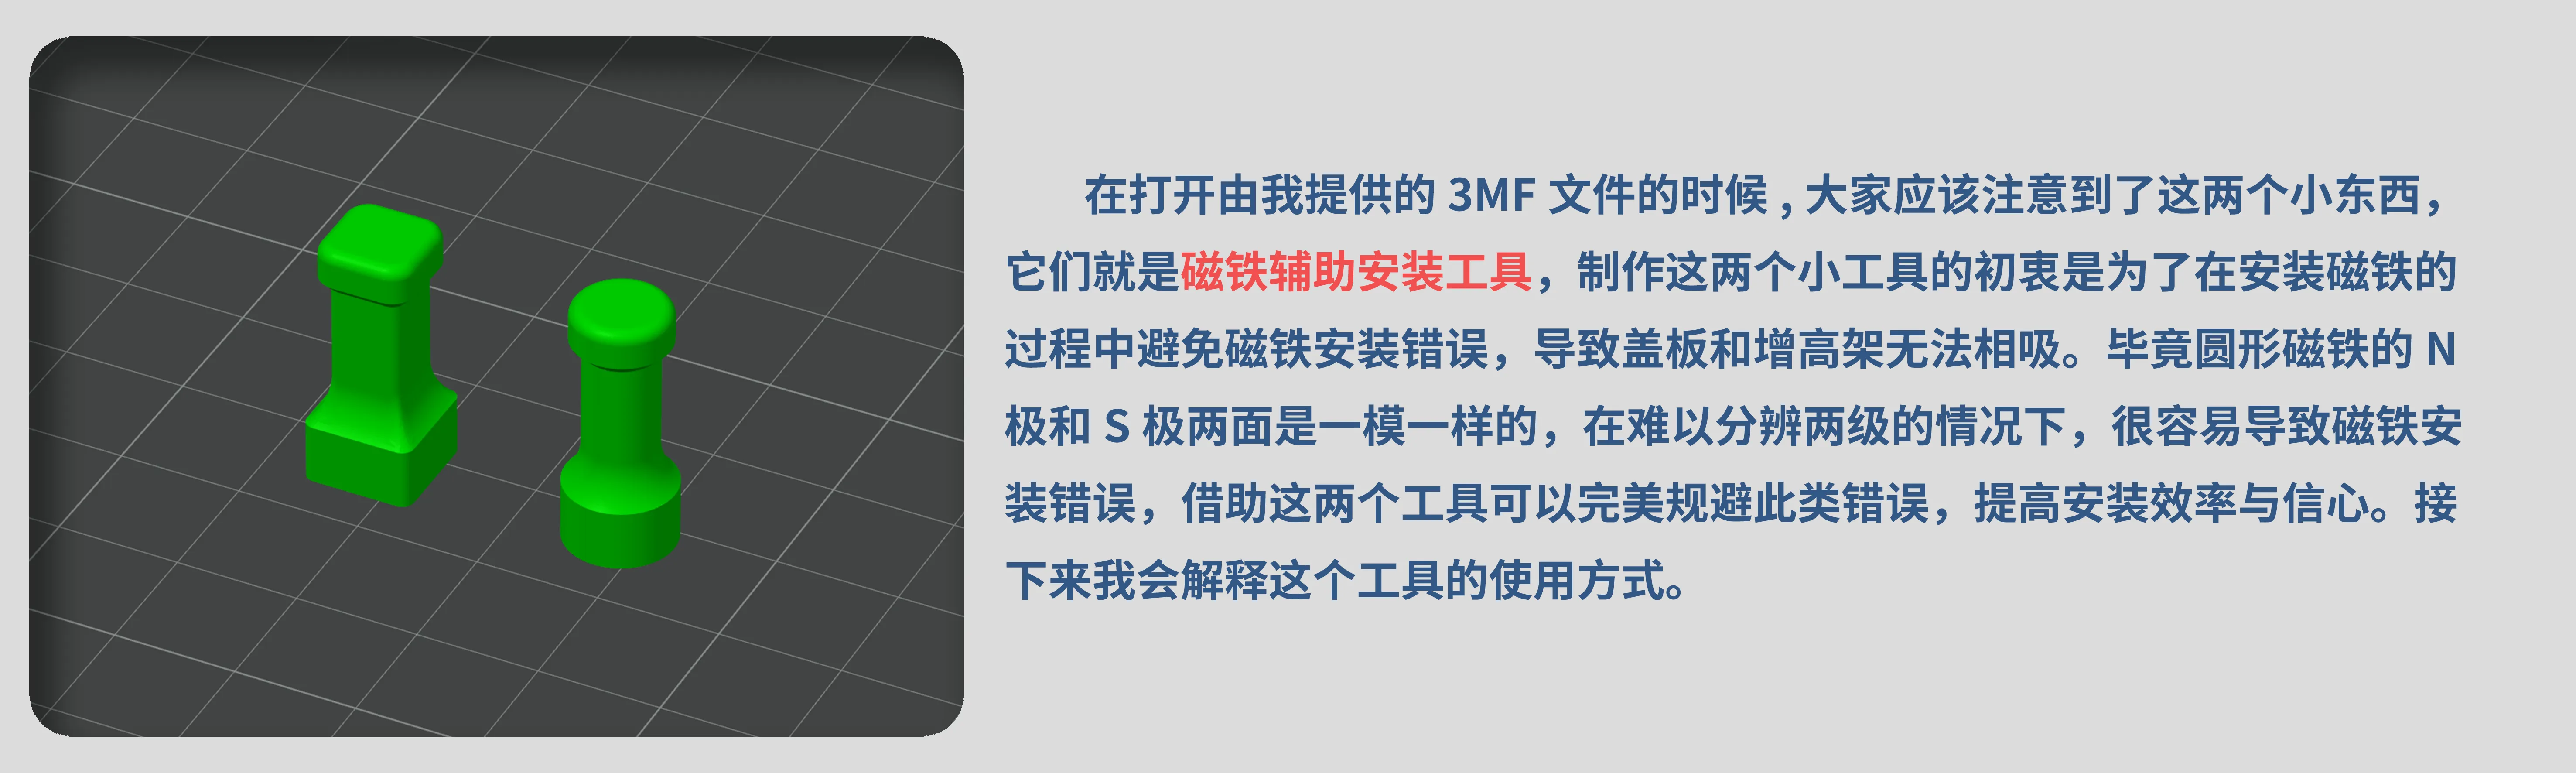
How to use the magnet installation tool


Q&A: Why install a riser

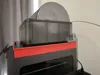
1, Because without installing a cooling riser, there is a high probability that the filament tube at the top of the print head will rub against the top glass

2, It can provide passive cooling space without opening the printer door or lifting the top glass, you only need to remove the magnetic cover plate, it's elegant and efficient

Comment & Rating (224)

(0/1000)

Pinned by Designer
Print Profile
X2D P2S HMJ Riser
This is a great design and model. I used the older version for my P1S and this one is just as good. not only does it look sick on my X2D, it’s super easy to open the air flow slots if needed with the magnetic doors. I HIGHLY recommend this model!
0
Reply
Boosted
I tool the chance and created TPU 3D print 1mm seal which is divided into 8 snap together pieces. I will post the model tomorrow if anyone wants to print it ;)
2
Reply
Would you kindly share the tpu gasket model? Thanks.
0
Reply
Boosted
Replying to @kmat1g12 :
Hi, sorry I did not get to it yesterday. I have it on my second computer to which I will get on Monday 6am. I will upload it first thing in the morning :-).
3
Reply
Boosted
Replying to @kmat1g12 :
I have uploaded it in the morning, but it is still in a phase of Verification for some reason.
0
Reply
Boosted
The texture is quite good, and with the AMS flipper, it's a perfect match I'll sort out the exhaust later 👍
The designer has replied
Show original
1
Reply
I will soon release an AMS flipper modified model that perfectly matches my bracket and will add the 3mf profile to the original author's page but yours is also great
Show original
0
Reply
What ams flipper file in this? Looking to do the combo with the exhaust bits
0
Reply
Why can your flipper retain the outer spool shaft? Mine requires dismantling the coil shaft
Show original
0
Reply
Very well done !! I printed everything in PETGHF I have also designed an exhaust system for it https://makerworld.com/de/models/2159317-p2s-exhaust-for-hmj-riser#profileId-2341026 thank you for your great model Very well done
Show original
1
Reply
A nice feature would be the ability to rotate the exhaust to point behind or toward the front of the printer instead of just straight out the side at the bottom. I would modify if I had skills. My first printer (P2S) is coming soon so maybe I'll figure that out one day.
0
Reply
ha, nice setup with the duel fan exhaust looks really good 👍
0
Reply
I printed for use on my P2S and used Bambu PETG HF for the print. The design, fit and finish of the riser is spot on. The added height provides plenty of clearance for the movement of print head ptfe feed tube and eliminates any rubbing on the top glass. I only have 200hrs on my P2S and already there is visible wear on the tube, so I would definitely recommend this print. The vents along the top certainly help with ventilation and reducing the internal temperature.
designer
3
Reply
The print profile is no longer public
Really good model, I had difficulty positioning the magnets, tolerances were perhaps too tight and I used a press to insert them
The profile uploader has replied
Show original
0
Reply
Different printers indeed have tolerances when printing, even for the same printer model. Some fit just right, some are very tight, and some are very loose. My P2S prints out perfectly, but the A1 is very loose and needs glue to bond. When designing the blueprint, a margin was already included; the actual hole size is slightly larger than the magnet. Such tolerance issues caused by printers are indeed difficult to avoid. Thank you for your support
(Edited)
Show original
1
Reply
Replying to @user_1315029560 :
It's definitely difficult to find tolerances suitable for everyone, on the other hand it was the only problem I encountered, nothing that twenty minutes in my father-in-law's garage couldn't fix :D Thanks for your model
Show original
0
Reply
Replying to @Boberko4023 :
The hole design has been modified for a better installation experience
Show original
0
Reply
Boosted
The print profile is no longer public
perfect, just waiting the magnets 👍🏻👌🏻
3
Reply
Boosted
Why did I print this shape? What should I do! I don't want to spend another ten hours printing it😭
Show original
0
Reply
What is wrong with this shape? Is it not normal?
Show original
0
Reply
Boosted
Replying to @user_3375547881 :
Hahaha, I think it should be round? Then I thought, maybe it's to make it easier to put in the magnet
Show original
0
Reply
Print Profile
X2D P2S HMJ Riser
I waited a little while before posting a review so that I had the opportunity to really make use of it. This is a very good print. The lines are clean, the fit spot on, it is functional, and it raises the glass to allow clearance for the ptfe tube and stop it from rubbing. What impressed me most about it was how well it assembled and how tight the fit of the joints were. Additionally, the holes for the magnets are very precise and there is no need for any glue or adhesive, the fit is that good. I also like that it just sits in place and isn’t attached, this allows for unrestricted access to the top of the printer and permits use of my top mount tpu holder.
The profile uploader has replied
1
Reply
Thank you for liking it
(Edited)
Show original
1
Reply
It came out really good. Used the dark grey PETG HF from BBL. I also printed the AMS flipper which is a game changer. Although I wish there was some kind of spool bracket to mount on the top for TPU printing. But all in all great print. Very happy with it.
0
Reply
Replying to @babylettuce :
Yes. something like that for P2S. I think the one shown is for the P1S. The PTFE inlet mount is slightly different in P2S
0
Reply
Boosted
Thanks to the creator of the riser, I was able to set up external filtration. Now, when printing ASA, the styrene reading is 0 ppm. Thank you!
0
Reply
thats some serious filtration unit, could you link this?
0
Reply

License

This user content is licensed under a Standard Digital File License.

You shall not share, sub-license, sell, rent, host, transfer, or distribute in any way the digital or 3D printed versions of this object, nor any other derivative work of this object in its digital or physical format (including - but not limited to - remixes of this object, and hosting on other digital platforms). The objects may not be used without permission in any way whatsoever in which you charge money, or collect fees.