Top Tool Storage for Bambu Lab X1C X1 P1S P1P printers with AMS


Print Profile(2)


Description
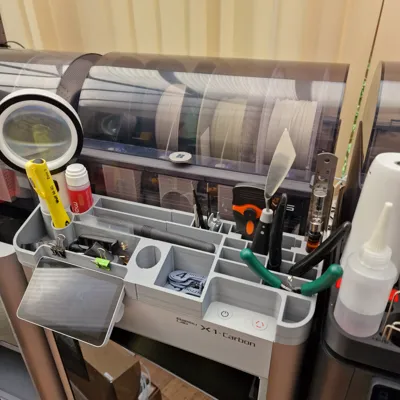
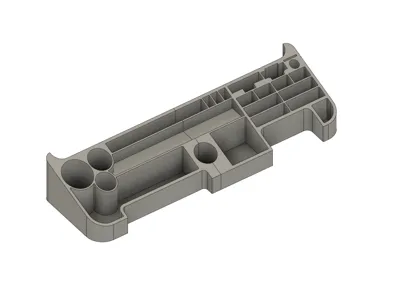
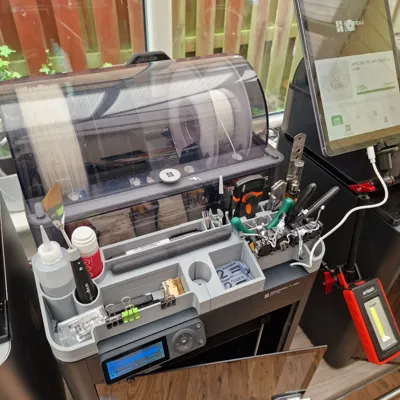
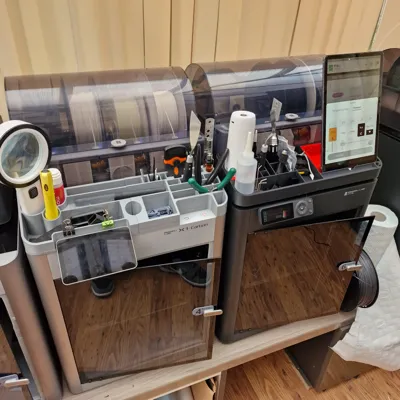
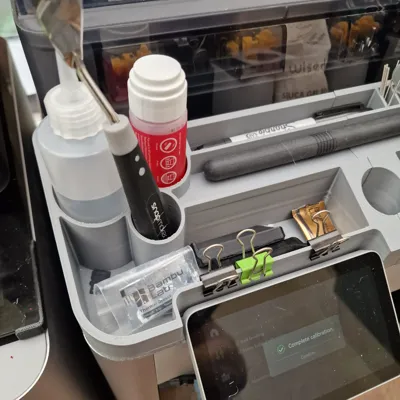
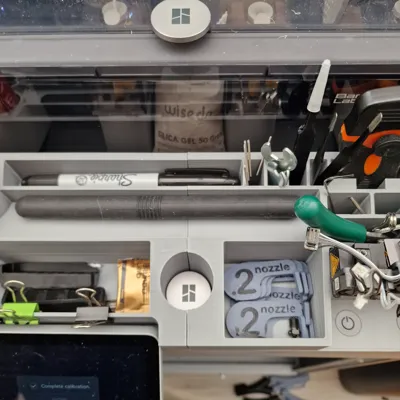
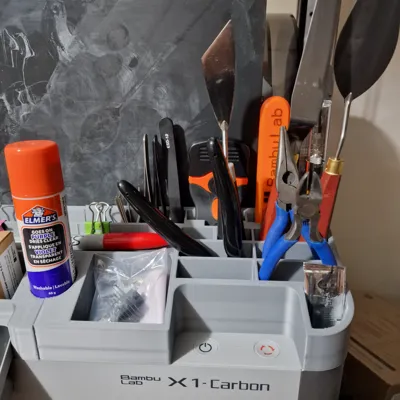
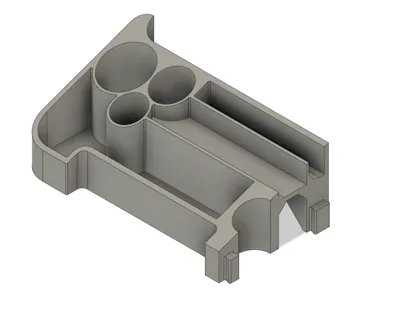
Hey there, I've designed this model to store my most common used tools, glue, consumables and parts for my printers. Slots for an isopropyl bottle, Elmer's and Bambu supplied glue at the left side but coincidentally the centre cut out for the top glass knob is the perfect size for Elmer's too. Plenty of slots on the right for scrapers, pliers, tweezers, unclogging pins and snips including a dedicated slot for the Bambu scraper that comes with the Printer. Middle and front has room for spare parts. This model has been very popular on Printables and downloaded over 6000 times so I must've done something right.
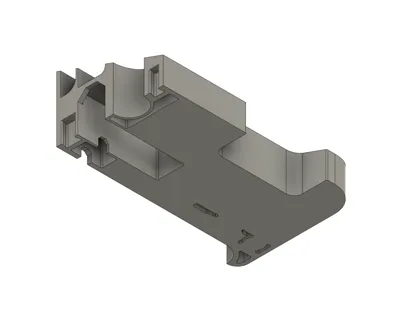
After some suggestions from some people on the Bambu FB group I've added the ability to install a small LED light and cable management underneath the storage to improve the much needed lighting in the printer but currently it only allows a small light bar approx 190x25mm. I do plan on rearranging and removing some slots to allow for a bigger light bar in near future so if you have suggestions for a popular or common light bar please comment and I'll try make it fit. I'd also consider requests/suggestions for specific tool or part slots.
The Model fits the dimensions of the X series perfect but also works great on P Series, it sits over the glass door knob and hugs each side of the AMS so will not move and cannot be knocked off. Cut outs are for the X1C touchscreen and the pointless buttons.
It's split into two parts that lock together (no tools screws or glue required) so that this can be printed within the X and P series build dimensions.
I've also more recently designed a similar storage optimised for the P Series but is still a great alternative for the X Series but it has some extra features such as phone/tablet stand, much bigger and modifiable modular slots that you can swap to suit or make specific tool holders. Link to that model is > https://makerworld.com/en/models/38428#profileId-37257

PRINT SETTINGS
I highly recommend you print using my STRONG and NEAT print profile as it's tried and tested. My Settings used are below to make this strong and solid but if you want to save an hour or two you do you, top/bottom layers and walls can be reduced to save time and plastic. you're looking at 10-12 hours print time with exactly 0.5kg filament used. I personally printed both parts separately as it is a long print however both parts can be printed at the same time on one build plate and worked great, my print profile contains build plates with both on and also with them separated one part per plate. I recommend eSun PLA+ silver for a good match for the X series printers and Filament PM PLA+ matte black for the P series. I've included build plates of the model in parts or together just pick which you want.
4 walls (.4 nozzle)
0.2 layer height
6 bottom 6 top layers
15% gyroid infill
TURN OFF AUX FAN TO AVOID WARPING -brim not used in this profile, use brim if you want but it'll probably make joining the parts together more difficult if the brim isn't removed fully.
This is designed NO SUPPORTS REQUIRED, no issues when I printed mine some bridging wasn't pretty but it's all hidden underneath, clean from above and strong.
Hope you love the model, all I ask in return is you hit like if you do. I would love for you to share your make on here and leave a review it means a lot to me.
User Lakopet has created an adaptor to allow this storage to fit perfectly to the side of the printer, rather than on top.
https://makerworld.com/en/models/15641#profileId-16038
Please also respect the license - this is for personal use only.
License
You shall not share, sub-license, sell, rent, host, transfer, or distribute in any way the digital or 3D printed versions of this object, nor any other derivative work of this object in its digital or physical format (including - but not limited to - remixes of this object, and hosting on other digital platforms). The objects may not be used without permission in any way whatsoever in which you charge money, or collect fees.
Comment & Rating (487)