Universal terrain adjustable table V2


Print Profile(1)

Description
Description
This is V2 of my Small Terrain Adaptable Coffee Table for Camping that I made for the contest Coffee Goes Places. It is sturtier, easier to print and optimized a bit more.
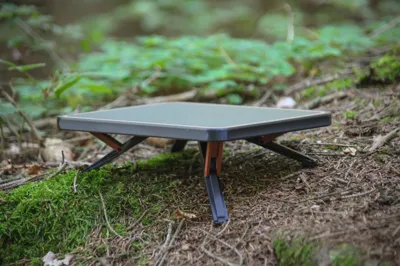
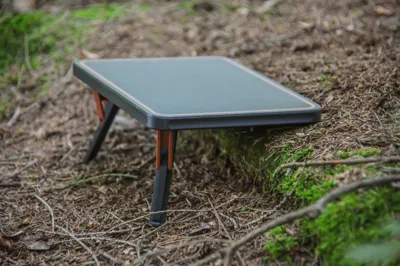
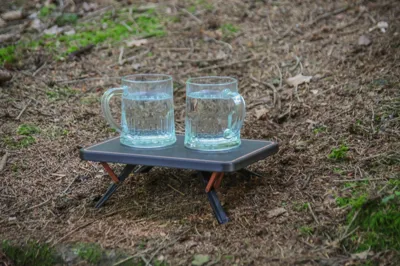
A small, height-adjustable mini table. It adapts perfectly to the terrain. Ideal for camping, picnics, drone launching or other activities. Set your things down without them falling over or getting dirty.
Its very ease to use, just press in the handles and the feet will drop down. Then adjust the height and let go of the handles locking the feet in place.
The dimensions of the table are 25cm x 18cm, and it is 13.5mm thick.
All parts are 3D printed, and no screws or any non-3D printed parts are needed. Fully dismountable.
Manual:
Overview of all parts:

1. Step
Parts needed:
New parts needed for this step:

--------------------------------------------------------------------------------------------
All parts needed:

--------------------------------------------------------------------------------------------
Insert the pins into the holes of the foot.

It should look like this:

Repeat for all four feet.
====================================================
2. Step
Parts needed:
New parts needed for this step:

--------------------------------------------------------------------------------------------
All parts needed:

--------------------------------------------------------------------------------------------
Slide the foot with the outstanding pin into the guide.

Then insert the pin into the hole at the end of the foot.

Repeat for all four feet.
====================================================
3. Step
Parts needed:
New parts needed for this step:

--------------------------------------------------------------------------------------------
All parts needed:

--------------------------------------------------------------------------------------------
Insert two handle pins to lock the handle in place.

Repeat for the other handle.
====================================================
4. Step
Parts needed
New parts needed for this step:

--------------------------------------------------------------------------------------------
All parts needed:

--------------------------------------------------------------------------------------------
Insert the spring as shown in the gif below (ATTENTION! The spring is directional and has a front and a back! see white picture below):


Insert the spring pin under the spring as shown below (better shown in the white picture below):


Repeat for all four sides.
====================================================
5. Step
Parts needed:
New parts needed for this step:

--------------------------------------------------------------------------------------------
Closeup:

NOTE: Cut 4 filament pieces with a length of 8-12mm
(in inch: 5/16" - 15/32" or 0,315" - 0,472") .
--------------------------------------------------------------------------------------------
Insert the filamentpeaces into the provided holes.

It should look like this:

Then insert the compartment slider as shown below:
(bending the compartment lid a bit helps)

Repeat for both compartment doors.
====================================================
6. Step
Click the compartment lid into place using a flat sturty object/tool
as shown below:

Repeat for both compartments.
====================================================
FINISHED!
License
You shall not share, sub-license, sell, rent, host, transfer, or distribute in any way the digital or 3D printed versions of this object, nor any other derivative work of this object in its digital or physical format (including - but not limited to - remixes of this object, and hosting on other digital platforms). The objects may not be used without permission in any way whatsoever in which you charge money, or collect fees.
Comment & Rating (314)