1970 Chevrolet El Camino (Pinewood Derby Car Shell)
1970 Chevrolet El Camino (Pinewood Derby Car Shell)


Print Profile(1)

Description
Summary
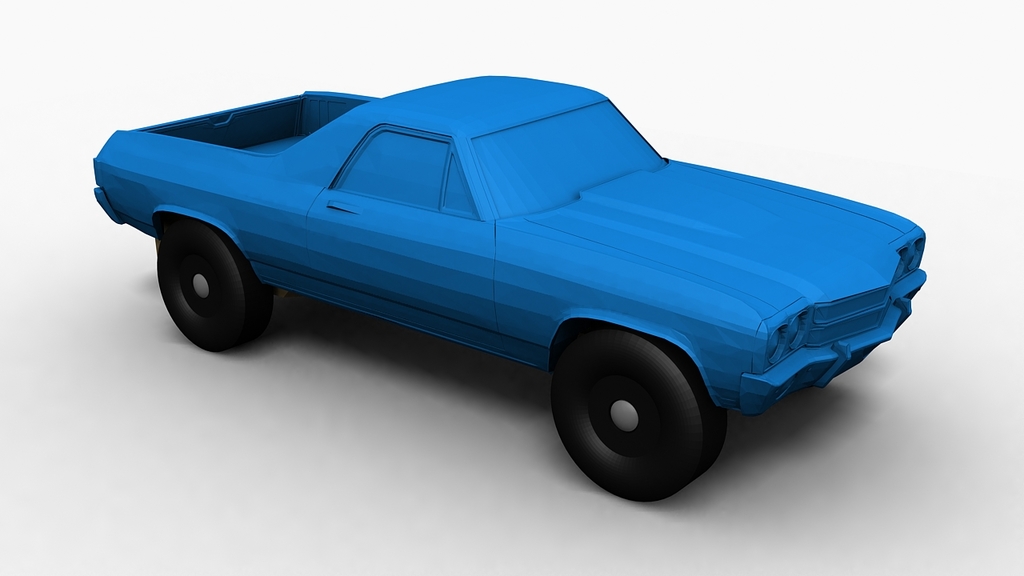
The first Chevy El Camino was produced in 1959. This is the 3rd generation El Camino, which was produced 1968-1972. This 1970 version was the last with 4 headlights. The available LS6 454 CID engine was rated at 450 hp and 500 lb. ft., delivering ¼-mile times in the 13s.
This is my first attempt to adapt an existing car model to be used with my standard “shaped block” template and to break out individual parts to create a somewhat more realistic end result. It was more difficult than I expected and the results aren't as good as I'd hoped, but it's different from anything I've done before and some may want to try building it.
The components of this car are more difficult to print and prep for painting than most of the cars I've designed and uploaded.
What is a "pinewood derby car shell"?
The pinewood derby is an event created by the Boy Scouts many years ago. Each scout is given a pinewood derby kit typically consisting of a block of wood with slots for axles, 4 wheels, and 4 nails to be used as axles. The scout (and his dad, usually) will then carve the block of wood into the shape of a car, paint it and apply stickers, install the wheels on the axles, and then race it at the "derby", which involves a sloped track with a timekeeping apparatus.
An official scout derby will usually require that the parts in the kit be used for cars entered in the derby. Other organizations (including workplaces) often hold derbies, too, and some of them require the use of the parts in the box, including the block of wood.
These "pinewood derby car shells" are intended to be used with an official derby wood block, cut down to size, along with the axles and wheels included in the kit. A printable model of the shaped wood block is provided. You can either use the printed model or use it to accurately cut an official wood block down to size.
Print Settings
Notes:
- Car body: Extensive supports are required. In Bambu Studio, I use Normal (auto) supports in Snug style. I prefer ABS for my car bodies because it sands smoother than PLA, even after using the smoothing technique described below. But PLA will work.
- Ideally, the windshield should be printed with 0% infill and 1 or 2 walls.
- If possible, print the headlight frames with a 0.2 mm hot end, or use the Arachne wall generator.
- The grill should be printed upright, in the same orientation that it goes on the car. I painted the silver accents in Bambu Studio, but you could just do the whole thing in black.
- All other parts print really easily.
Post-Printing
Just super glue all the parts together.
Smoothing
This car was smoothed with 3d printing resin and baby powder. You can find videos and guides online that describe the process, but here it is in a nutshell:
- Mix 1 part resin and 2-3 parts baby powder in an opaque container (so that it can be stored without hardening due to UV exposure).
- Using a paintbrush or cotton swab, spread a thin layer of the resin/baby powder mix over the body, wherever you want to smooth print lines and gaps.
- Use a UV flashlight (a cheap one--like the kind used to harden resin finger nail polish, which you can order from Amazon or buy in the pharmacy department of Walmart) to harden the resin.
- Sand the body smooth until there are no thick layers left.
- Repeat over any areas that are still rough.
Weights
You can add tungsten weights to the holes in the rear of the body to end up right at 5 oz. Playing with different infills and weights can get you close to the ideal front/rear balance.
Comment & Rating (5)