
Octo-Bubble
Print Profile(1)

Bill of Materials


Description

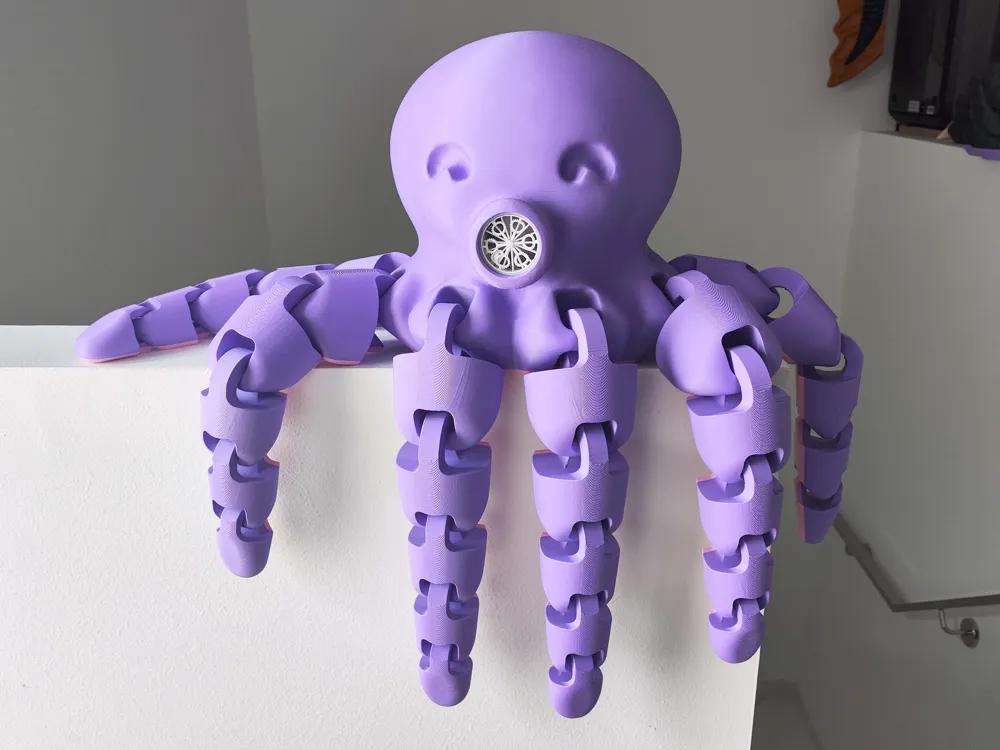
Let's be honest, this design was mandatory!

A carefully done adaptation of my original Cute Mini Octopus, rebuilt from scratch to hold the Bubble Maker Kit from Maker's Supply.
Just a few considerations for printing:
- You need to print 8 tentacles (yes, quite obvious, but you can't imagine what people are capable of).
- The head needs supports for the inner and outer overhangs of the mouth, and also the raised base at the bottom. They are already set in the printing profile.
- A color change has been set a few mm after start, to get a different color base. This can be done even with single color printers, but it can be printed just in one color if you want to.
- The tentacles need supports for the link side. They are already set in the profile.
- It's a huge print, large nozzles are recommended to save time.
Assembly:
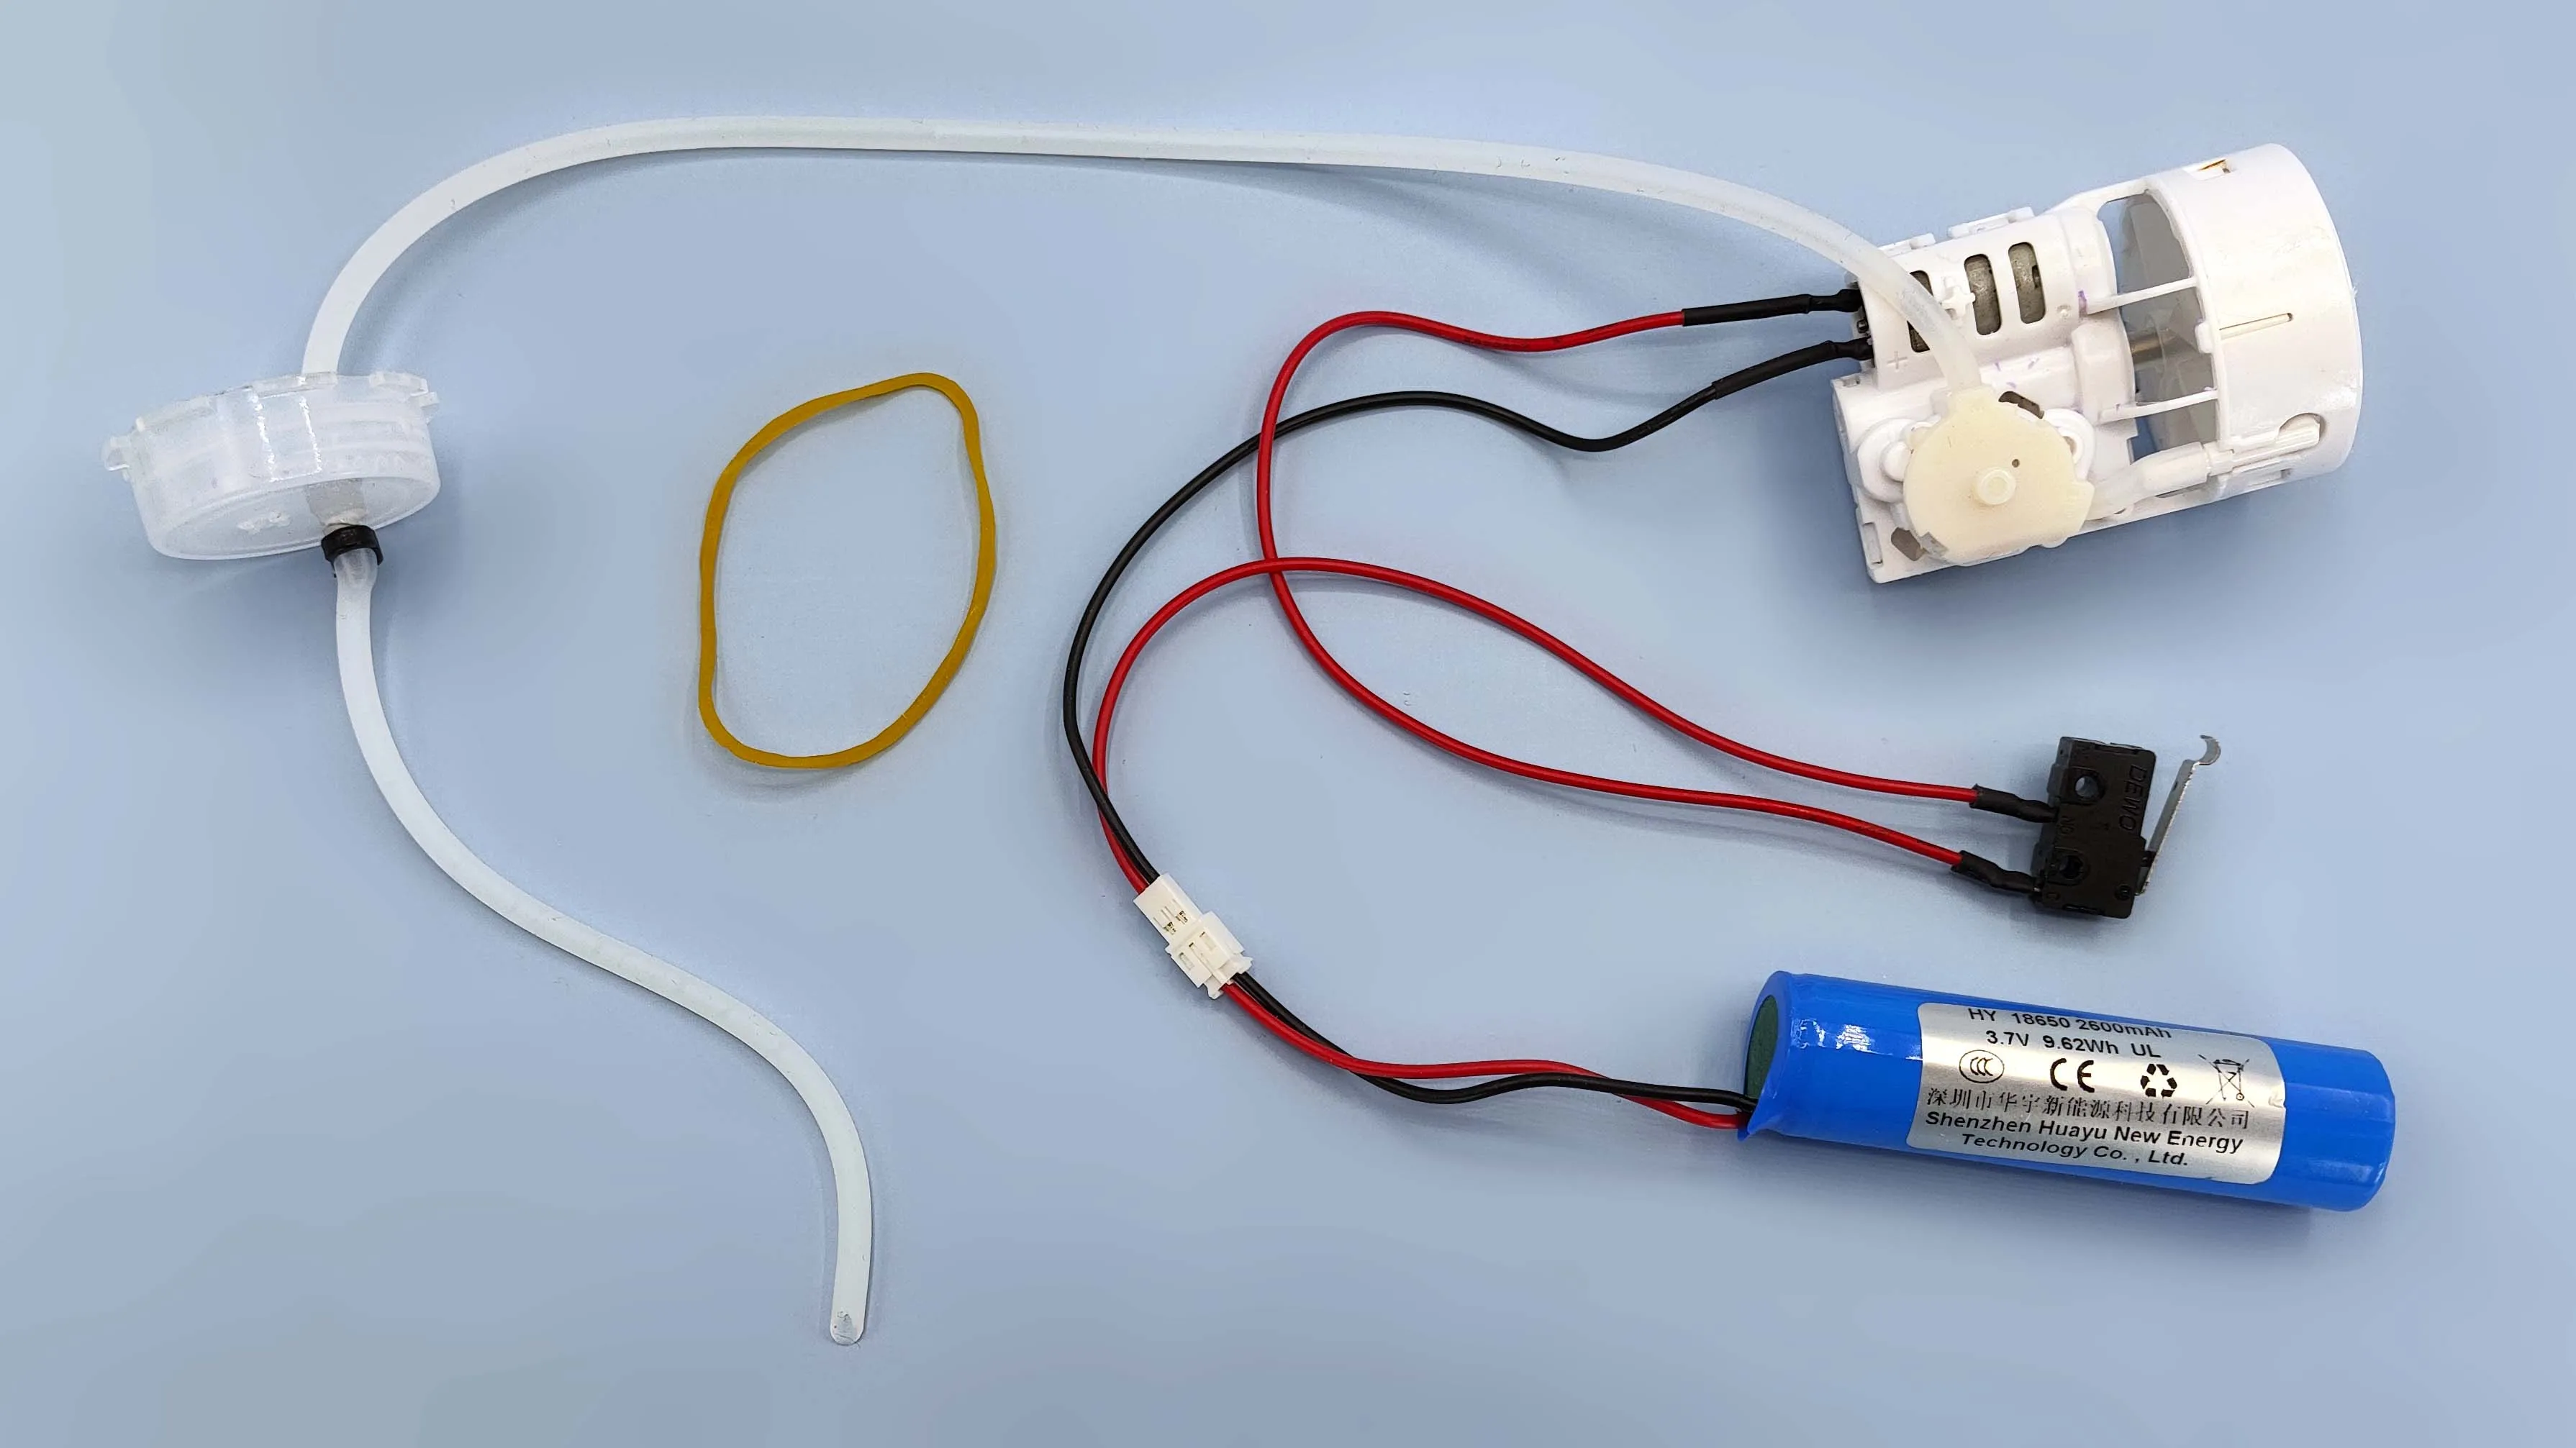
You need the Bubble Maker kit, and a couple of rubber bands:
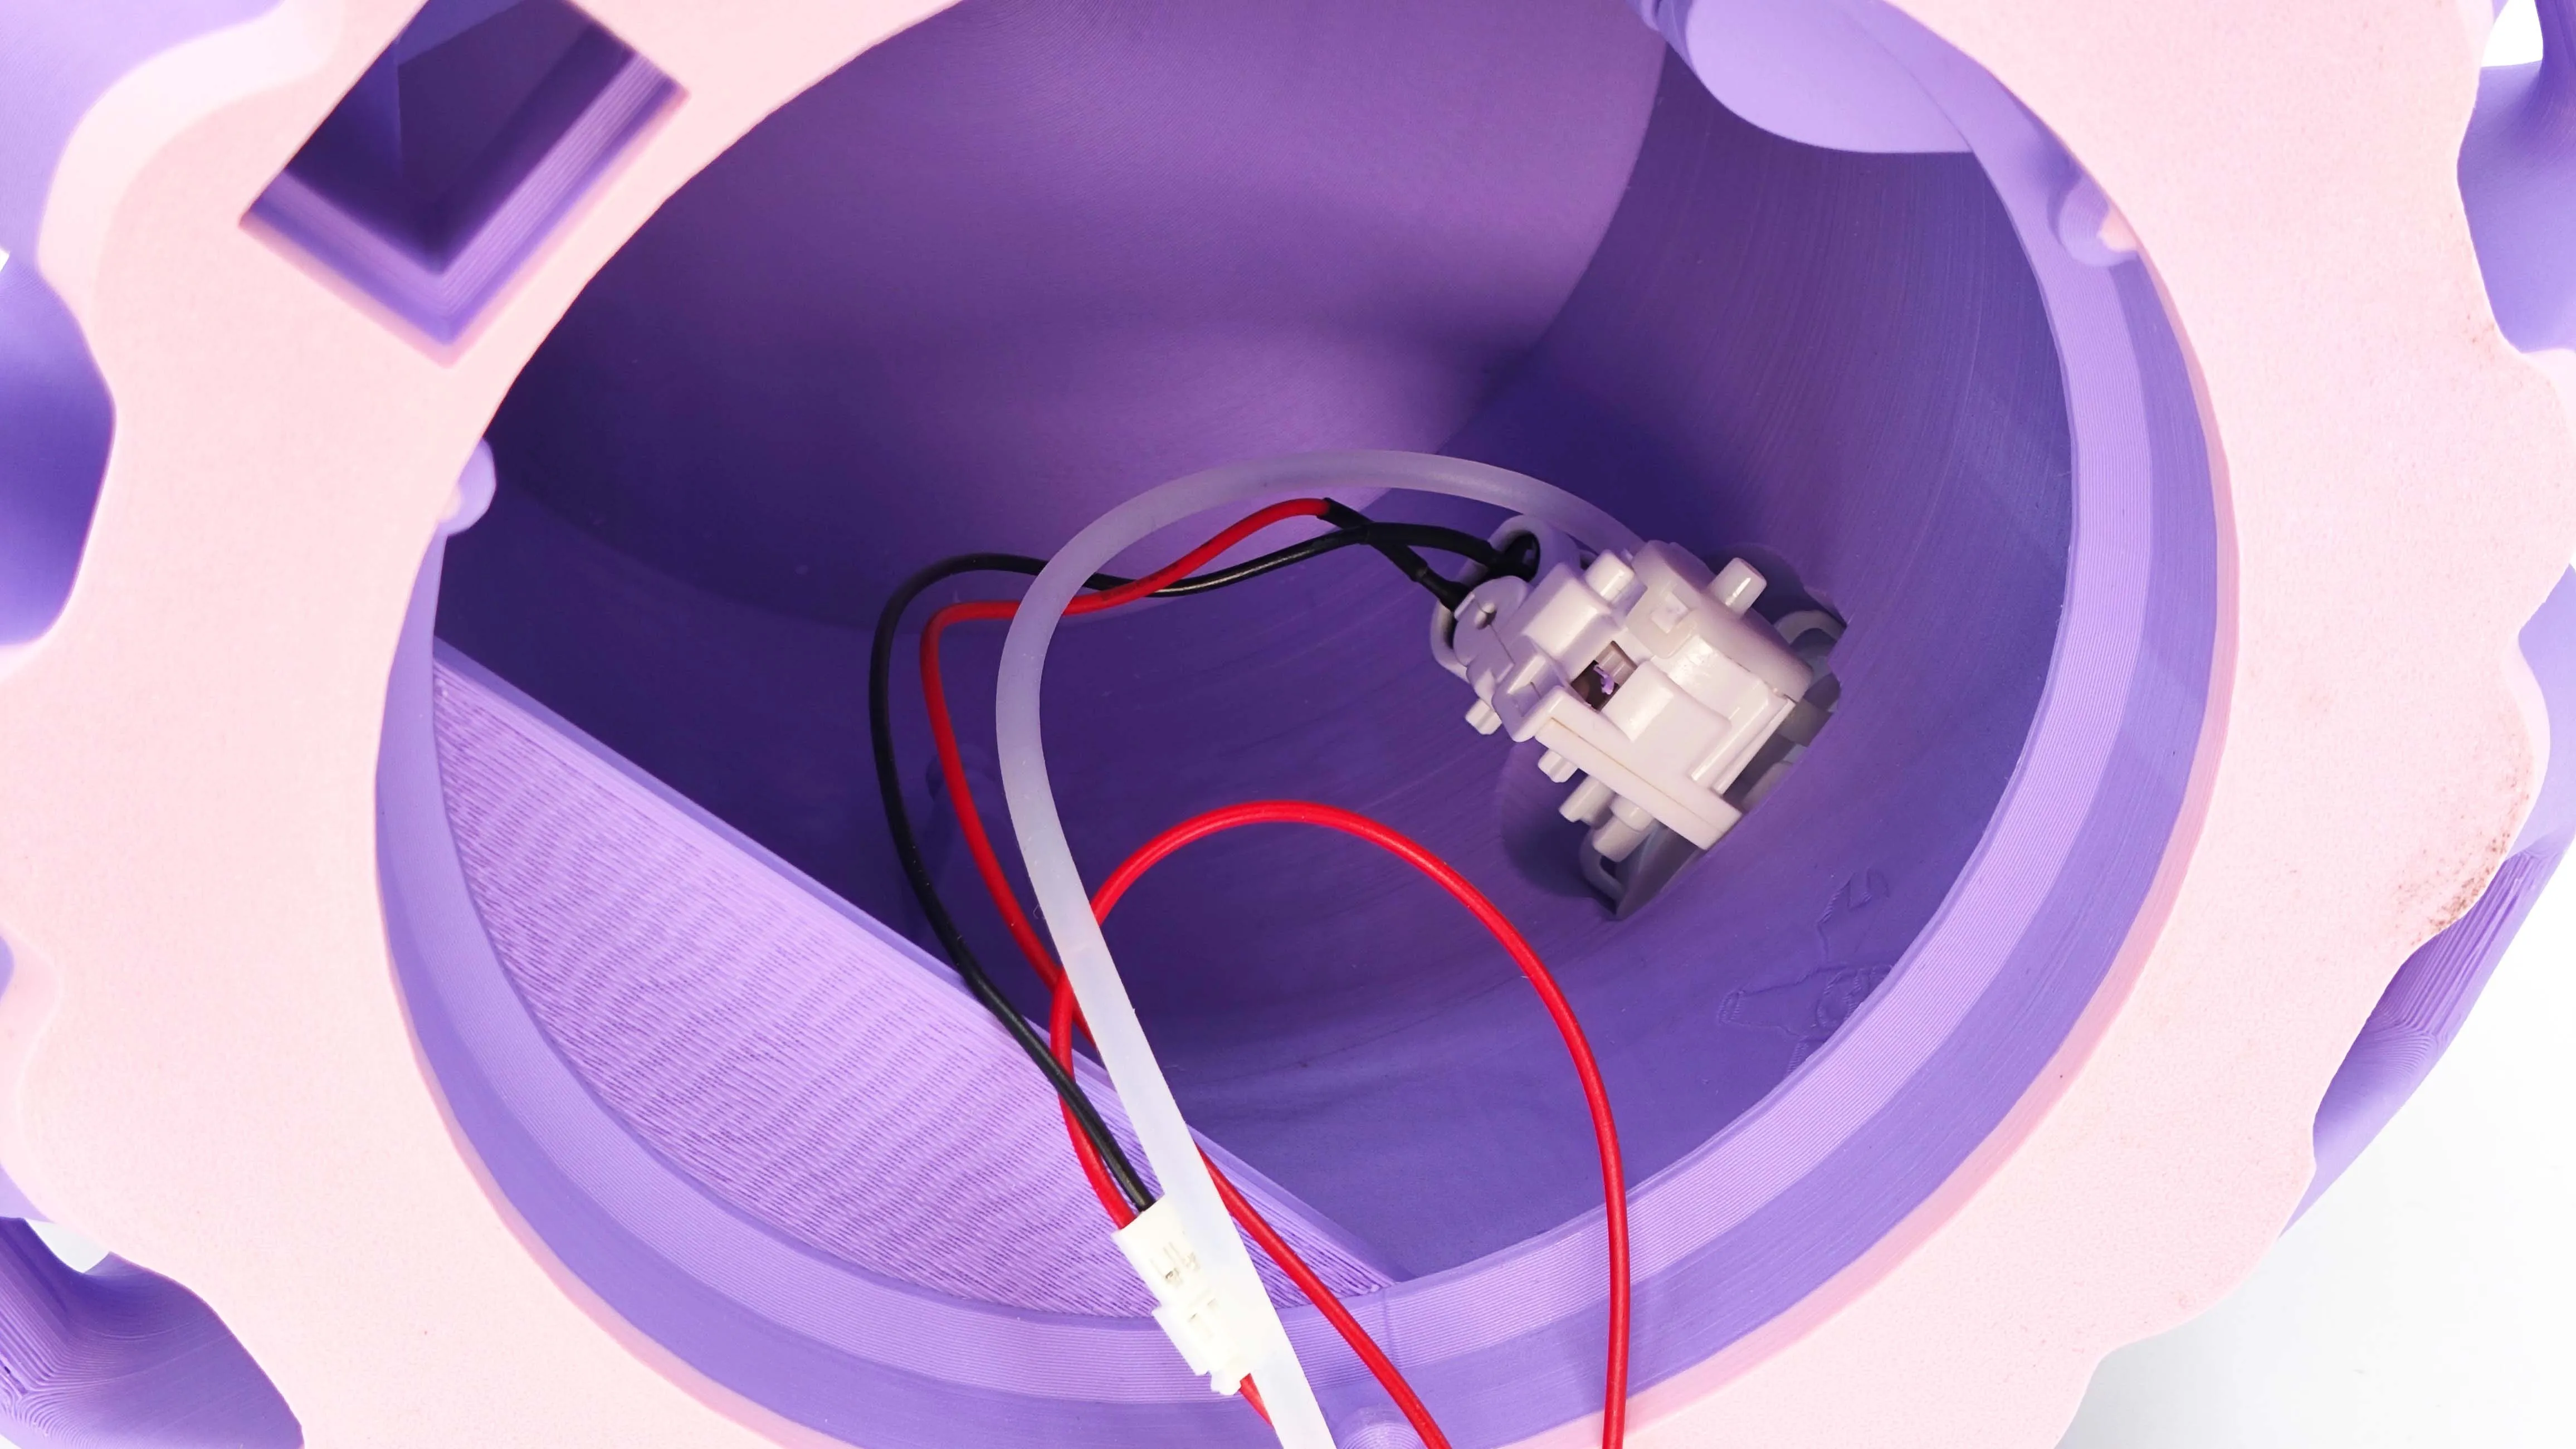
The motor must be placed from the inside in this position:
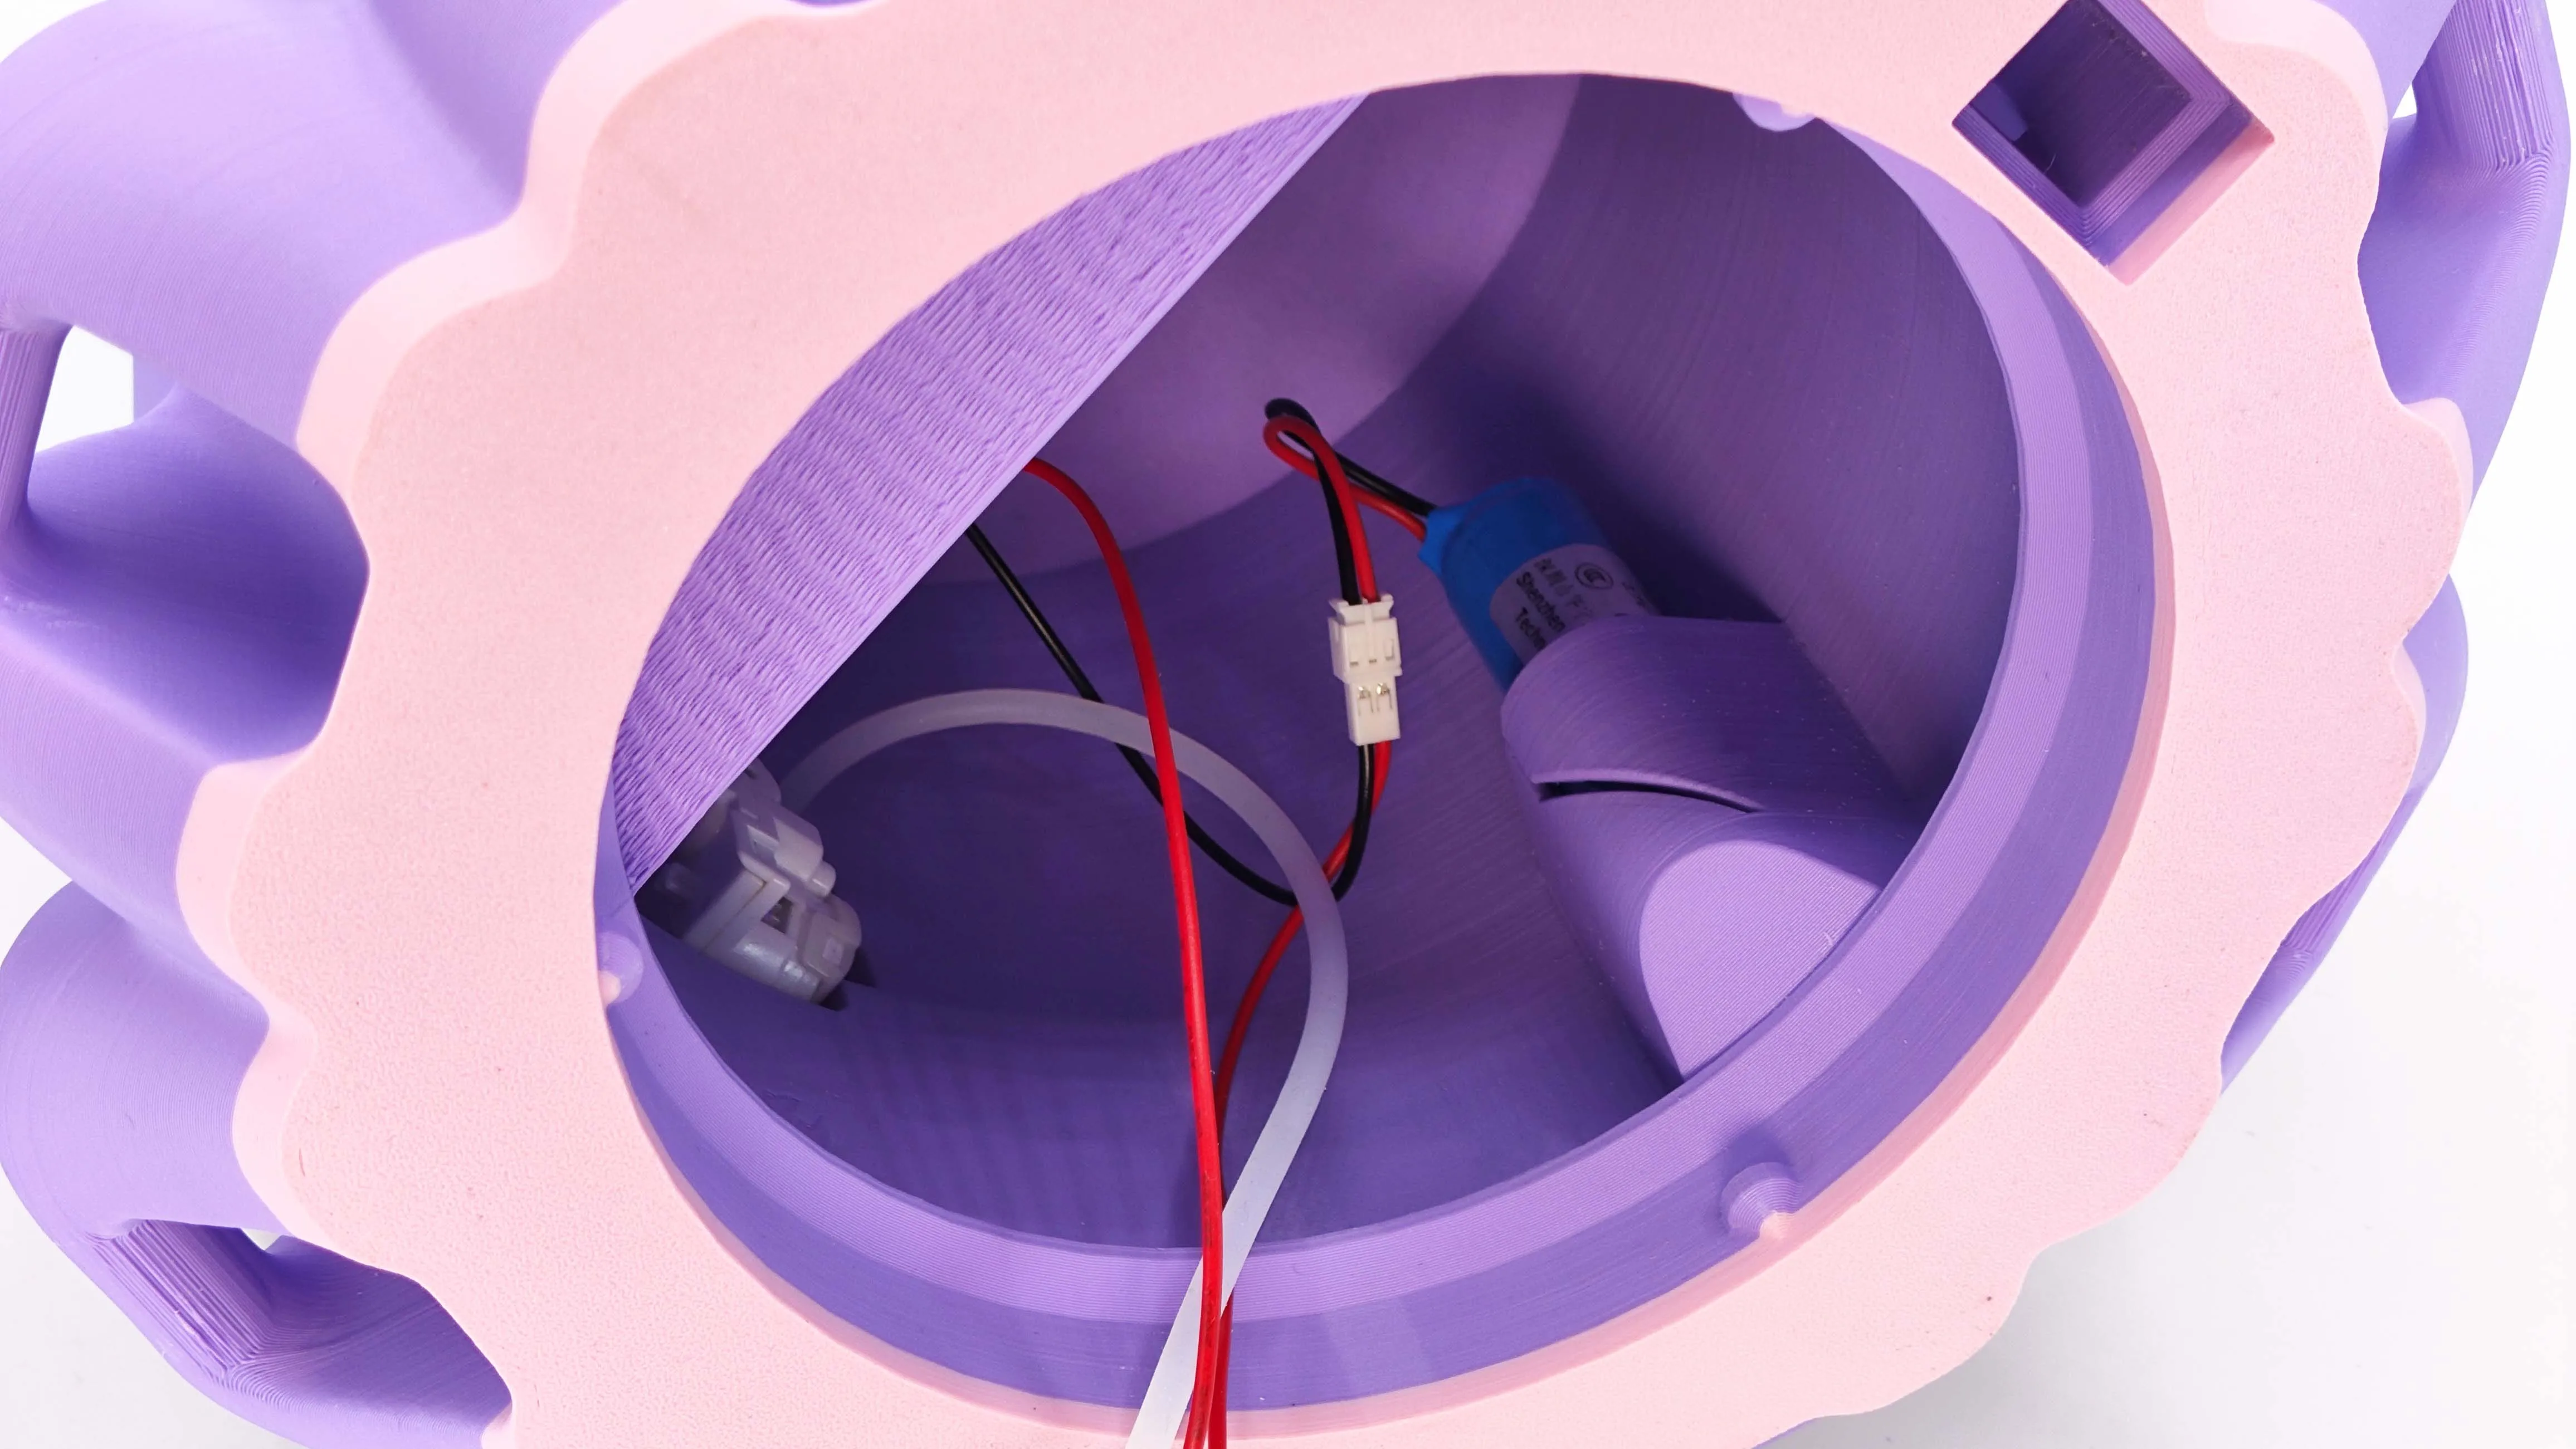
The battery holder is prepared for the included battery:

The trigger slides into place in this orientation:

AFTER the trigger is in place, assemble the outer button. This will hold the switch in place, and should be loose enough to be pressed like this:
Place the bubble soap bottle in the flat shelf, and secure it with the rubber bands. I made it this way so a wide range of bottles could fit.
⚠ Be aware that the liquid may pour outside if the cap is not properly sealed!
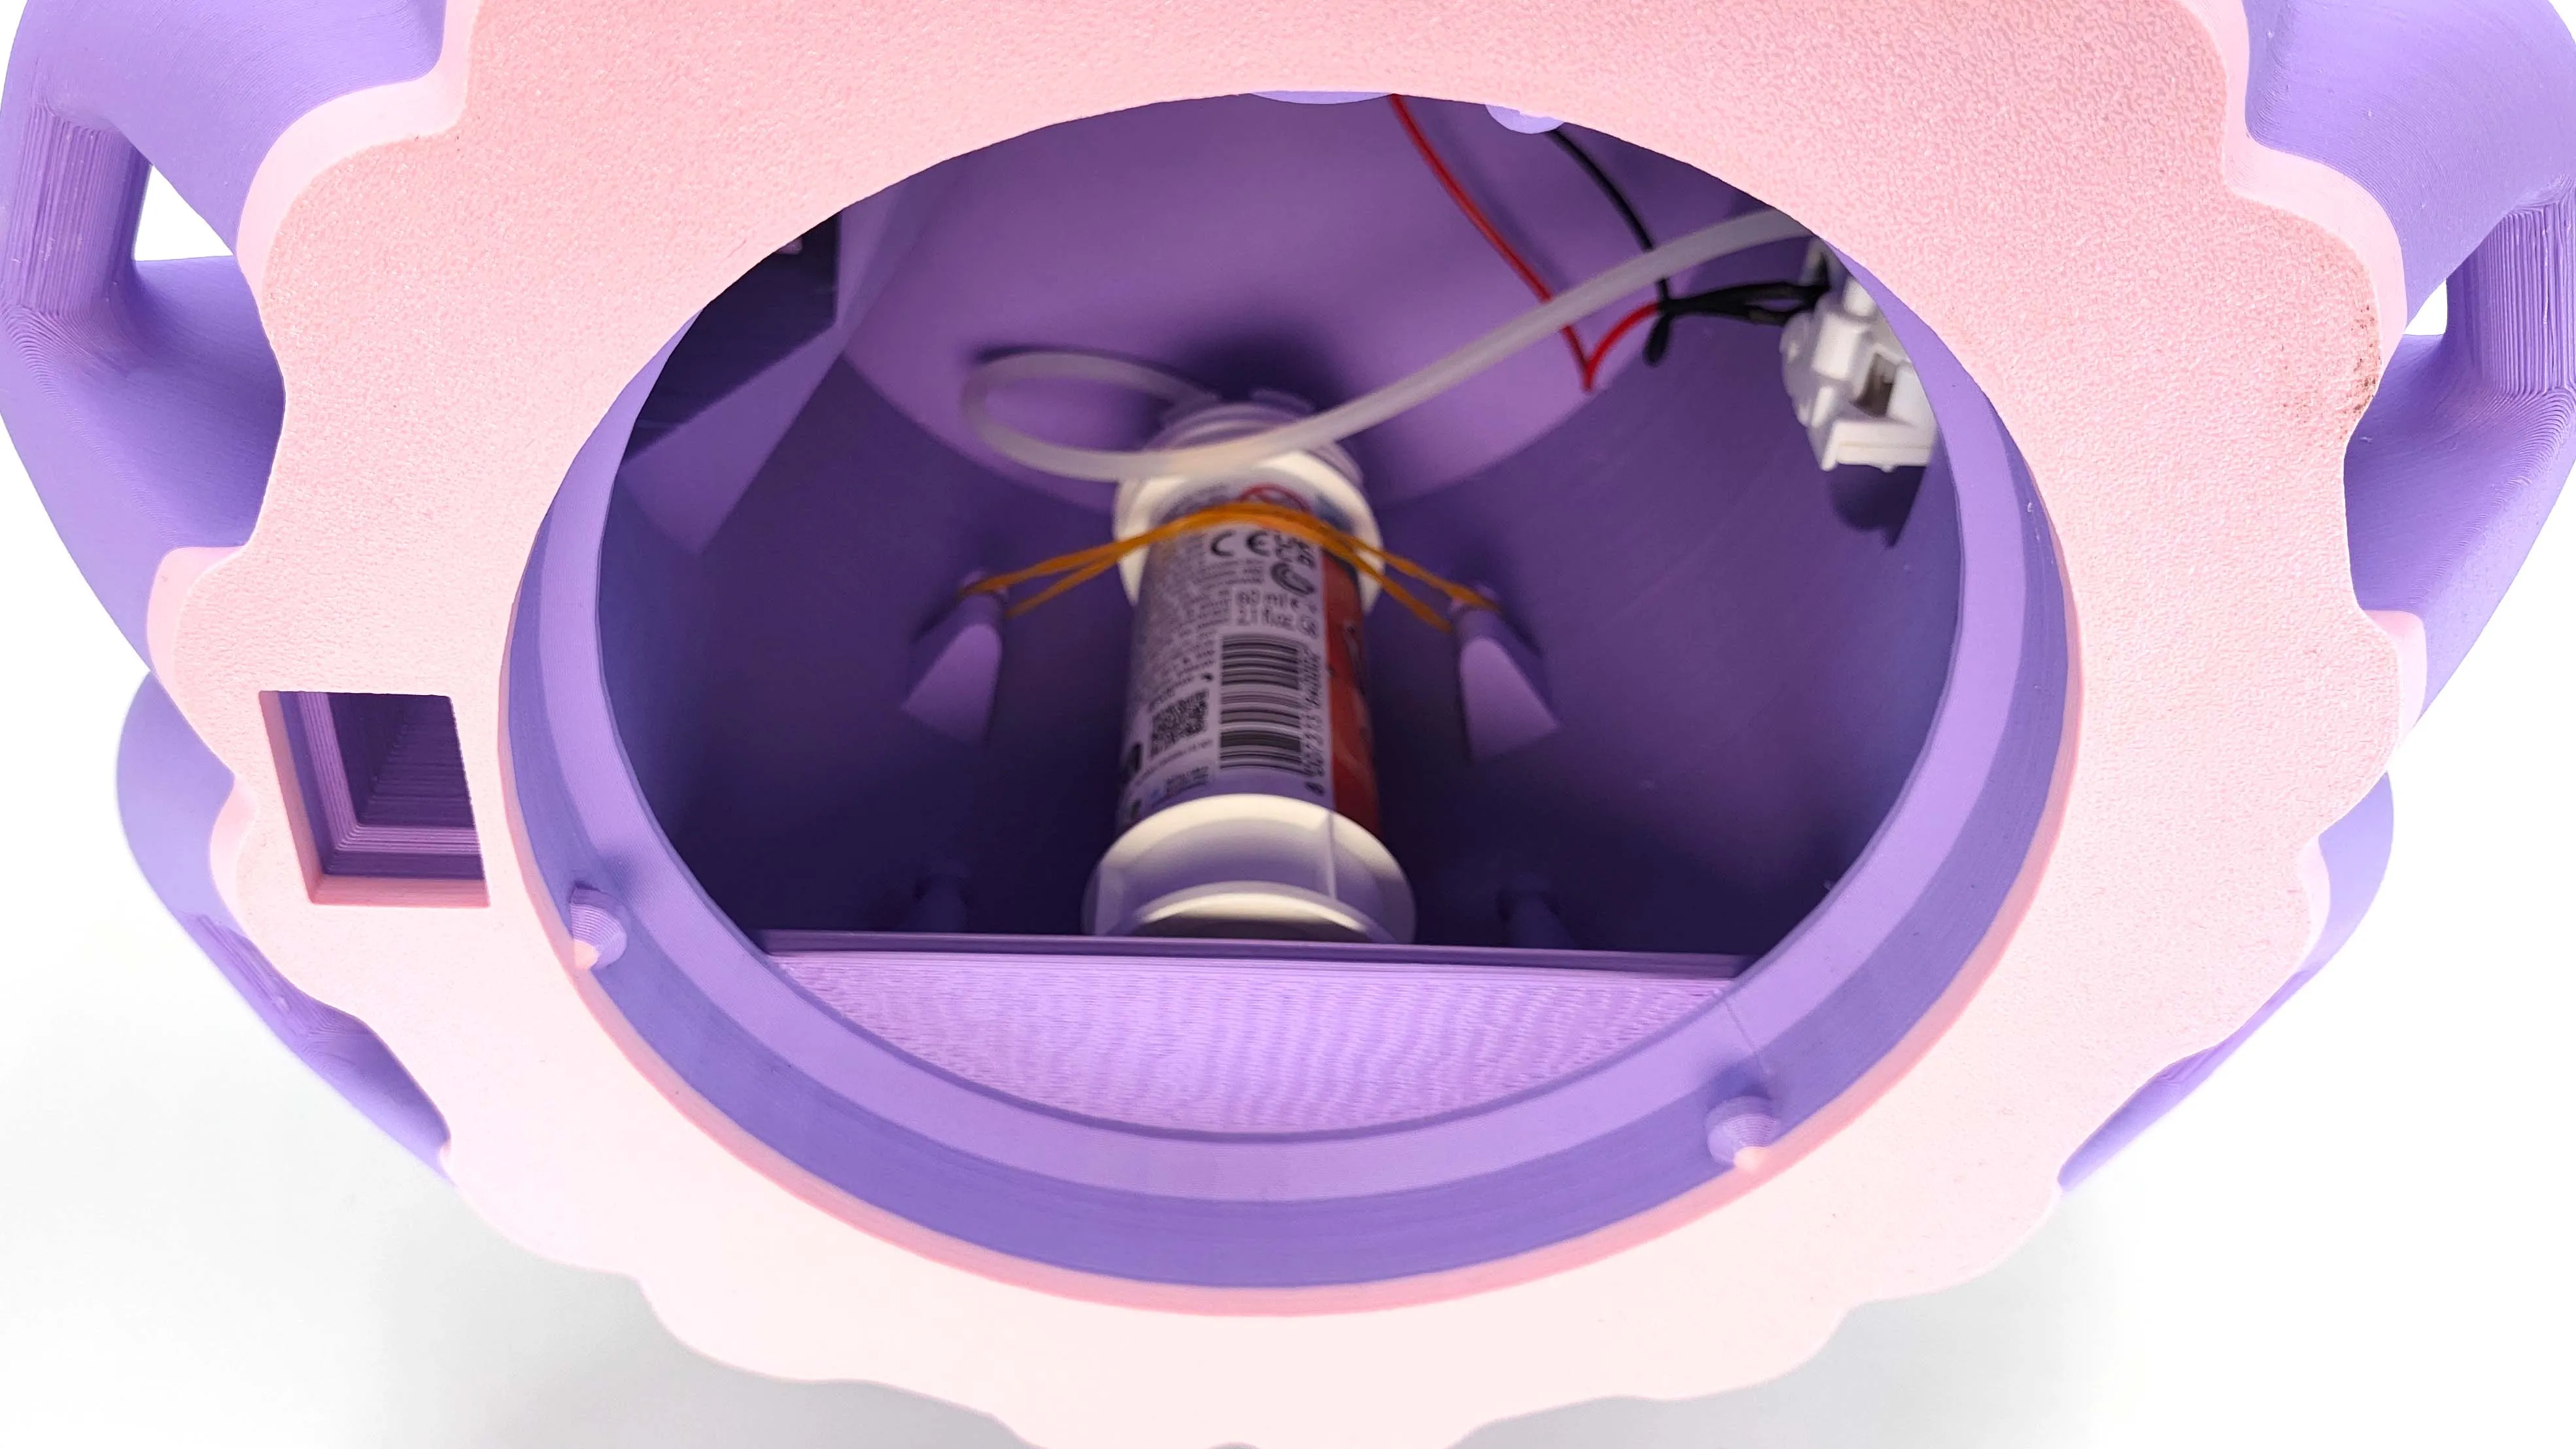
An additional rectangular hole (seen at the left in the picture above) is prepared to fit a regular switch, intended for continuous mode operation. If you want to add it, you should wire it in parallel to the trigger. That way, both could work at the same time.
Last, close the bottom lid (be careful not to pour the soap), and place the tentacles. They are designed to be assembled in this position, and slide 45º down:

The tentacle assembly is quite loose to make it easy to assemble/disassemble, for easier storage.
That's it! Hope you enjoy!
Membership
Looking for a Commercial License? Check here!
License

You shall not share, sub-license, sell, rent, host, transfer, or distribute in any way the digital or 3D printed versions of this object, nor any other derivative work of this object in its digital or physical format (including - but not limited to - remixes of this object, and hosting on other digital platforms). The objects may not be used without permission in any way whatsoever in which you charge money, or collect fees.


Comment & Rating (28)