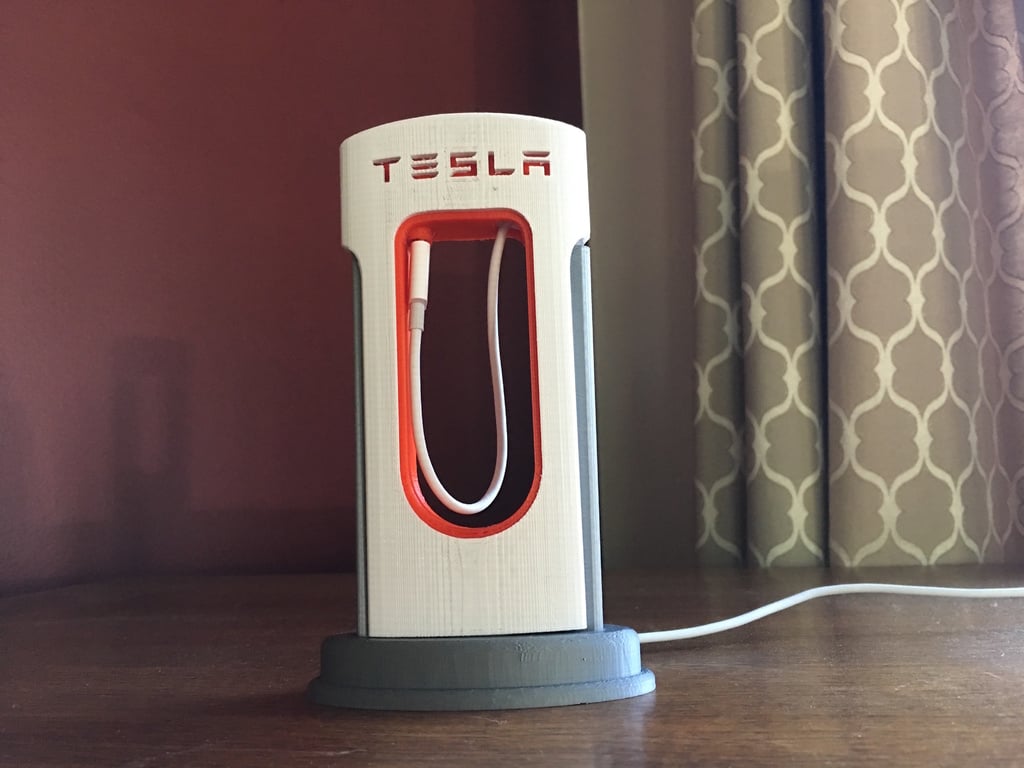
Tesla Supercharger Iphone Charger
Remixed by
Boost
126
188
31


Print Profile(1)

0.16mm layer, 4 walls, 15% infill
6.7 h
3 plates
Boost
126
188
31
8
426
290
Released
Description
This is remixed version of thingiverse model, which is completely printed without supports.- I changed the dimensions, completely redesigned the Silver Plate, the same with the Red middle, White sides are now easier to print without supports, I added insert letters, it is also possible to use a USB C and micro USB cable (written in the model name!) Added .step file
ASSEMBLY INSTRUCTIONS:
- Insert the red center piece into the white side piece with the cord channel
- Push the cord through the hole in the gray base
- Push the cord through the hold in the red center
- Adjust the length of exposed cord in the middle and then push the cord into the channel in the white side piece
- Cover with the other white side piece
- Push the 2 gray columns into the gray base
- Slide the gray base assembly up into the top assembly
- Push the cord out the side channel on the bottom and cover with the final gray base piece
Comment & Rating (31)
All

The print fails every time due to the orientation of the model, please fix to make it vertical

The designer has replied
1
Reply

hi i added version 2, it doesnt need supports. Please try it and let me know if you can print it now.
1
Reply
Replying to @Majkl.k88
Thanks I’ll try
0
Reply

Print Profile
0.16mm layer, 4 walls, 15% infill
Nice looking Charger with some issues in printig!
A vertical printed and letter supported version will be prefered!

1
Reply
great print ! i added version 2, it doesnt need supports and letters are push in
(Edited)1
Reply

Boosted
Print Profile
0.16mm layer, 4 walls, 15% infill
very nice print and fairly easy too! supports were a bit hard to remove on the red part, but it worked out

0
Reply

Print Profile
0.16mm layer, 4 walls, 15% infill
Nice one

0
Reply

Print Profile
0.16mm layer, 4 walls, 15% infill

0
Reply

Boosted
Print Profile
0.16mm layer, 4 walls, 15% infill

0
Reply
How to assemble? could you take some pictures or video.
The designer has replied
0
Reply
Hello, here are instructions for v2
Insert the red center piece into the white side piece with the cord channel
Push the cord through the hole in the gray base
Push the cord through the hold in the red center
Adjust the length of exposed cord in the middle and then push the cord into the channel in the white side piece
Cover with the other white side piece
Push the 2 gray columns into the gray base
Slide the gray base assembly up into the top assembly
Push the cord out the side channel on the bottom and cover with the final gray base piece
0
Reply
Replying to @Majkl.k88
thank you, bro. you are a hero.
0
Reply
any way to model this as one piece?
The designer has replied
0
Reply
Hi, i added version 2 where is also .step file which is in one piece
0
Reply

Print Profile
0.16mm layer, 4 walls, 15% infill
Nice model thanks
0
Reply

Print Profile
0.16mm layer, 4 walls, 15% infill
great work !
0
Reply
Related Models


© 2024 MakerWorld