Super Screw Scrubber: A Sensational Solution for Sparkling Screws (Powered by AI)
Super Screw Scrubber: A Sensational Solution for Sparkling Screws (Powered by AI)


Print Profile(4)


Description
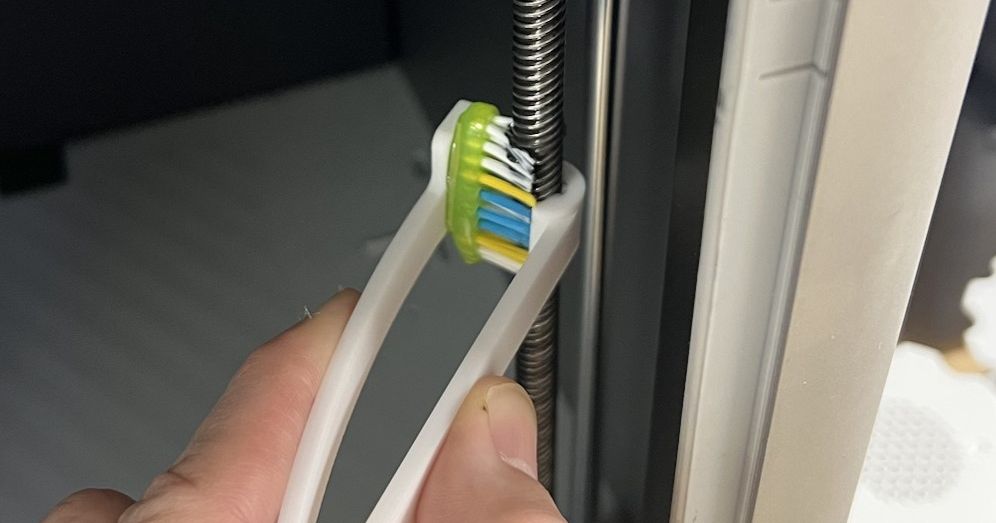
5/10/23 update: I also created a new alternative remixed version using toothbrushes/brass bristle brushes that looks like this, which you may prefer if you don't like the paper towel solution in this design. If you have a spare toothbrush/brush, this alternative likely provides a deeper clean (at least according to my dentist).

Does your printer, like mine, have leads screws? Do you put off cleaning them because it's a messy chore ?
This little gadget should help eject pesky particles from your threads in no time! Designed to clean the TR8 lead screws on my Bambu X1C , most printers use this same type of 4-start TR8 screw, so it ought to work for a variety of different printers with this common part.
I have two basic versions here, one with a taper and one without.
Versions
Recommended:
- NoTaper: This version has the tigher fit, but it's possible elephant's foot on a first layer could cause this to fit less than ideally. In that case, use the tapered version.
- Tapered: This version has a conical taper (pictured) on the “bed side” to avoid having any first layer issues ruin your thread fit.
If for some reason you don't like the angled gap (designed to encourage gunk to flow outward from the screw) between the two sides and prefer a straight gap:
- Flat_NoTaper: Tighter fit.
- Flat_Taper: Conical taper, as above.
Printing instructions
- Print at high layer resolution, I recommend 0.1 or 0.08 if possible on your printer, so that the threads fit nicely. There are slight tolerances built into the thread design so that it should clamp nicely.
- Most filaments should be fine.. but I would avoid anything like carbon fiber or glow in the dark filament to avoid any scratching of the screws (though most are made of steel that probably would not scratch anyways).
- Orient the flat side down. I designed the part slightly asymmetrically so this is intentionally hard to screw up when placing on your bed :).
Use instructions (updated 5/10/23)
- Find a paper towel (ideally low lint) and cut off a small section to insert into the clamp. This will help clean out the threads much better than just using the tool by itself because of inevitable tolerance issues. Regular cheap paper towels or tissues probably fine too for this application. Just make sure it doesn't leave lots of lint in the threads. If you're worried, lint free shop towels or a microfiber cloth cut up should work too. Brawny makes some good ones here, but they're not the cheapest.
- Attach the clamp and section of paper towel to your lead screws.. run the bed up and down (make the screws rotate), and hold the clamp with towel in place as you do so.
- Remove the widget, and clean the gunk off. If necessary, repeat with a clean section of paper towel for a second cleaning pass.
- Re-grease your threads if you stripped all the grease off (especially if you did 2 passes)
3MF & STEP file included!
re: “Powered by AI” : The design is sadly not AI generated… only the title and the summary text are AI generated with Bing, with some fun prompting :). One day maybe AI will make 3D models.. but we're not there yet. For now.. AI is a lot of hype.. which the title is a nod to.
Comment & Rating (52)